5
4 205 118 / 01 Assembly
2. Assembly
2.1 Installation position
Where limited space is available, the Uno-3 can
be transported standing on the door. Hex nuts are
mounted behind the door as supports for this purpose.
After transport, they can simply be screwed back to
the bracket.
Release and screw back 6 transport
counter nuts before commissioning.
Counter nut
2.2 Setting up, levelling
A special foundation plate for the boiler is not an
essential, but it is recommended.
Space requirement
for fitting the heat insulation and casing panelling:
at least 40 cm each on the left and right side of
the boiler.
If the space between the boiler and the wall is less
than 50 cm, all heat insulation and casing must be
fitted before the boiler can be pushed into its final
position.
Do not connect lines until the heat insulation
and casing have been fitted to the boiler!
There must always be enough space
between the back of the boiler and the
wall to allow easy access to the clea-
ning aperture in the flue gas collector.
There must be enough space to swing open
the boiler door, incl. the burner.
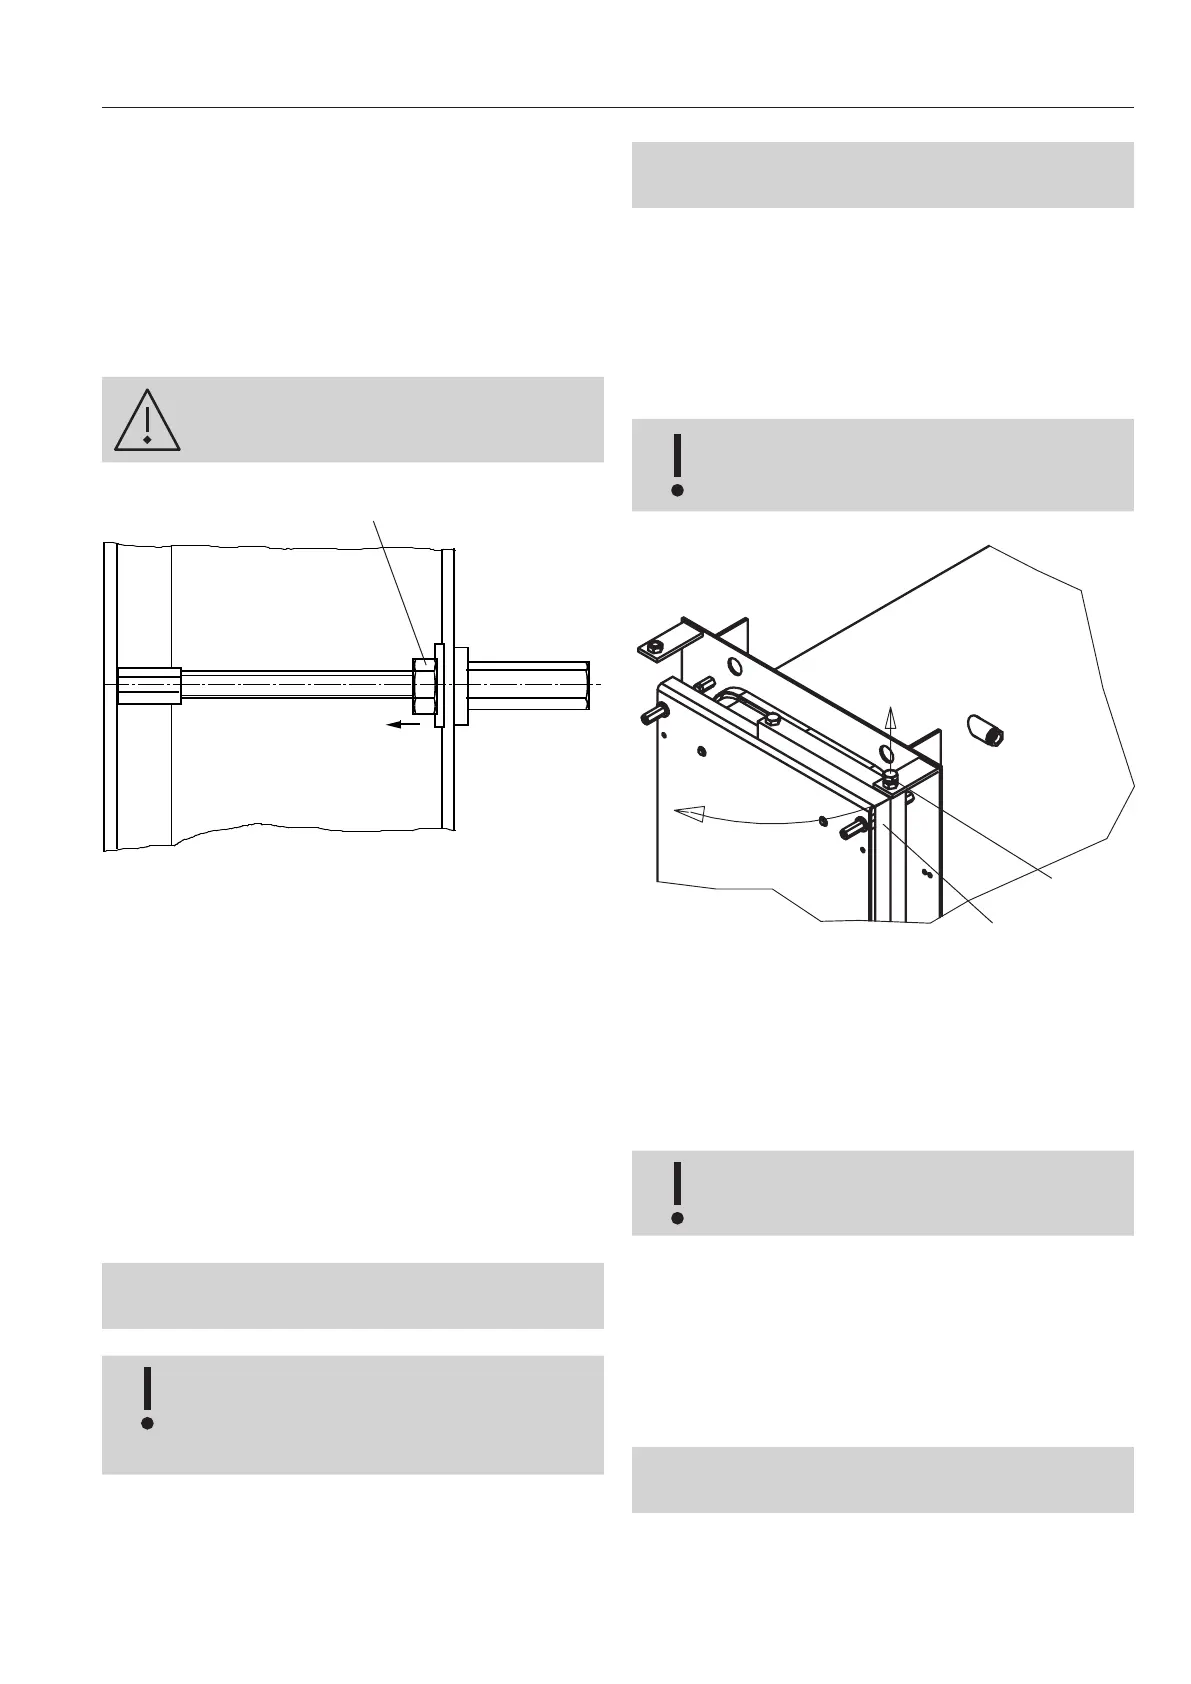
Boiler door pivotable to the left
It is possible to change the attachment of the boiler
door so that it opens towards the left. This can be of
advantage when installing the boiler in a corner.
Proceed as follows:
Close the boiler door and lock it in po-
sition before changing the attachment
of the door
Fig. 2
1
2
1. Remove special screw (1).
2. Swing the arm (2) to the opposite side.
3. Refit the special screw (1) on the other side.
4. Fit the burner plug on the other side (see also point
4.5.1).
The cable must not touch any hot
parts!
Levelling
Using a spirit level, align the upper edge of the boi-
ler water jacket (longitudinal axis of the boiler) until
it is precisely horizontal or sloping very slightly up-
wards towards the rear by inserting the plinth rails
correspondingly, to allow the boiler to vent properly.
Before fitting the burner, first fit the double
door (Pos. 8a, Figure 6) (door casing).

 Loading...