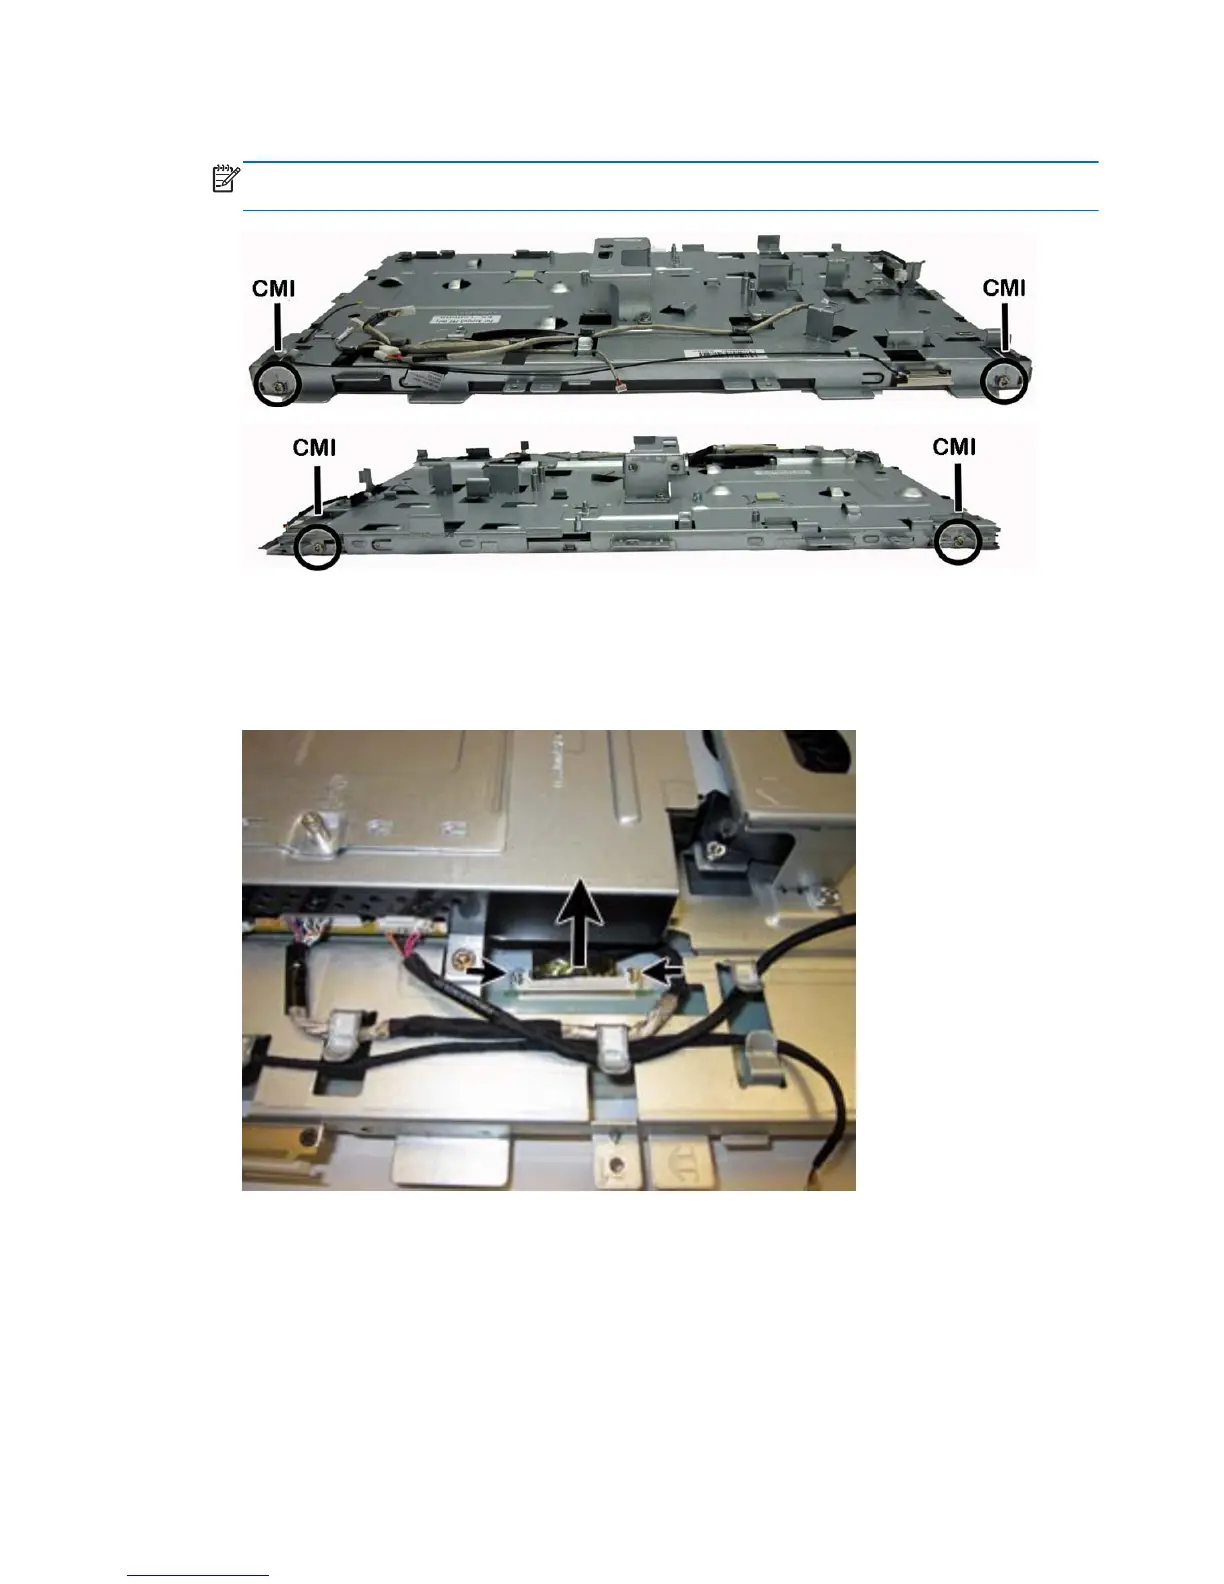
CMI panels:
NOTE: Shown with computer completely disassembled. Note that you do not have to remove
most components to replace the display.
10. Disconnect the two LCD backlight cables from the backlight controller board.
11. Lift the bracket assembly from the bottom side of the display.
12. Disconnect the display cable from the display panel.
13. Lift the bracket assembly off the display panel.
To install a display panel, reverse the removal procedures.
Multiple display panels are available for this computer. The panels use the same converter board
spare part. You must position the jumper on the converter board based on the display panel installed.
Please refer to the table on the base pan near the converter board for the appropriate jumper setting
on the converter board.
78 Chapter 7 Removal and Replacement Procedures All-in One (AIO) Chassis