When replacing the system board, be sure to remove the following components (as applicable) from
the defective system board and install them on the replacement system board:
● WLAN module (see WLAN module on page 50)
● Memory modules (see Memory module on page 43)
● Heat sink (see Heat sink assembly on page 57)
Remove the system board:
IMPORTANT: Make special note of each screw size and location during removal and replacement
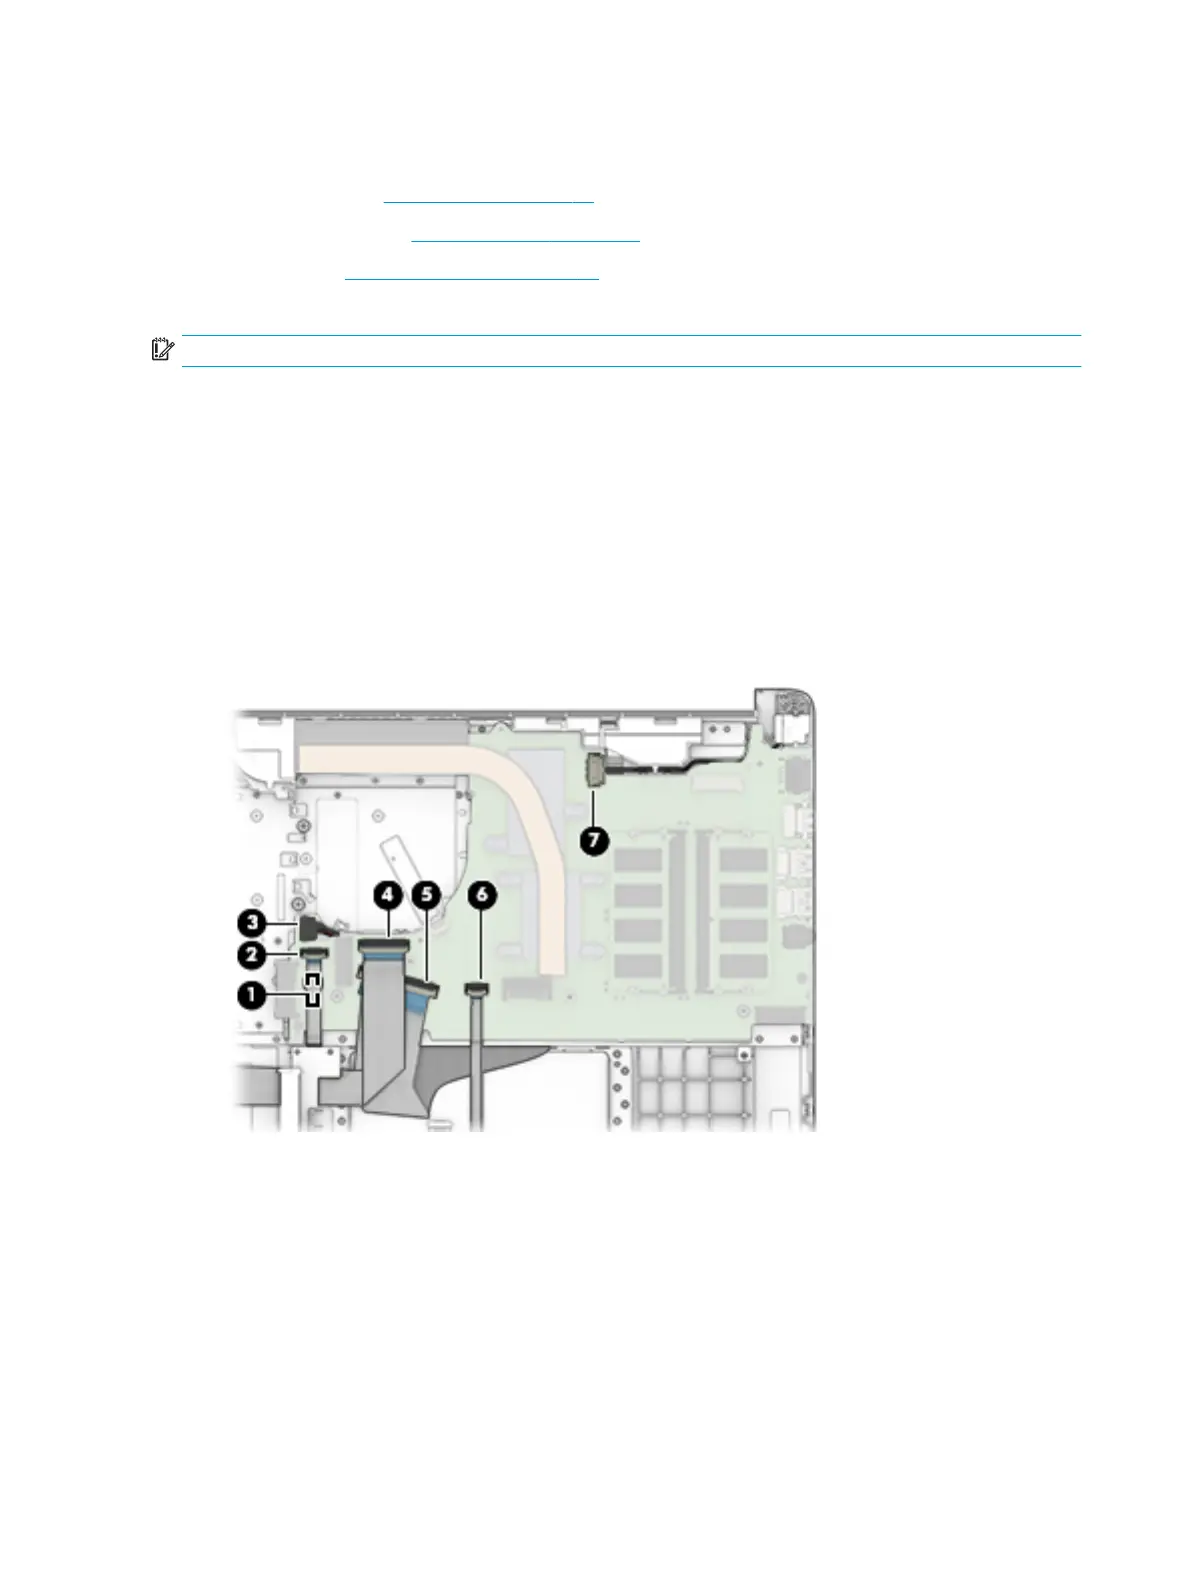
1. Disconnect the following cables from the system board:
(1) Keyboard backlight cable
(2) Hard drive connector cable
(3) Speaker cable
(4) USB/card reader board cable
(5) Keyboard cable
(6) TouchPad button board cable
(7) Power connector cable
2. Remove the two Phillips M2.0 × 3.0 screws that secure the system board to the computer (1).
72 Chapter 6 Removal and replacement procedures for authorized service provider parts
 Loading...