Before removing display subcomponents while the display assembly is still attached to the computer, follow
these steps:
1. Shut down the computer. If you are unsure whether the computer is o or in Hibernation, turn the
computer on, and then shut it down through the operating system.
2. Disconnect all external devices connected to the computer.
3. Disconnect the power from the computer by rst unplugging the power cord from the AC outlet and then
unplugging the AC adapter from the computer.
4. Remove the battery (see Battery on page 32).
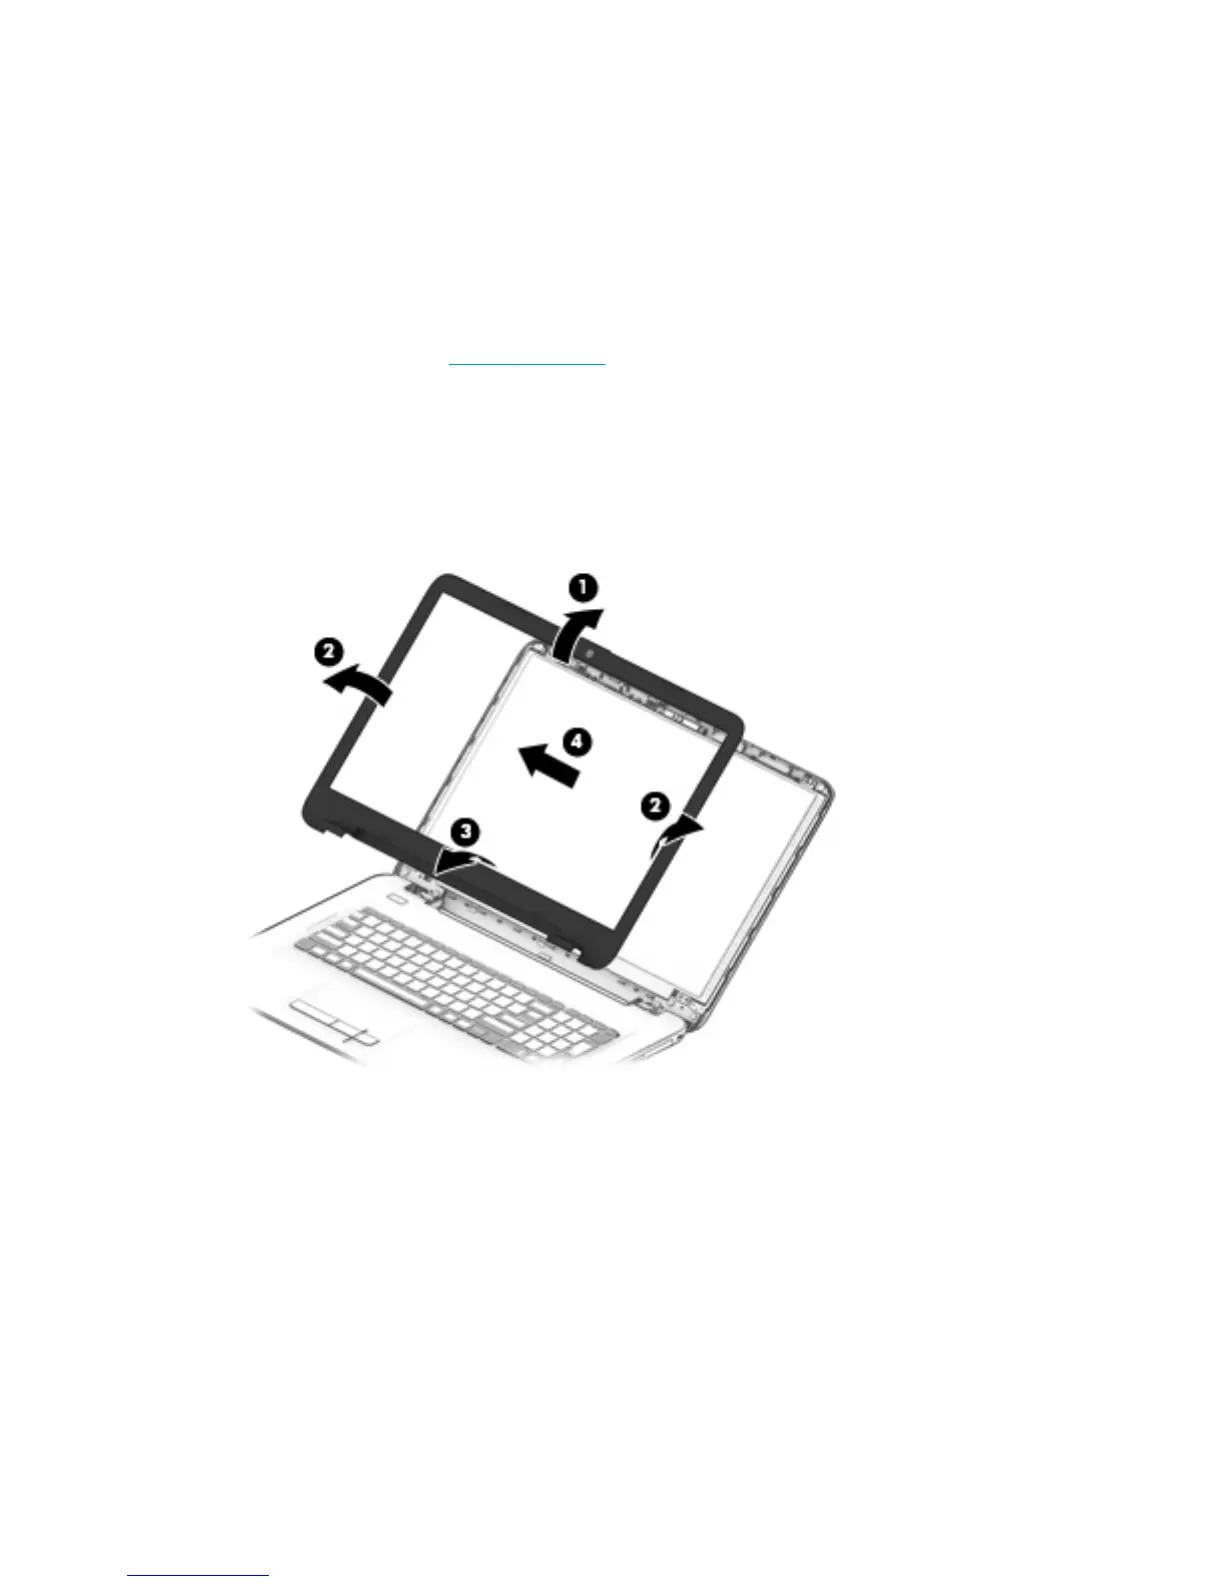
To remove the display bezel, webcam/microphone module, and raw display panel:
1. Position the computer upright with the front toward you, and then open it.
2. Flex the inside of the top edge (1), left and right sides (2), and the inside of the bottom edge (3) of the
display bezel until the bezel disengages from the display enclosure.
3. Remove the display bezel (4).
4. To remove the webcam/microphone module:
a. Position the display assembly with the top edge toward you.
b. Lift to disengage the adhesive that secures the webcam/microphone module to the display (1).
c. Disconnect the cable (2) from the module.
36 Chapter 6 Removal and replacement procedures for Authorized Service Provider parts
 Loading...