SECTION
II
INSTALLATION
2·1.
INTRODUCTION
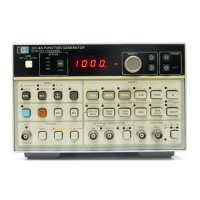
ThIS section provides installation mstructions
for
the
3314A Function Generator. This section also provides in-
formation
about
initial inspection
and
damage
claims,
preparation
for using the
33l4A
and
what to do in case
of
difficulty. In
addition,
installation instruction sheets
for
several -hp- accessories (rack, handle
and
foot kits)
are
located at the end
of
this section. See Section
VII,
Manual
Backdating, for
"8"
explanations
2·2.
INITIAL
INSPECTION
Inspect
the
shipping
container
for
damage.
If
the
ship-
ping
container
or cushioning material is
damaged,
it
should
be
kept
until
the
contents
of
the
shipment
have
been checked for completeness
and
the
instrument
has
been checked mechanically
and
electrically.
The
con-
tents
of
the
shipment
should
be:
An
Operating
Manual
A Service
Manual
A
Power
Cord
A
50n
Feedthrough
Termmation
If
the contents
are
incomplete, if there is mechanical
damage
or defect or if
the
33l4A
does not pass
the
Per-
formance
Tests,
notify
the
nearest
Hewlett-Packard
of-
fice.
If
the
shipping
container
or
the
cushioning
material
is
damaged,
notify
the
carrier as well. Keep
the
shipping
material
for
the
carrier's inspection. The -hp- office will
arrange
for repair
or
replacement at -hp- option
without
waiting
for
a claim settlement.
I
WARNING
I
The integrity
of
the protective earth ground
may be interrupted
if
the 3314A has been
mechanically damaged. Under no cir-
cumstances should a 3314A be connected to
power
if
it is damaged.
2·3.
MATING
CONNECTORS
The
33l4A
uses
50n
BNC(f) type connectors for all
signal
1/0.
The
outer
shield is connected to protective
earth
ground.
The
HP-IB
connector
is an
Amphenol
or
Cinch
type 57
connector.
See Figure 2-1
for
pin
assignments.
An
Improperly set voltageselector willcausethe line
fuse to blow.
The wrong fuse value or type will not protect the
instrument's circuitry and may result in damage to
your
3314A.
Remove
line voltage selector to change voltage
Rotating selector without removal
Will
damage the
module.
A 2 A.l5
2·4.
LINE
VOLTAGE
SELECTION
FIgure 2-2 provides instructions for line voltage
and
fuse
selection.
The
line voltage selector position
and
line fuse
value are selected at
the
factory based
upon
the
country
of
destination. Always check the line voltage selector
and
line fuse value before connecting the
33l4A
to AC power.
To
change
voltage, be sure to remove selectorbefore
rotating
to
avoid damaging
the
module.
The
three-wire power
cord
provided with the
33l4A
establishes a protective
earth
ground
for the chassis
and
cabinet when plugged into a receptacle with a ground con-
tact.
The
offset
pin
on the plug is the ground connection.
This protective
ground
may
be interrupted If the
33l4A
is mechanically damaged Intentional mterruptron
IS
pro-
hibited.
An
interruption
of
any
connection
that
establishes
the
ground
can
make
the
instrument
dangerous
If
It is likely
that
ground
protection is im-
paned,
the
instrument
must
not
be connected to power.
The
lme voltage selected for the
33l4A
is indicated on
the
hne
voltage
selector
It
is set at the factory to corres-
pond
to
the
most commonly used line voltage
of
the coun-
try
of
destination.
Refer to Figure 2-2 for setting the line
voltage
and
selecting
the
appropriate
fuse.
If
you
make
any
changes to
the
voltage selector or the
fuse, be
aware
of
correct alignment indications. Before
closing
the
module's
cover,
confirm
that
the arrow on
the
fuse
holder
aligns WIth the arrows on
the
inside
of
the
cover.
They
should
all
point
m
the
same direction
After
firmly pushing the cover closed, be sure the cor-
rect
hne
voltage appears
through
the cover window.
2-1
 Loading...