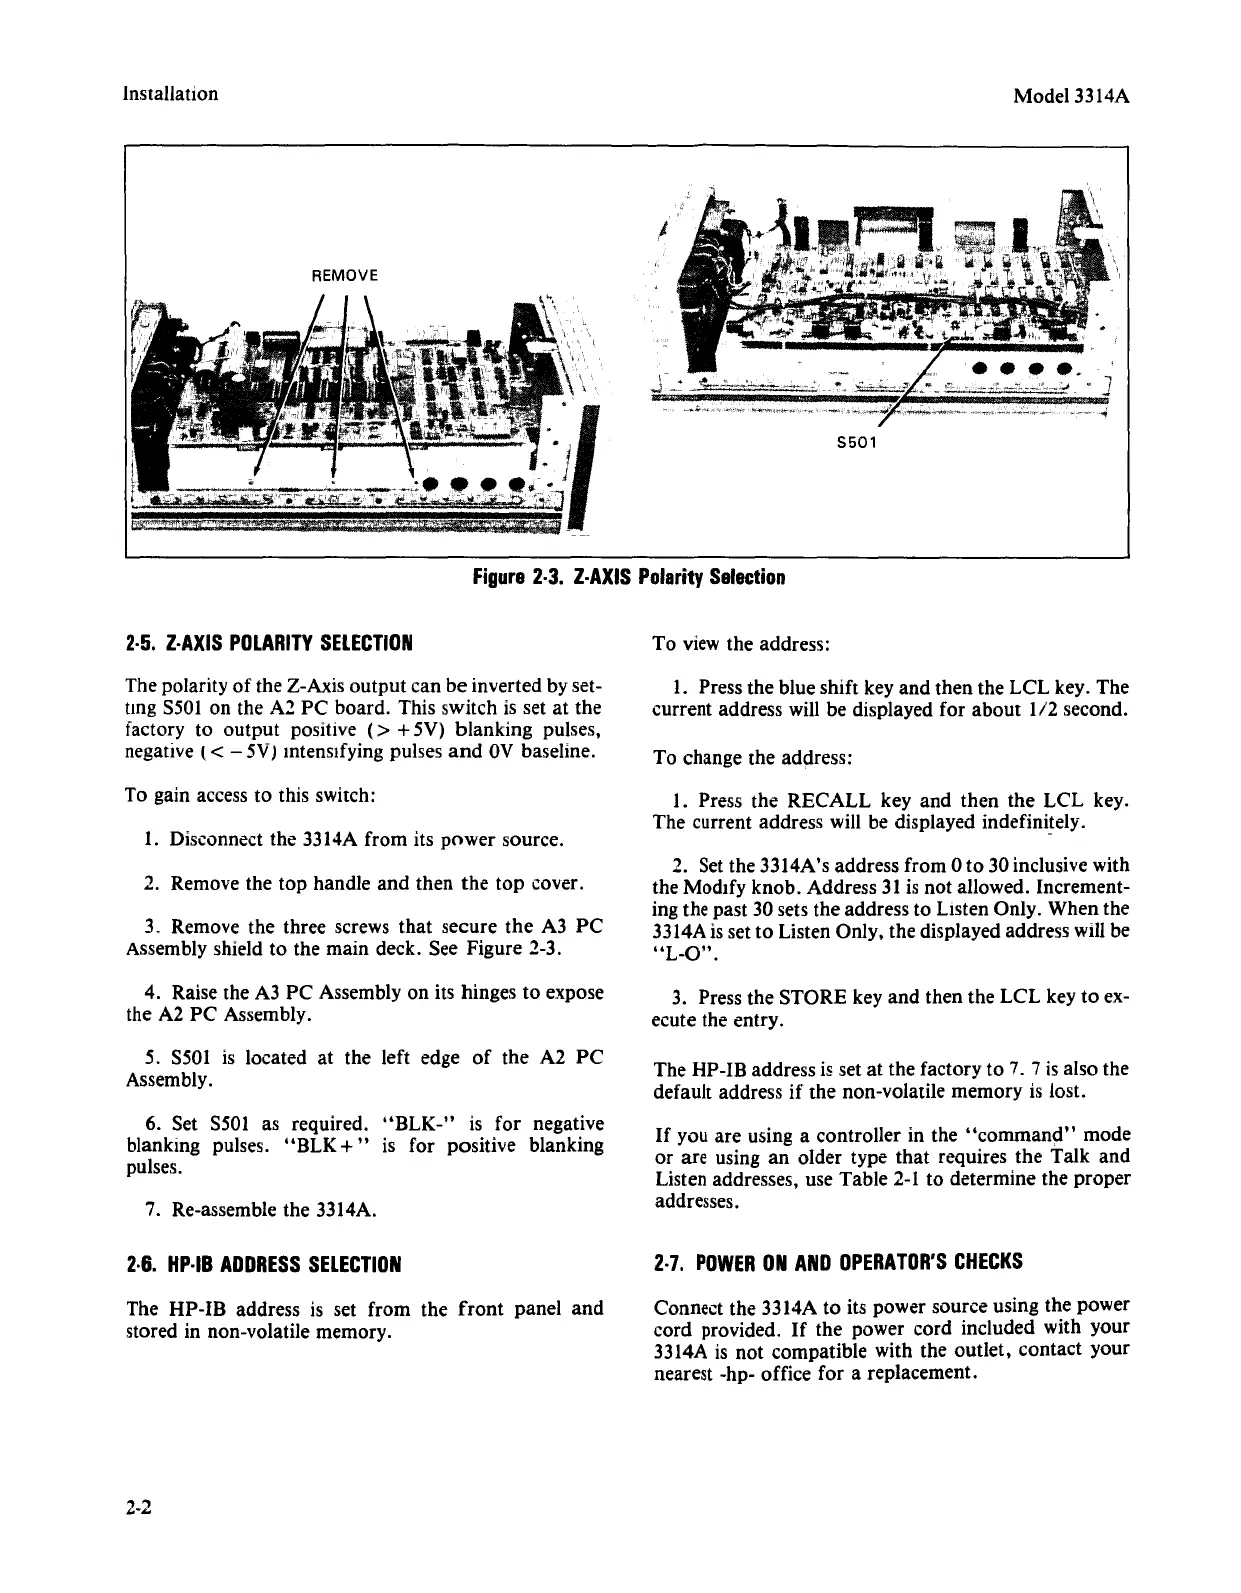
Installation
REMOVE
Model 3314A
5501
2·5.
Z·AXIS
POLARITY
SELECTION
Figure
2·3.
Z·AXIS
Polarity
Selection
To view the address:
The polarity
of
the Z-Axis
output
can
be
inverted by set-
ung S501 on the A2
PC
board. This switch is set at the
factory to
output
positive
(>
+5V)
blanking
pulses,
negative
(< - 5V) Intensifying pulses
and
OV
baseline.
To gain access to this switch:
1. Disconnect the 3314A from its
power
source.
2. Remove the
top
handle
and
then
the
top
cover.
3. Remove the three screws
that
secure
the
A3
PC
Assembly shield to the main deck. See Figure 2-3.
4. Raise the A3
PC
Assembly on its hinges to expose
the A2
PC
Assembly.
5. S501 is located at the left edge
of
the A2
PC
Assembly.
6. Set 5501 as required.
"BLK-"
is for negative
blanking pulses.
"BLK
+"
is for positive blanking
pulses.
7. Re-assemble the 3314A.
2·6.
Hp·IB
ADDRESS
SELECTION
The
HP-IB
address is set
from
the
front
panel
and
stored in non-volatile memory.
2-2
1. Press the blue shift key
and
then the
LCL
key.
The
current address will be displayed for
about
1/2
second.
To change the address:
1. Press
the
RECALL
key and
then
the
LCL
key.
The current address will be displayed indefinitely.
2. Set the 3314A's address from 0 to 30 inclusive with
the Modify knob. Address 31 is
not
allowed. Increment-
ing the past 30 sets the address to
LIsten Only. When the
3314A is set to Listen Only, the displayed address will be
"L-O".
3. Press the STORE key
and
then the
LCL
key to ex-
ecute the entry.
The HP-IB address
is set at the factory to 7. 7 is also the
default address
if
the non-volatile memory is lost.
If
you
are
using a controller in the
"command"
mode
or are using an older type
that
requires
the
Talk
and
Listen addresses, use Table 2-1 to determine the
proper
addresses.
2·7.
POWER
ON
AND
OPERATOR'S
CHECKS
Connect the 3314A to its power source using the power
cord
provided.
If
the power cord included with
your
3314A is
not
compatible with the
outlet,
contact
your
nearest -hp- office for a replacement.