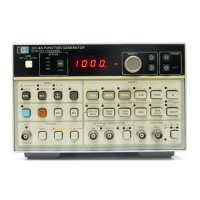
Model 3314A
just
the waveform until
the
bottom
of
the
Square wave's
rising edge is on
top
of
the Y-axis graticule. Note
the
distance between the
10070
and
90070
points on the rising
edge.
If
the distance between
the
points
is less
than
or
equal to ,9cm (note scope setting), the specification is
met.
F. Set
the
Main
Triggering function
of
the
Oscilloscope to negative.
G. Observe
the
trailing edge
of
the waveform.
Note
the
distance between
the
90070
and
10070
points.
If
the
distance
IS
less
than
or equal to .9cm,
the
test passes.
H. Set the
Time/div
setting on the Oscilloscope to
lus/cm.
I.
Rotate the Oscilloscope's
"Cal"
knob
(located on
the
VOLTS/DIY
knob) counterclockwise until
the
waveform is
four
divisions tall. The
"intensified"
por-
tion on the
top
of
the wave should be <O.5V (1 minor
division).
4·9.
SINE
WAVE
HARMONICS
This is a test to check
the
amplitude levels
of
the Sine
Wave Harmonics.
Specification;
Performance Tests
D. To verify
that
the
Sine wave harmomcs are within
specification, set the Spectrum Analyzer as follows:
1. Press
"INSTR
PRESET".
2. Press
"DSPL
LINE"
and
adjust the
Control
knob
for
a-55
dB level.
3. Press
"STOP
FREQ"
and
set it to 8
times
the
3314A frequency setting.
4. Press
"MARKER"
and
using the Con-
trol
knob,
place It over the fundamental.
5. Press
"MKR-REF
LVL"
and
wait
for the sweep to
update
the screen display.
Eo
Observe the harmomcs displayed on the Spectrum
Analyzer
and
verify
that
they are below the - 55dB
level.
F. Repeat steps D (parts 3-5)
and
E for the 3314A fre-
quency settings listed in Tables 4-5
and
4-6 whose har-
monic
level specification is - 55dB.
G. Press
"INSTR
PRESET"
on the Spectrum
Analyzer.
H. Press
"DSPL
LINE"
and adjust the Control
knob
for a - 40dB level.
20Hz to 50kHz
, , ,
..
50kHz to 1.999MHz ,
1.999MHz to 19.99MHz " ,
..
Equipment Required:
Spectrum Analyzer
High Frequency Spectrum Analyzer
Procedures:
A. Preset the 3314A.
-55dB
-40dB
-25dB
I.
Repeat step D, parts 3-5 for the 3314A frequency
settings listed in Table 4-6 whose harmonic level
specification is - 40dB. Verify
that
these levels are
within the specification.
]
_Disconnect the 3314A from the Spectrum Analyzer
K To measure the harmonics of the frequencies listed
III
Table 4-7, connect the 3314A to the High Frequency
Spectrum Analyzer as shown in Figure 4-9.
L. Set the frequency
of
the
3314A to 1.00MHz.
B. Set
the
3314A as follows:
Frequency ,
, , . 20.0Hz (Range 3)
Amplitude , ,
..
, .
~
IOVp-p
Function
, ,
,.....
Sine
Range
Hold
, . , ,
..
, . _ On
C. Connect the 3314A to the Spectrum Analyzer as
shown
III
Figure 4-9
NOTE
To get to the frequencies listed in the follow-
tng ranges (see Tables 4-5, 4-6, 4-7), set the
3314A to the middle value in the range (i.e.
range
3,
lOO.OHz),
activate Range Hold,
then use the Modify knob to select the fre-
quencies. Be sure that the frequency on the
3314A
is set exactly as shown in the table.
M. Set the High Frequency Spectrum Analyzer as
follows:
Input
Range ,
..
, . . . . . . . .
..
+ 30dBm
Time/div
,
Auto
Start
Frequency ,
IMHz
N. Measure
2nd
through 7th harmonics.
O. Set the frequency on the 3314A to
IO.OOMHz,
and
adjust
the
start
frequency on the High Frequency Spec-
trum
Analyzer to lOMHz.
P. Measure
2nd
through 7th harmonics.
Q. Set the frequency on the 3314A to 19,99MHz, and
adjust
the start frequency on the High Frequency Spec-
trum
Analyzer to 19.99MHz.
R. Measure the 2nd through 7th harmonics.
 Loading...