Paper Timing Roller Removal
7-60 Removal/Replacement Procedures June 1999
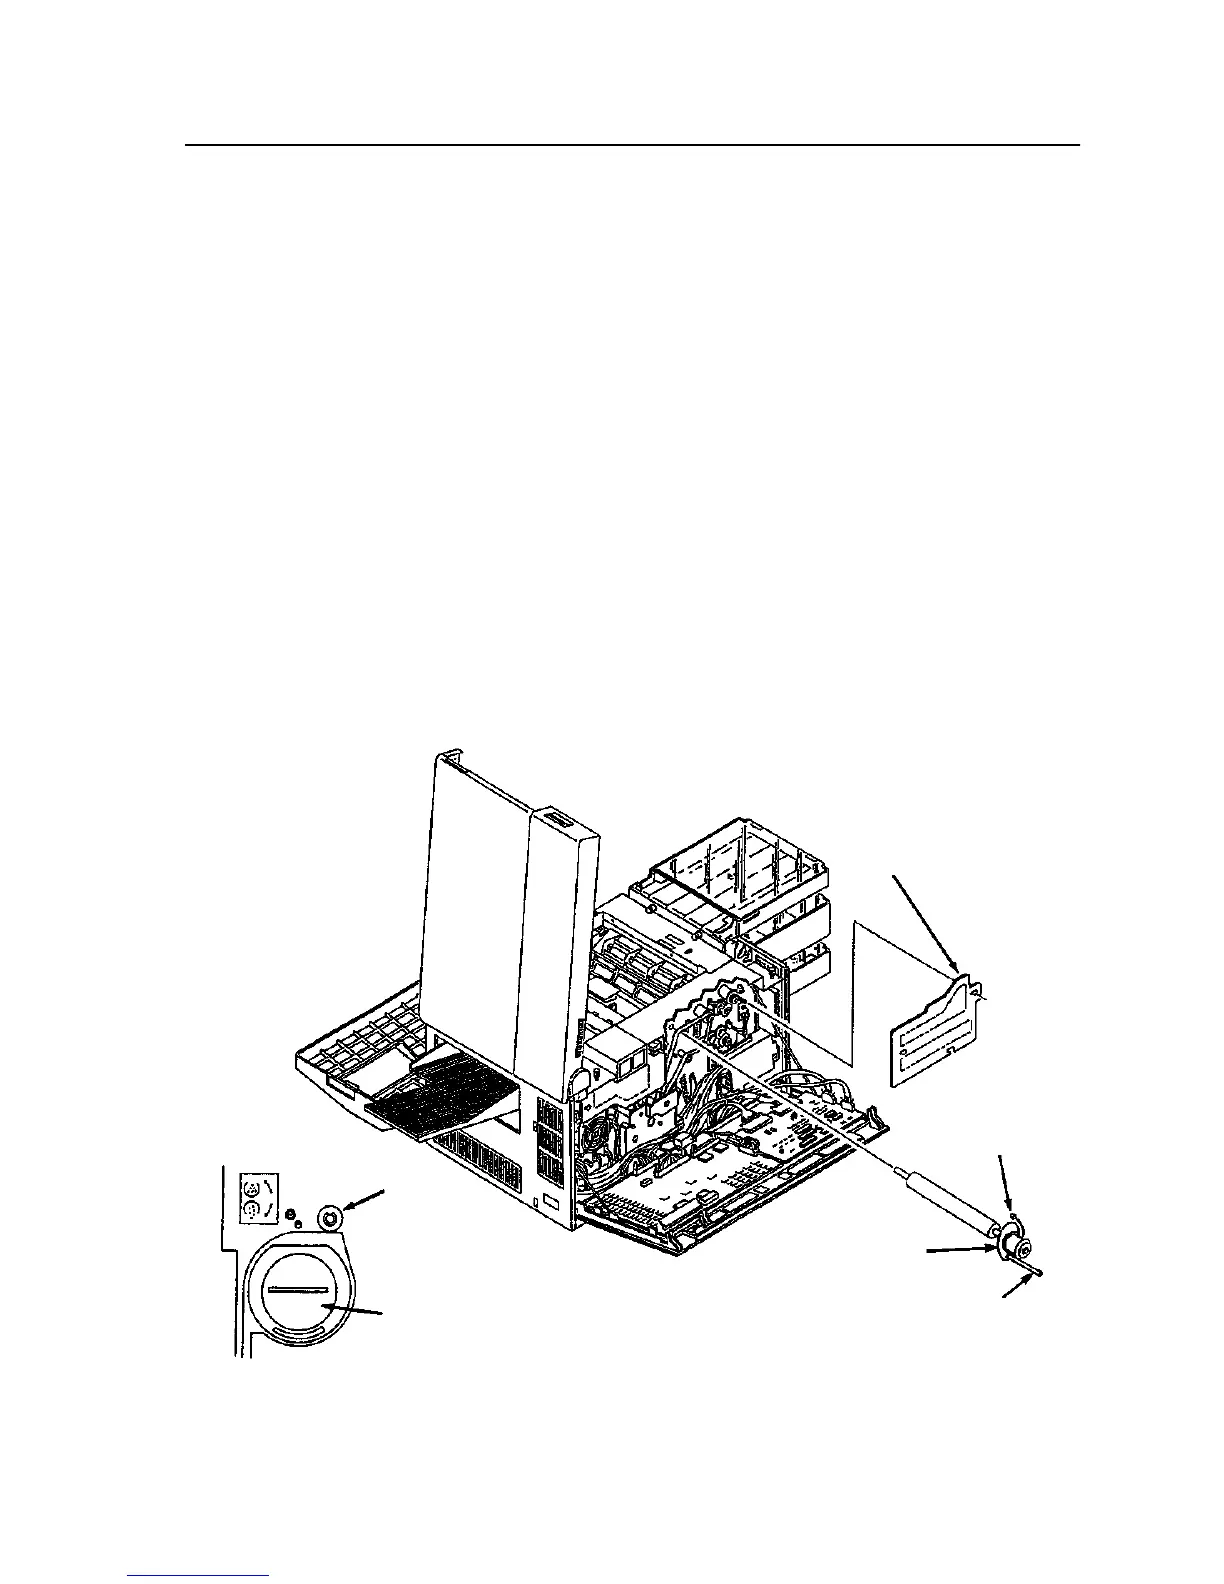
Paper Timing Roller Removal
To remove the paper timing roller:
1 Open the front, back, and top covers.
2 Raise the upper paper guide.
3 Remove the photoconductor and place it in its protective bag.
4 Remove the paper feed drive cover (three screws).
5 Remove the paper feed drive belt from the paper timing roller gear.
6 Disconnect CN65.
7 Unscrew the standoff post from the collar surrounding the end of the roller.
8 Remove the front C-clip and bearing.
9 Slide the paper timing roller out the back of the printer.
Replacement Notes:
• Reinstall the original collar and standoff post with any new paper timing roller.
• Be sure to align all of the guide pins or the C-clip will not fit correctly.
Paper Feed
CN65
Collar
Standoff Post
C-Clip
Cassette Release Cover
Drive Cover
and Bearing
Front Detail