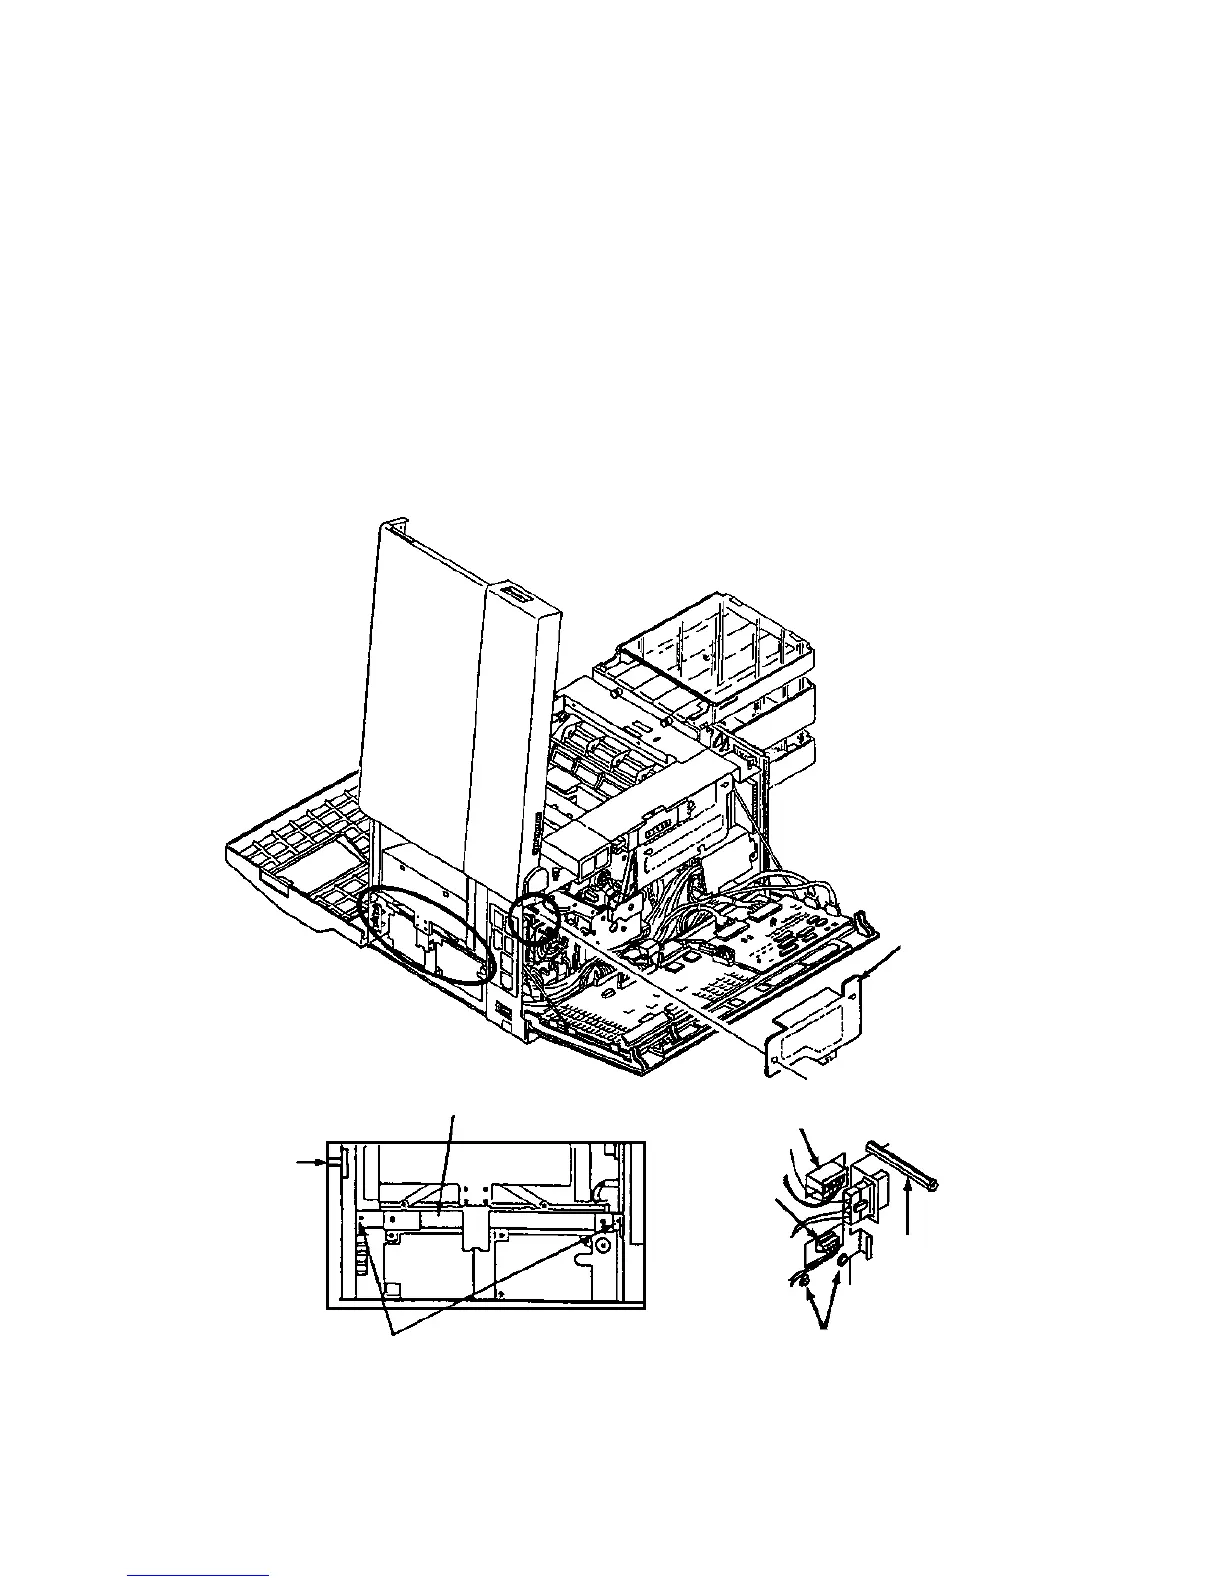
Job Offset Assembly Removal
7-68 Removal/Replacement Procedures June 1999
5 Remove the DC power supply (see page 7-31).
6 Remove the mounting bracket for the DC power supply (two screws).
7 Remove the fuser drive cover (three screws).
8 Disconnect CN19 and CN54.
9 Remove the five screws holding the job offset assembly in place (three front and two
back).
10 Remove the fuser drive cover mounting post.
11 Remove the output option mounting pin (single screw, located on the front of the
printer).
12 Remove the job offset assembly.
Mounting
Pin
Bracket
Bracket Mounting Screws
Right Side Detail
CN54
CN19
Mounting Screws
Back Detail
Fuser Drive Cover
Mounting Post
Fuser Drive
Cover