Fuser
WARNING! The fuser might be hot. After turning off the product power, allow the fuser to cool for at
least five minutes before removing it.
NOTE: The fuser can be removed without removing the upper-cover assembly. However, it might be
easier to access some of the connectors with this component removed.
1. Remove the following components:
●
Right cover. See
Right cover on page 108.
●
Upper-cover assembly. See
Upper-cover assembly on page 121.
●
Left cover. See
Left cover on page 126.
●
Rear door (simplex products). See
Rear door (simplex product) on page 104.
●
Rear cover (simplex products). See
Rear cover and feed guide (simplex product)
on page 112.
●
Rear-upper cover (duplex products). See
Rear-upper cover (duplex product) on page 111.
●
Rear door (duplex products). See
Rear door (duplex product) on page 106.
●
Rear-lower cover (duplex products). See
Rear-lower cover and rear-door links (duplex
product) on page 116.
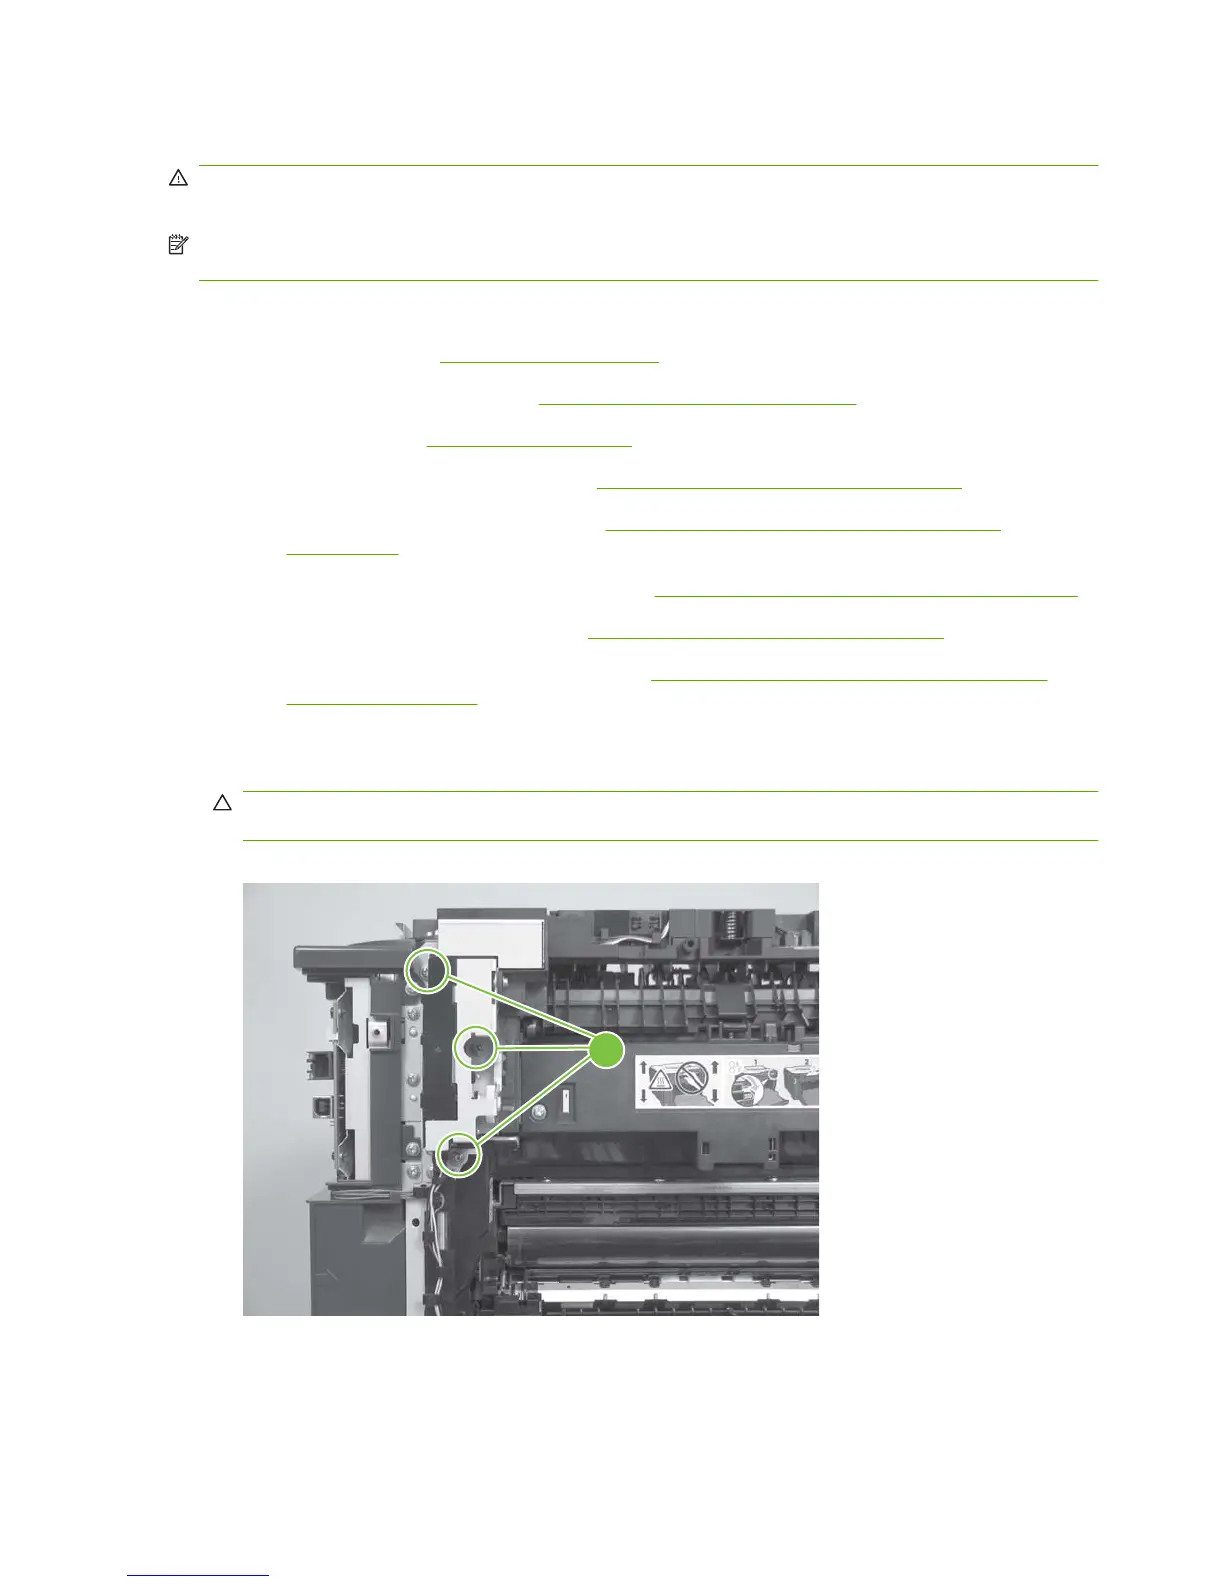
2. Duplex models only: Remove three screws (callout 1) and separate the duplex reverse-drive
assembly from the product.
CAUTION: The duplex reverse-drive assembly is still attached to the product. Carefully set the
assembly out of the way.
Figure 6-129 Remove the fuser (1 of 8)
1
162 Chapter 6 Removal and replacement ENWW
 Loading...