Do you have a question about the HP Compaq 6000 Pro SFF and is the answer not in the manual?
How to access HP user guides and diagnostic tools for Windows systems.
How to access HP user guides for Linux systems via desktop icon.
Steps to check computer warranty status and HP Care Pack registration.
Instructions for automatic operating system installation upon first boot.
Guide to downloading and installing critical Windows updates.
Procedures for installing drivers for optional hardware devices.
How to adjust monitor settings like resolution and color.
Instructions for using Windows XP Mode on Windows 7.
Locating and using ISO files for additional software installation.
Importance of backing up system software and data.
Overview of HP Vision Field Diagnostics utility for hardware testing.
Steps to access HP Vision Field Diagnostics via CD or USB.
Guide to downloading the latest diagnostics from HP.com.
Proper procedures for shutting down and turning off the computer.
How to access additional HP publications and user manuals.
Preparations and safety precautions before contacting HP support.
General suggestions for resolving common computer issues.
Guide to understanding LED indicators and beep codes for diagnostics.
This document provides a comprehensive guide for setting up, using, and maintaining HP Business PCs, focusing on quick setup procedures, software installation, troubleshooting, and accessing support resources. It is designed to assist users from initial unboxing and connection to advanced diagnostics and ongoing maintenance.
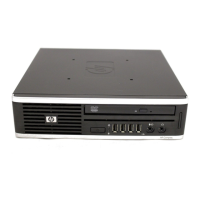
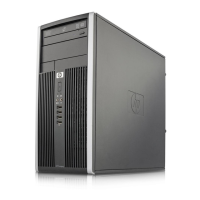
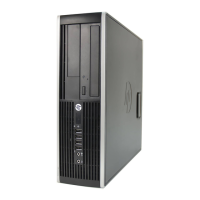
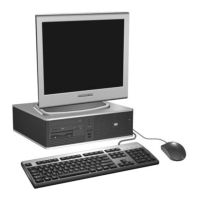
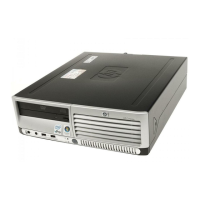
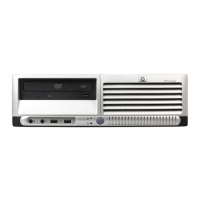
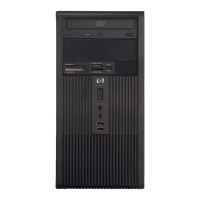
The manual begins by illustrating the components typically included with an HP Business PC, such as various computer tower configurations (desktop, mini-tower), a monitor, keyboard, mouse, and necessary cables. This visual guide helps users identify all parts before starting the setup process. Following this, a detailed visual of various cables and connectors is provided, including power cables, monitor cables (VGA, DVI), USB cables, and audio cables. This section is crucial for ensuring correct connections during the initial setup. The final setup illustration demonstrates how to connect the monitor, keyboard, mouse, and power cables to the computer, emphasizing proper cable management and power supply connections. A critical detail highlighted is the voltage selector switch (115V/230V) on the power supply, which must be set correctly for the user's region to prevent damage.
The quick setup process is designed to be straightforward. Upon the first power-on, the operating system (OS) typically installs automatically. Users are advised to carefully read and follow on-screen instructions during this process, which can take between 5 to 60 minutes depending on the OS and language options. A crucial warning is issued against turning off the computer during OS installation to prevent software damage. The manual also notes that if the computer shipped with Windows Vista or Windows 7, users will be prompted to register with HP Total Care before OS installation. It is also recommended not to add optional hardware or third-party devices until the OS is successfully installed to avoid potential errors. Adequate clearance (10.2 cm or 4 inches) at the back of the unit and above the monitor is necessary for proper airflow, which is essential for maintaining optimal operating temperatures.
Once the operating system is installed, the manual guides users through downloading Microsoft Windows Updates. This involves connecting to the internet, accessing Windows Update via the Start menu, and installing all critical updates and service packs. Users are advised to save any open files before rebooting the machine, as a reboot is typically required after updates. For installing or upgrading device drivers, users are directed to the HP support website to download the latest software for their specific computer model. This ensures that all hardware components function correctly, especially after installing optional devices.
Customizing the monitor display is another key aspect covered. Users can adjust settings such as monitor model, refresh rates, screen resolution, color settings, font sizes, and power management settings by right-clicking on the Windows Desktop and accessing display properties. For users with Windows 7, the manual explains how to launch Windows XP Mode, which allows running Windows XP applications from the Windows 7 taskbar, a feature available on some models.
The document also details how to access Disk Image (ISO) Files located in the C:\SWSetup\ISOs folder. These ISO files contain installation software for additional programs like Corel WinDVD (for playing DVD movies) and HP Insight Diagnostics or Vision Diagnostics (for performing diagnostic activities). Users are encouraged to burn these ISOs to CD media or copy them to USB flash drives to create installation disks and install the software to maximize their PC's functionality.
Protecting the software is emphasized, with a recommendation to create backup copies of all system software, applications, and data files. Users are advised to refer to their operating system or backup utility documentation for specific instructions on making these backups.
A significant portion of the manual is dedicated to Hewlett-Packard Vision Field Diagnostics, a utility for viewing hardware configuration information and performing diagnostic tests. This tool simplifies identifying, diagnosing, and isolating hardware issues. The Survey tab displays the current computer configuration, while other tabs offer diagnostic test options and results. Test results can be saved as HTML files and stored on a diskette or USB flash drive. Running these tests is optional but highly recommended, especially after installing new devices, and saving/printing reports is advised before contacting customer support. The manual provides detailed steps on how to access HP Vision Field Diagnostics, which involves burning the utility to a CD or copying it to a USB flash drive and then booting the computer from that media. Instructions are also given for downloading the latest version of HP Vision Field Diagnostics from the HP website.
Turning off the computer properly is explained, differentiating between shutting down the operating system (which automatically powers off the computer) and pressing the power button (which might put the computer into a low-power or "standby" state). A warning is included about manually forcing the computer off, as this can lead to data loss. Users can reconfigure the power button's behavior in Computer Setup (F10) Utility.
For finding more information, the manual lists several publications available on the computer's hard drive, accessible via Start > All Programs > HP User Manuals. These include the Quick Setup & Getting Started guide (also in print), Hardware Reference Guide (for upgrading and component information), Computer Setup (F10) Utility Guide (for modifying default settings), Desktop Management Guide (for security and manageability features), Troubleshooting Guide (for resolving hardware/software problems and diagnostic codes), and Safety & Regulatory Information Guide.
Before calling for technical support, users are strongly advised to perform basic troubleshooting steps. A critical safety warning is given: always disconnect the power cord from the wall outlet and allow internal components to cool before touching them, as voltage is always applied to the system board when plugged in. Troubleshooting steps include running diagnostics utilities (like Drive Protection System Self-Test), checking the power LED for error codes, ensuring the monitor is properly connected and functioning, verifying network connections, removing recently added hardware or software, booting in Safe Mode, and checking online technical support resources. Users are also encouraged to have their computer's serial number, product ID, and monitor serial number ready when contacting support.
Helpful hints for resolving common issues include checking power connections, verifying the voltage selector switch setting, ensuring the computer and monitor are turned on, checking for flashing power LEDs, adjusting monitor brightness/contrast, pressing keys to wake the system from suspend mode, checking cable connections, reconfiguring the computer after installing non-plug-and-play devices, ensuring all device drivers are installed, removing bootable media before starting, and verifying OS support. For systems with multiple video sources, ensuring the monitor is plugged into the primary VGA adapter is crucial.
Finally, for Windows 7 systems, the manual highlights the centralized PC management location accessible via Start > Devices and Printers. This allows users to view/change computer name and system settings, add devices/printers, get help, install HP support software, and purchase supplies/accessories.
Overall, this manual serves as an essential resource for HP Business PC users, guiding them through every step from initial setup to advanced troubleshooting and maintenance, ensuring a smooth and productive computing experience.
| Audio | Integrated High Definition Audio |
|---|---|
| Networking | Integrated Intel 82567LM Gigabit Network Connection |
| Power Supply | 240W |
| Form Factor | Small Form Factor (SFF) |
| Processor | Intel Core 2 Duo, Intel Pentium Dual-Core |
| Memory | Up to 8 GB DDR3 SDRAM |
| Storage | SATA Hard Drive or Solid State Drive |
| Graphics | Integrated Intel GMA 4500, optional discrete graphics |
| Optical Drive | DVD-ROM, DVD+/-RW |
| Ports | USB 2.0, VGA, DisplayPort, serial, parallel |
| Operating System | Windows 7, Windows Vista, Windows XP |
| Weight | 7.6 kg |
| Expansion Slots | 1 PCIe x16, 1 PCIe x1 |
| Chipset | Intel Q43 Express Chipset |