G
Using the screwdriver supplied, remove the two screws that
hold Drawer 1 in place. Note: the screws are only for transit,
they are not to be replaced.
Do not reinsert these
screws after removal!
Slide Drawer 1 out until it touches the foam packaging.
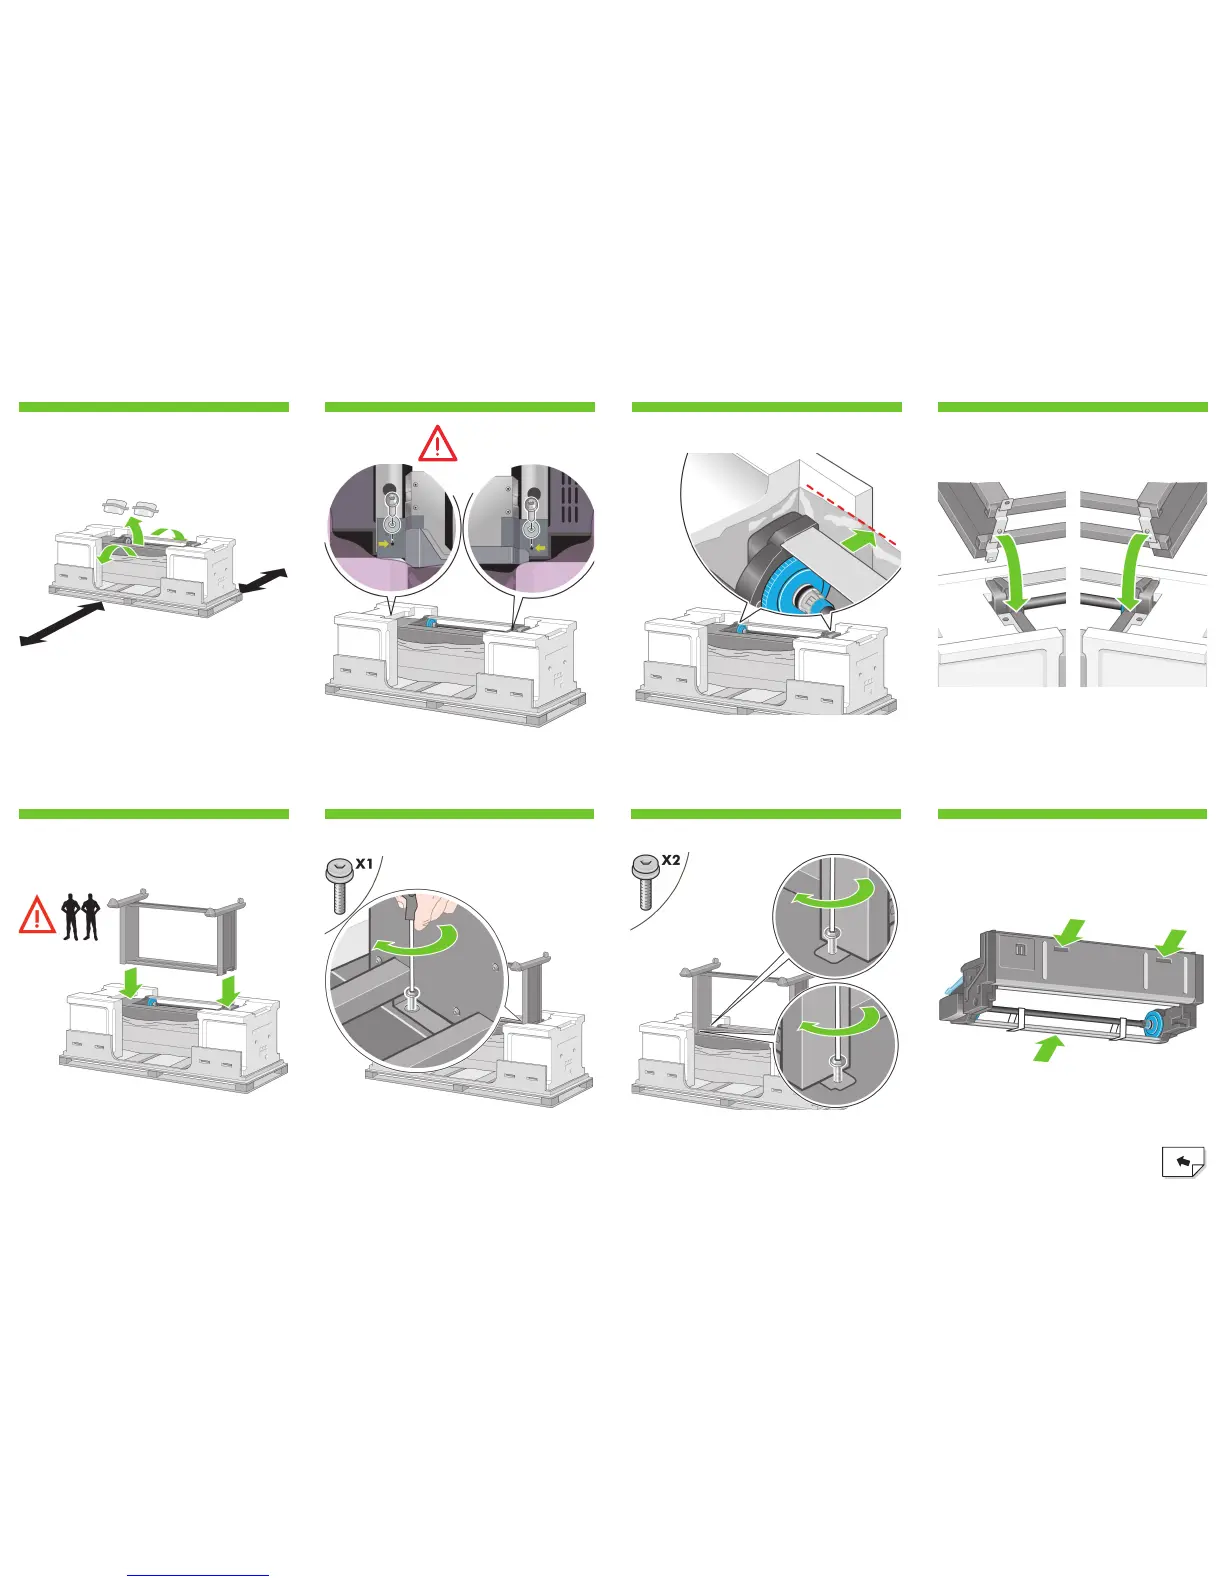
Advance warning: in the next step, make sure you position
the stand pins in the holes in the center of the printer body
brackets.
Right leg.Left leg.
Pull open the protective plastic from the base of the printer.
Please ensure that there is a three-meter space clear of
obstructions to the rear of the printer and one meter at the
front of the printer.
Remove the two desiccant bags from the printer.
3m (9ft)
Rear
Important information
Front
1m (3ft)
Fix the right side of the stand to the printer using one screw.
Make sure that the screw is fully tightened.
Slide Drawer 1 forwards to gain better access for the front
screw. Fix the left side of the stand to the printer using two
screws. Make sure that the screws are fully tightened.
Before unpacking the roll module, note that you
should only handle this piece of equipment using
the points indicated by the green arrows shown
above.
Lift the stand assembly onto the printer body.
The anti-slip material should face to the rear of the printer.
4544 46 47
4948 50 51
 Loading...

