8-16
Removal and Installation
HP Designjet 4500 Printer Series Service Manual
Right Trim
Removal
Switch off the product and remove the power cable.
1. Remove the Right Cover
⇒
Page 8-8
.
2. Remove the Output Platen
⇒
Page 8-104
.
3. Remove the Pinch Wheel Lever assembly
⇒
Page 8-123
.
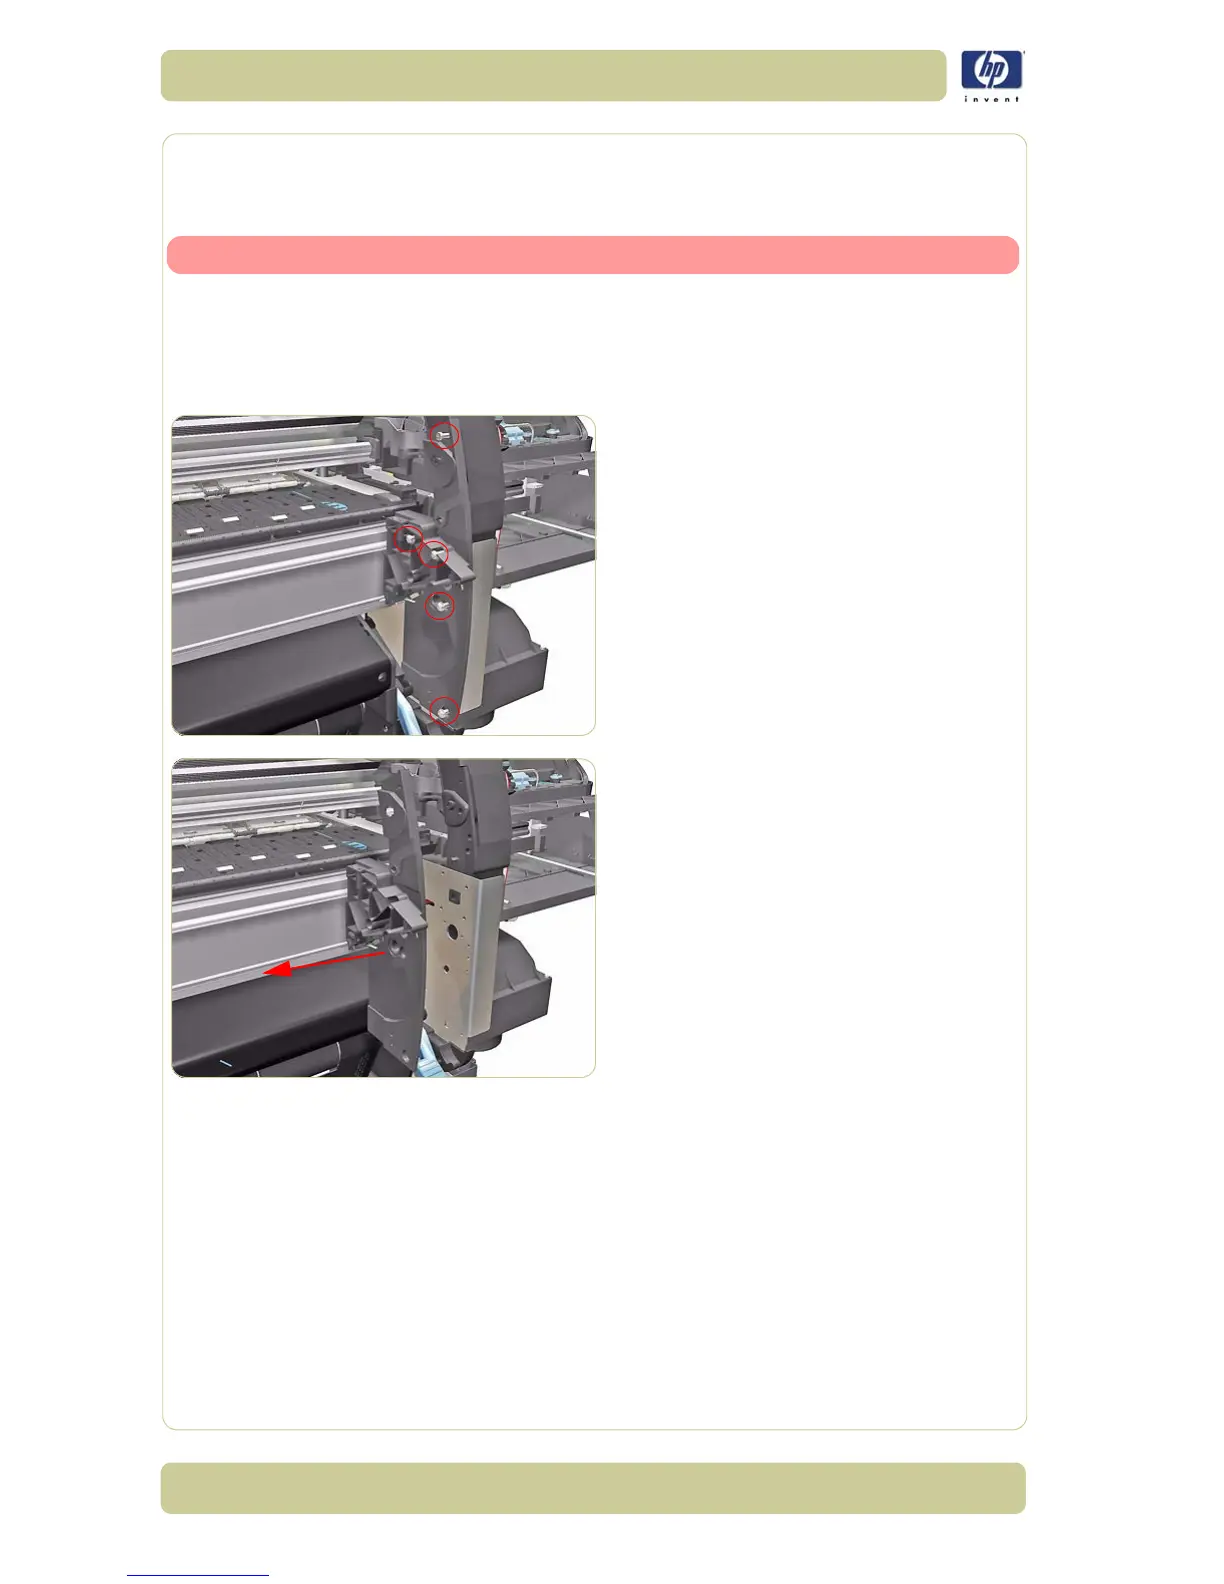
4. Remove five T-15 screws (Type B) that
secure the Right Trim.
5. Carefully remove the Right Trim from the
Printer.
 Loading...

