8-35
Removal and Installation
HP Designjet 4500 Printer Series Service Manual
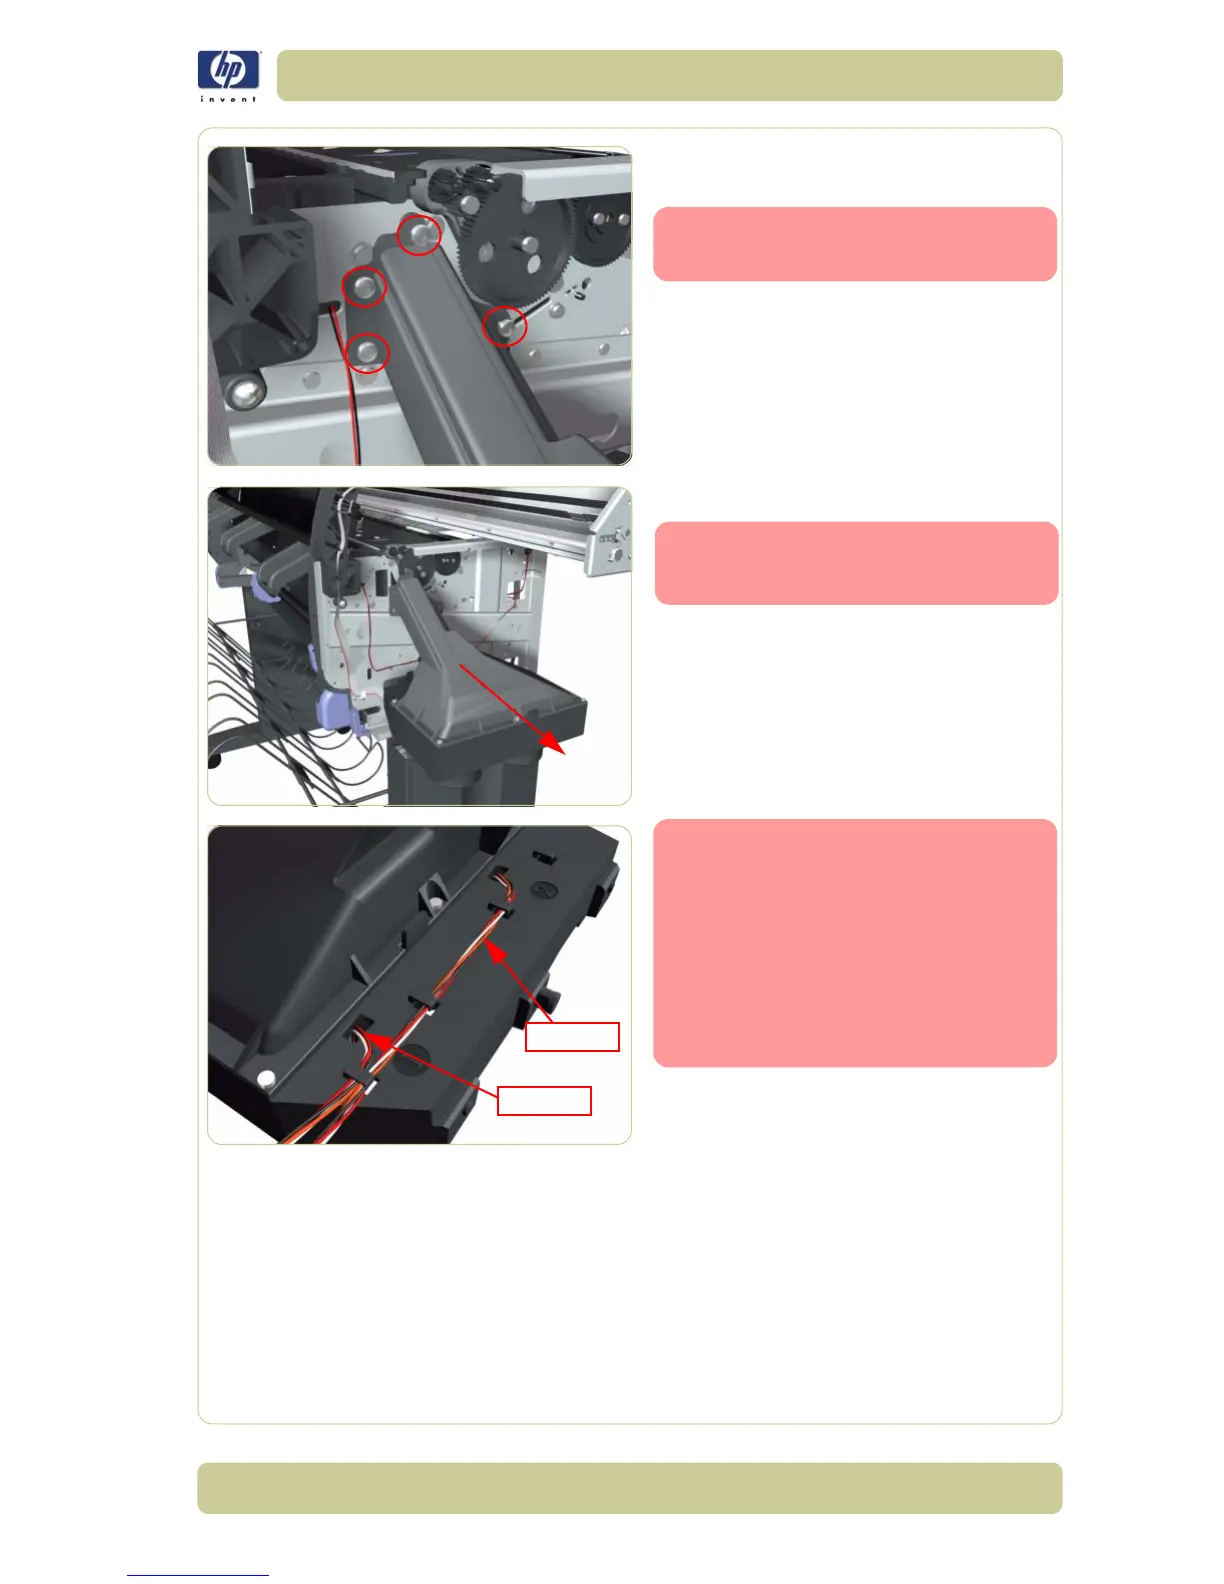
7. Remove four T-20 screws (Type B) that
secure the Vacuum Fan to the Printer.
To remove the Vacuum Fan you
need to open the Roll 1 Module
(Front Path).
8. Remove the Vacuum Fan from the Printer.
After installing the NEW Vacuum
Fan, make sure you perform the
following Service Calibration:
Paper Advance Calibration
⇒
Chapter 5.
When connecting the Vacuum Fan
cables to the Interconnect PCA,
make sure you connect the cable
with the label marked Vacuum
Fan 1 to connector 1 and the cable
with the label marked Vacuum
Fan 2 to connector 2. You can
verify if both cables are labelled
correctly by the actual markings
on the Vacuum Fan.
Cable 2
Cable 1
 Loading...

