8-129
Removal and Installation
HP Designjet 4500 Printer Series Service Manual
Pinchwheel Assembly
Removal
Switch off the product and remove the power cable.
1. Remove the Right Cover
⇒
Page 8-8
.
2. Remove the Rear Door
⇒
Page 8-23.
3. Remove the Service Station
⇒
Page 8-30.
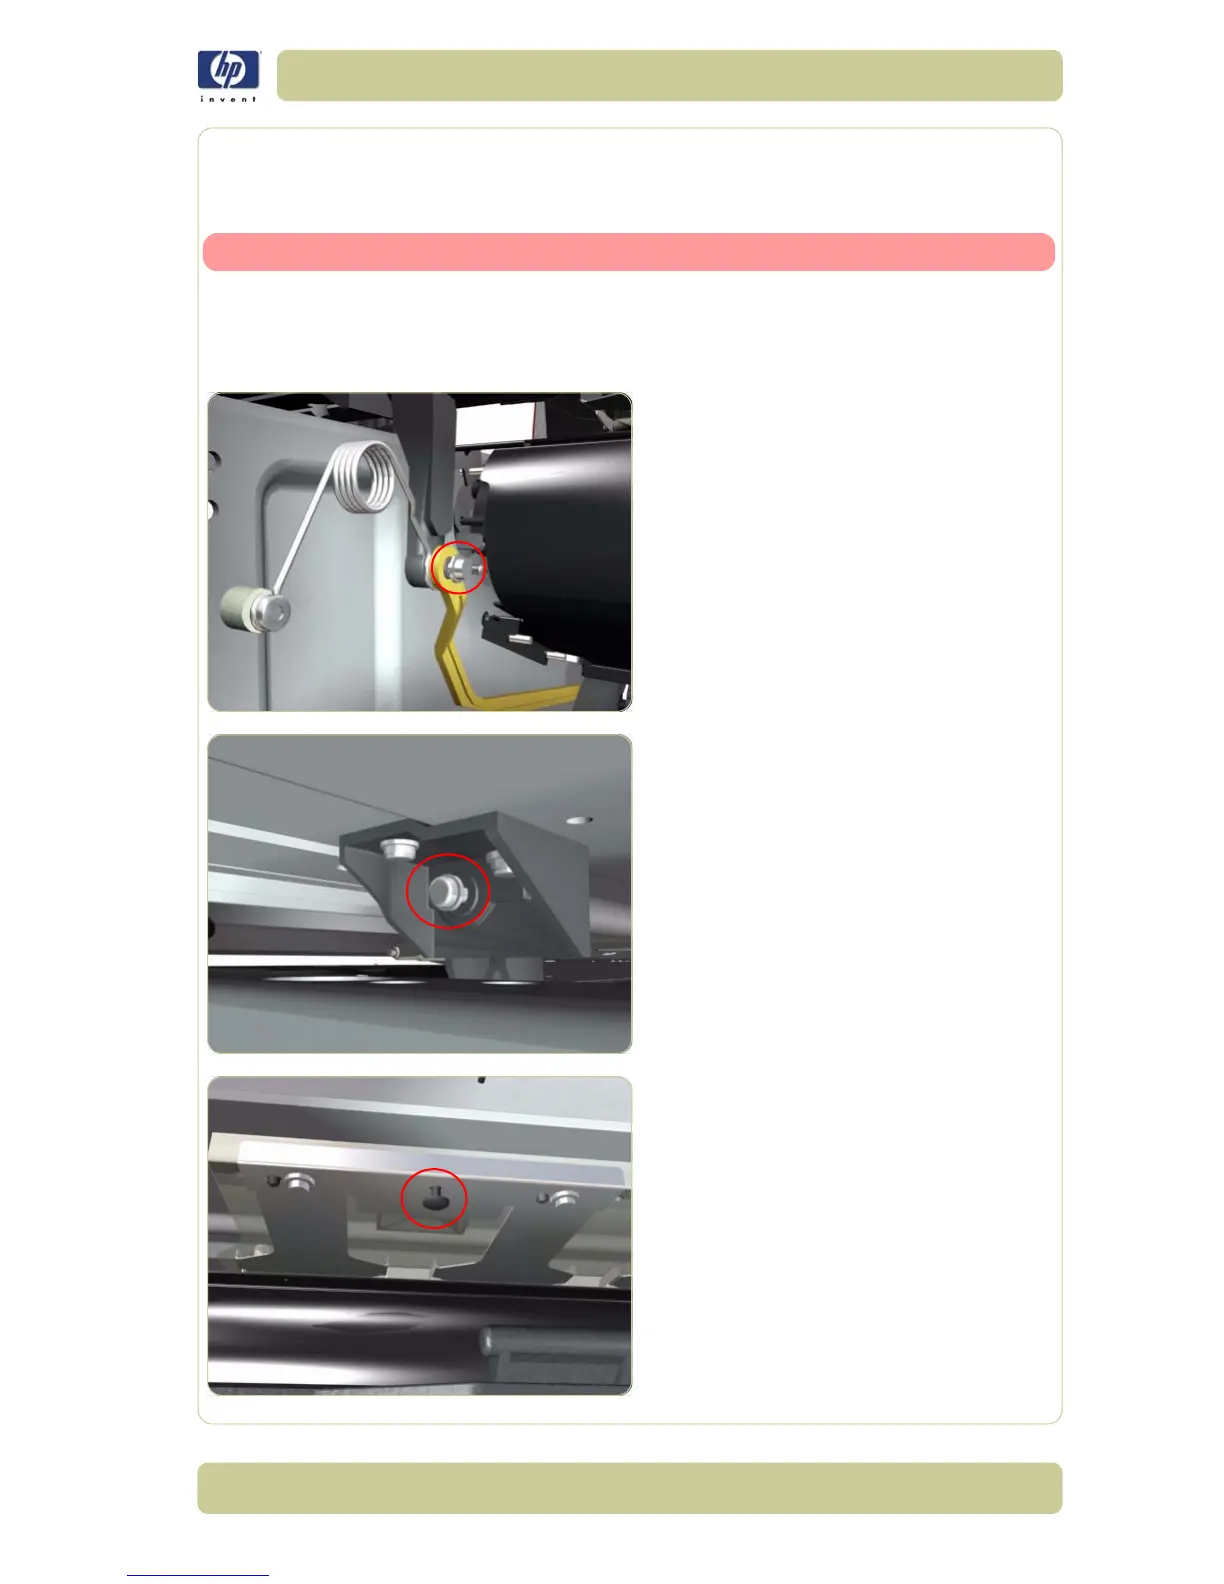
4. Remove one T-20 screw that secures the
Linkage to the Spring.
5. Remove one T-20 screw that secures the
Cam to the Cam Lever.
6. Insert a plastic stud in to each Pinchwheel
Subassembly (the Plastic Studs can be
found in the replacement Pinchwheel
Assembly kit).

 Loading...


