7-35
Removal and Installation
HP Designjet Ultra Low End Printer Service Manual
Carriage Assembly (Applicability: 70, 100, 100+, 110+,
120, 120nr)
Removal
Switch off the product and remove the power cable.
1. Remove the Center Cover
⇒
Page 7-7
2. Remove the Right End Cover
⇒
Page 7-9
.
3. Remove the Left End Cover
⇒
Page 7-11
.
4.
Remove the Electronics Module
⇒
Page 7-18.
5.
Remove the Power Supply Unit
⇒
Page 7-22.
6. Remove the Service Station
⇒
Page 7-24.
7. Remove the Ink Supply Tubes
⇒
Page 7-32.
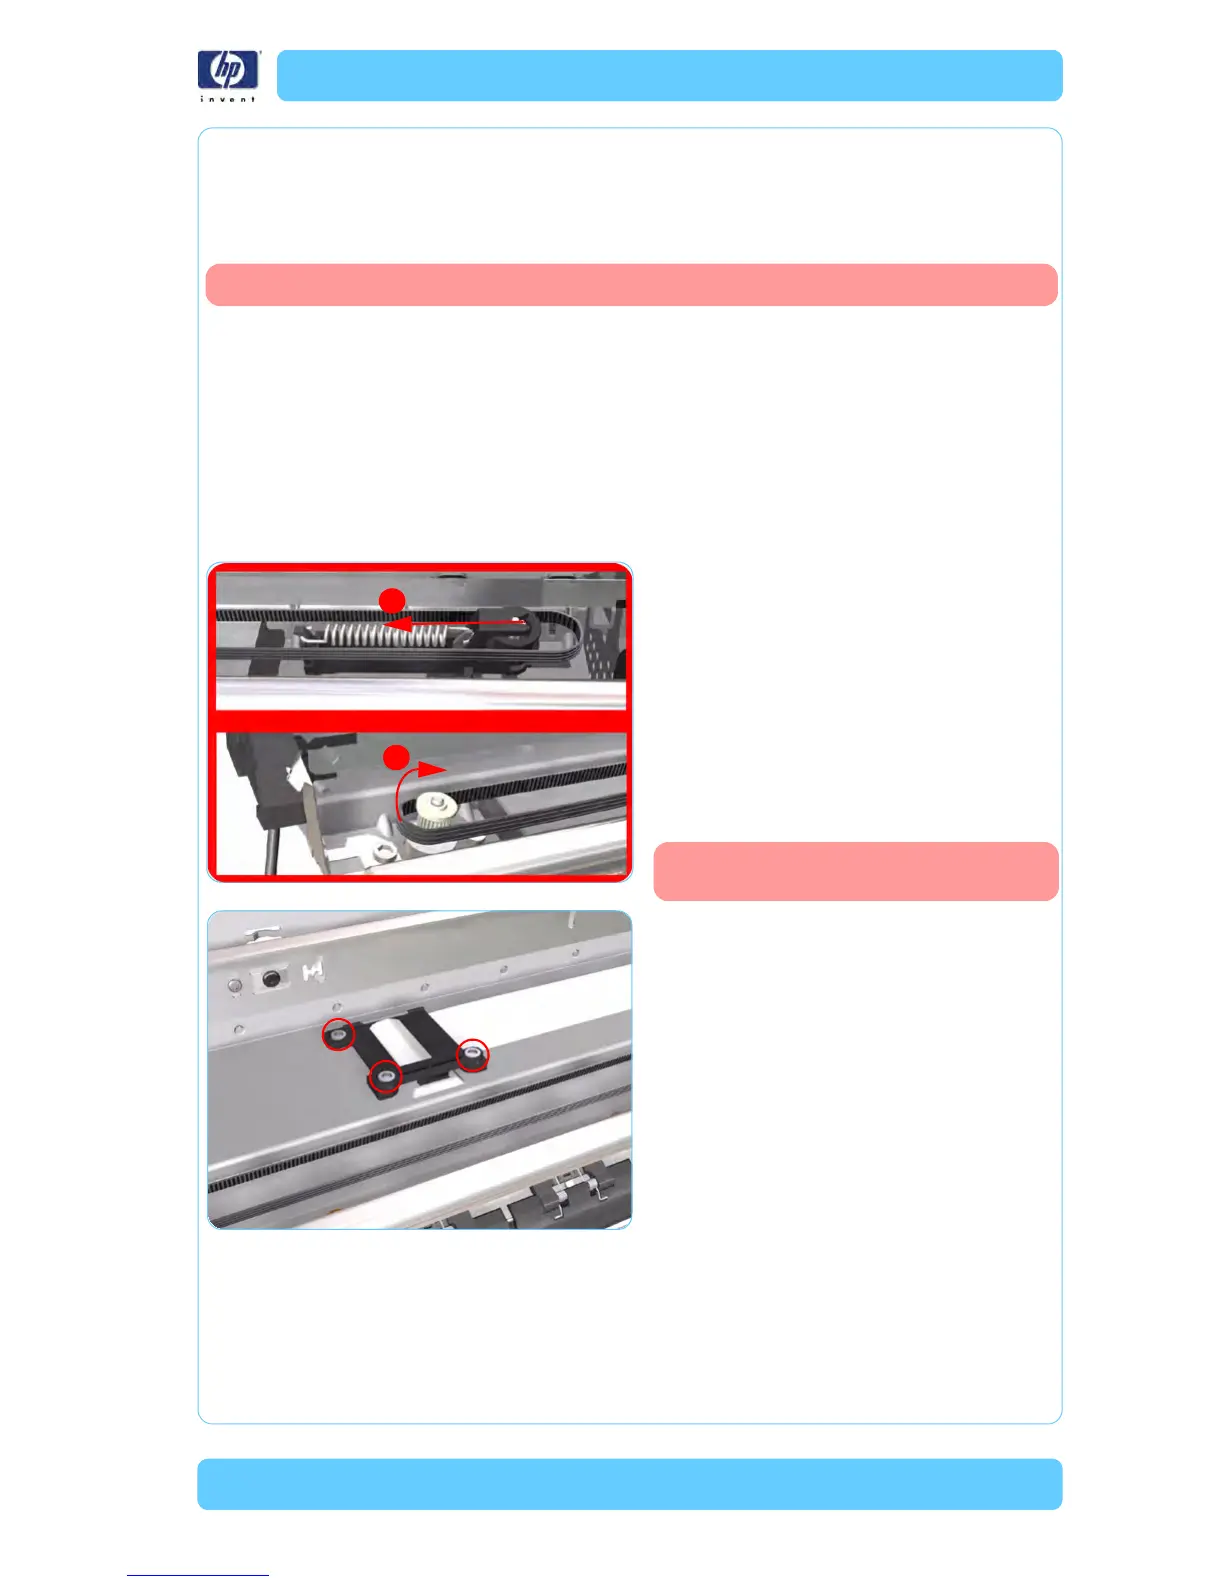
8. Release the Belt from the Carriage Motor
by pushing in the Turnaround Assembly
(right hand side of the printer) and at the
same time releasing the Belt from the
Motor on the left hand side of the printer.
The following step is only
applicable to 120, 120nr
9. Remove 3 T-10 screws that secure the
Trailing Cable Clip to the Chassis.
1
2
 Loading...