Notes on Installation
1. Please measure the front windshield viewing area, make sure not to
block driver's front view, install the camcorder below the rearview
mirror (the central, higher right position of the front windshield). And
we recommend that the sky and the land occupied by the screen 50%.
2. Make sure that the lens is within the wiping range of the windscreen
wiper to ensure a clear view even when it rains.
3. Do not touch the lens with your fingers. Finger grease may be left on
the lens and will result in unclear videos or pictures. Clean the lens on
a regular basis.
4. Do not install the camcorder on a tinted window. Doing so may
damage the tint film.
5. Make sure that the installation position is not hindered by the tinted
window.
6. This product is suitable for light windshield or light color heat-
resistant film windows , it will affect video quality if install it on the
dark windows or dark heat-resistant film windows.
7. Use the products of the attached power charger only, please do not
use other brand power charger, in order to avoid equipment burn or
cause the battery explosion.
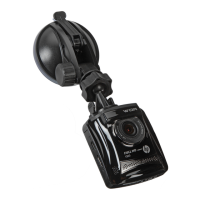
8. We have provided 2 mounting brackets with this HP Car Camcorder. The
suction cup bracket is designed for temporary mounting and will require
periodic re-installation. The adhesive bracket is designed for one time and long
term installation. We recommend using the adhesive bracket if permanent
installation is desired. Please install the bracket on the best open-field view. Do
NOT install the bracket in a location that may obstruct your field of view and
impact driving safety. HP or our authorized HP partners are
NOT liable for any damages or data loss due to improper bracket mounting
or suction cup bracket losing seal and dropping.
5