Q1342-90910 External assemblies 31
LED status panel
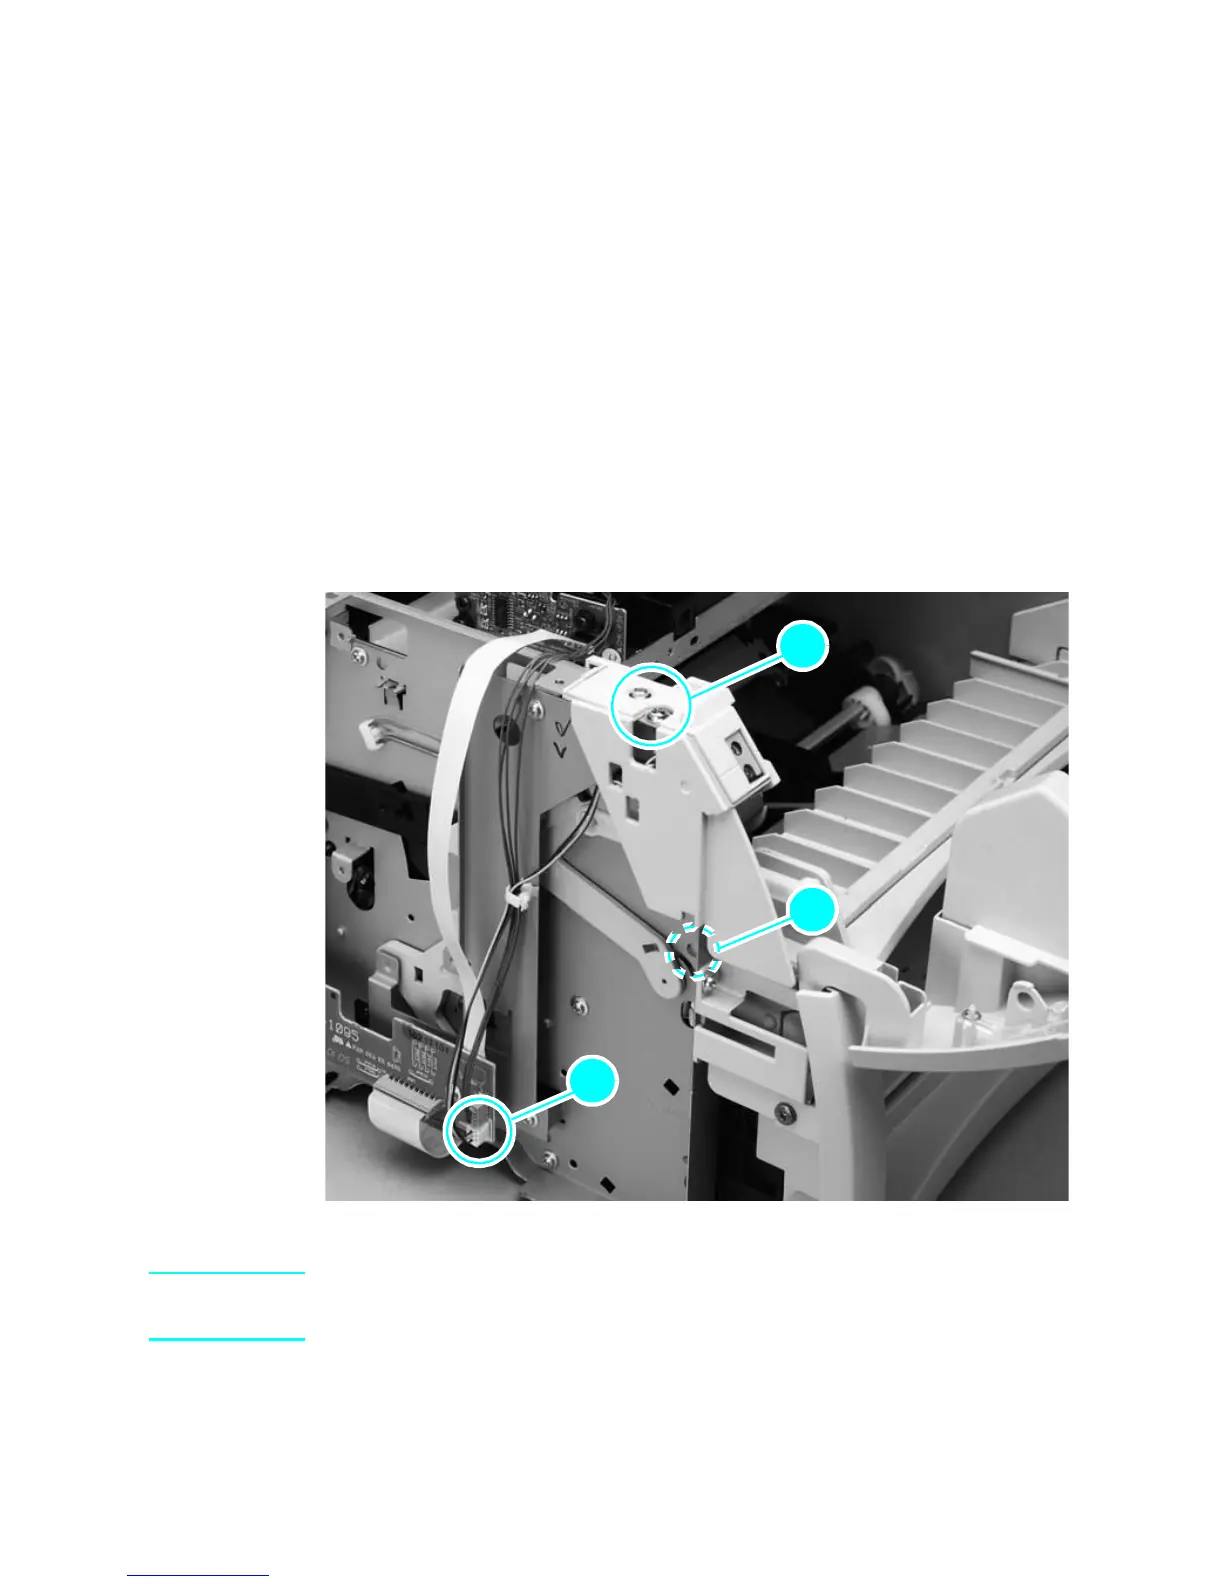
1 Remove the following assemblies:
z Toner cartridge, media tray, and cable pod. See “Toner cartridge”
on page 15 through “Cable pod” on page 17.
z Left side, back, right side, and top covers. See “Left side cover”
on page 18 through “Top cover” on page 29.
2 Open the toner cartridge door.
3 Disconnect the status panel cable (callout 1) from the connector
assembly. Unlace the harness from the harness clip.
4 Remove two screws (callout 2) from the top of the control panel
assembly.
5 Lift and remove the panel assembly.
Figure 20. Remove the LED status panel
Hint When replacing the LED status panel assembly, verify that the locator
tab (callout 3) is correctly positioned in the provided hole.
3
2
11
3
2
 Loading...