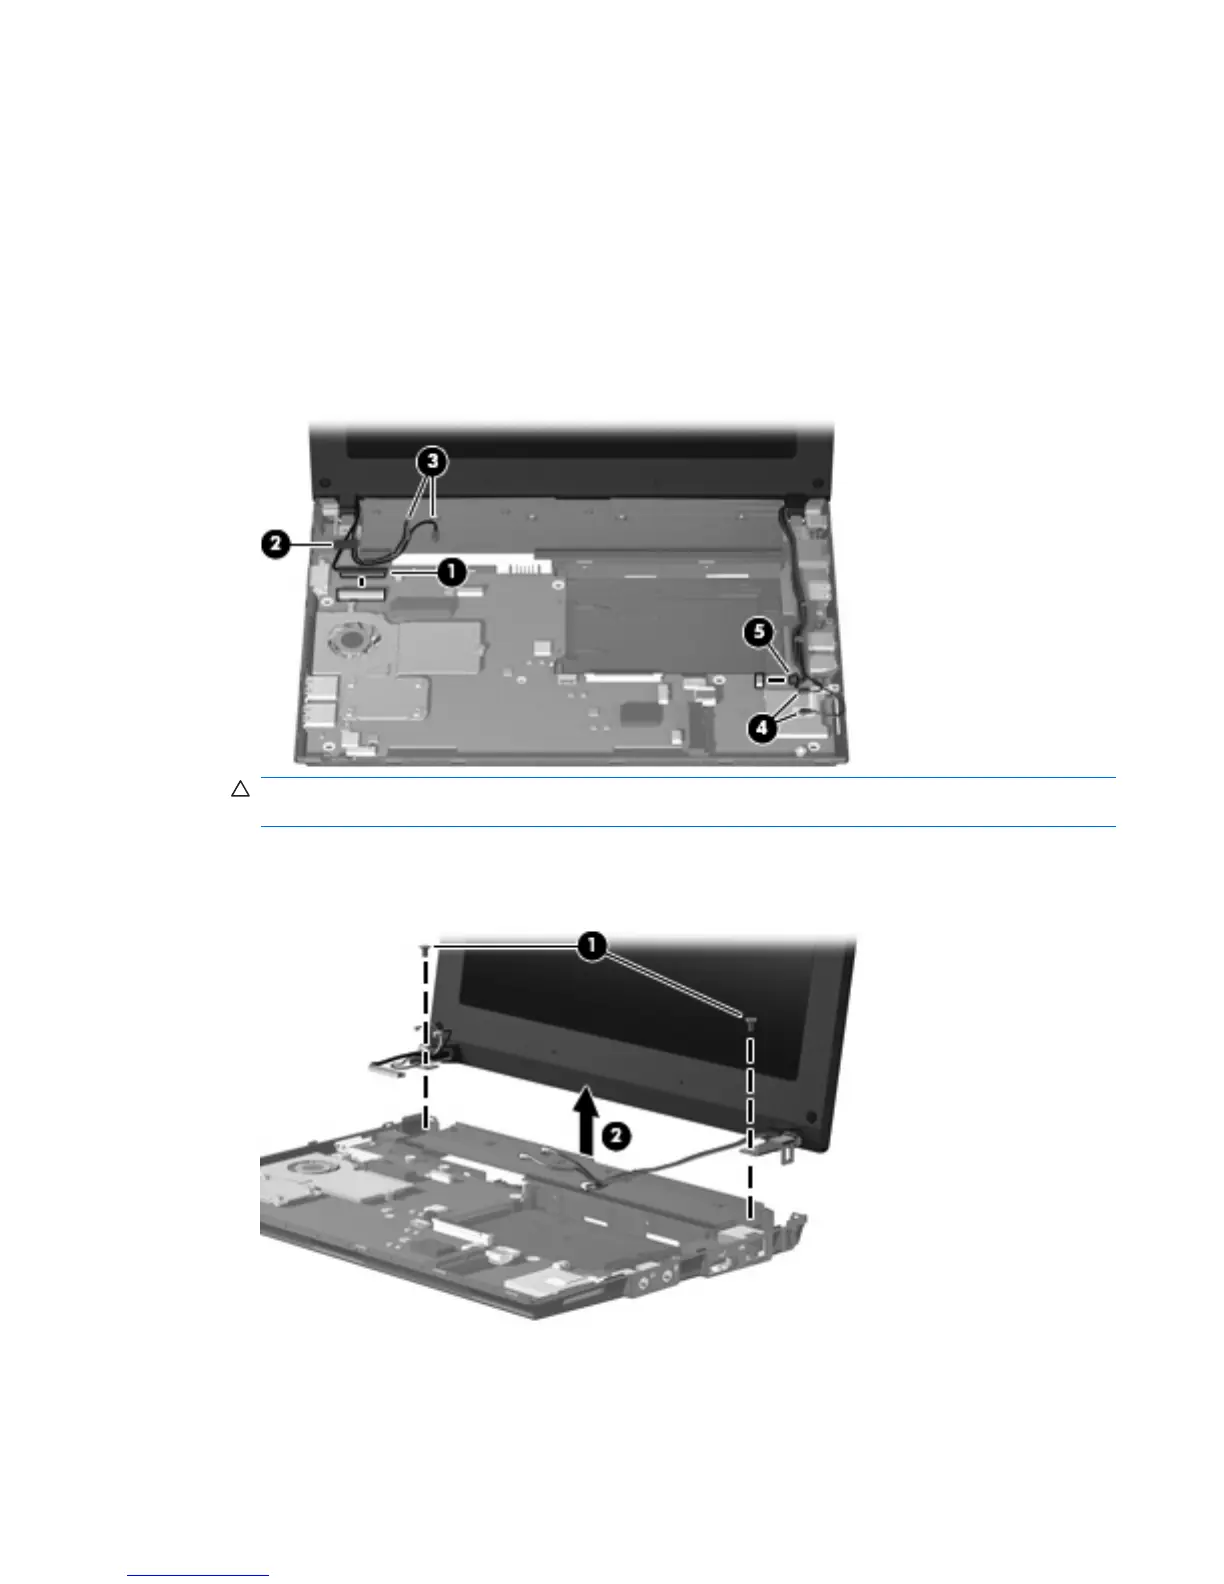
Remove the display assembly:
1. Disconnect the following cables and grounding tape from the system board:
(1) Display panel cable
(2) Display panel cable grounding tape
(3) WLAN cables
(4) WWAN cables (select models only)
(5) Microphone cable
CAUTION: Support the display assembly when removing the following screws. Failure to support
the display assembly can result in damage to the display assembly and other device components.
2. Remove the 2 Phillips PM2.5×6.0 screws (1) that secure the display assembly to the device.
3. Remove the display assembly (2).
4. If it is necessary to replace the display bezel, perform the following steps:
a. Flex the inside edges of the left and right sides (1), and then the top and bottom (2) of the
display bezel until the bezel disengages from the display enclosure.
Component replacement procedures 53
 Loading...