BottomofChassis
FrontofChassis
ConnectMonitor,Keyboard,andMouse
9
ReplacetheCover
1.Positionthecoolingduct/cover:
2.ReplacetheNetServercover:
Returntheduct/coverto
theshutposition,andsnapintoplace.
Placeonehandoneithersideofthecoverandpressinward
lightlytoassistinaligningtheinsideflangeofthecoverwiththe
bottomedgeofthechassis.SeeFigureA.
Slideforward.SeeFigureB.
!
!
3.Replacethescrews:
Replacethesixscrewsinthecover.
8
1.Connectcables:
2.Securecord:
3.ConnectUPS:
Connectthemonitor,keyboard,andmousetothe
HPNetServerandpluginthepowercordstotheNetServerandtothemonitor.
Secureserverpowercordwiththepowercordstrainrelief.
IfyouhaveanUninterruptiblePowerSupply(UPS),installit
andturniton.RefertotheuserguideincludedwiththeUPSforinstructions.
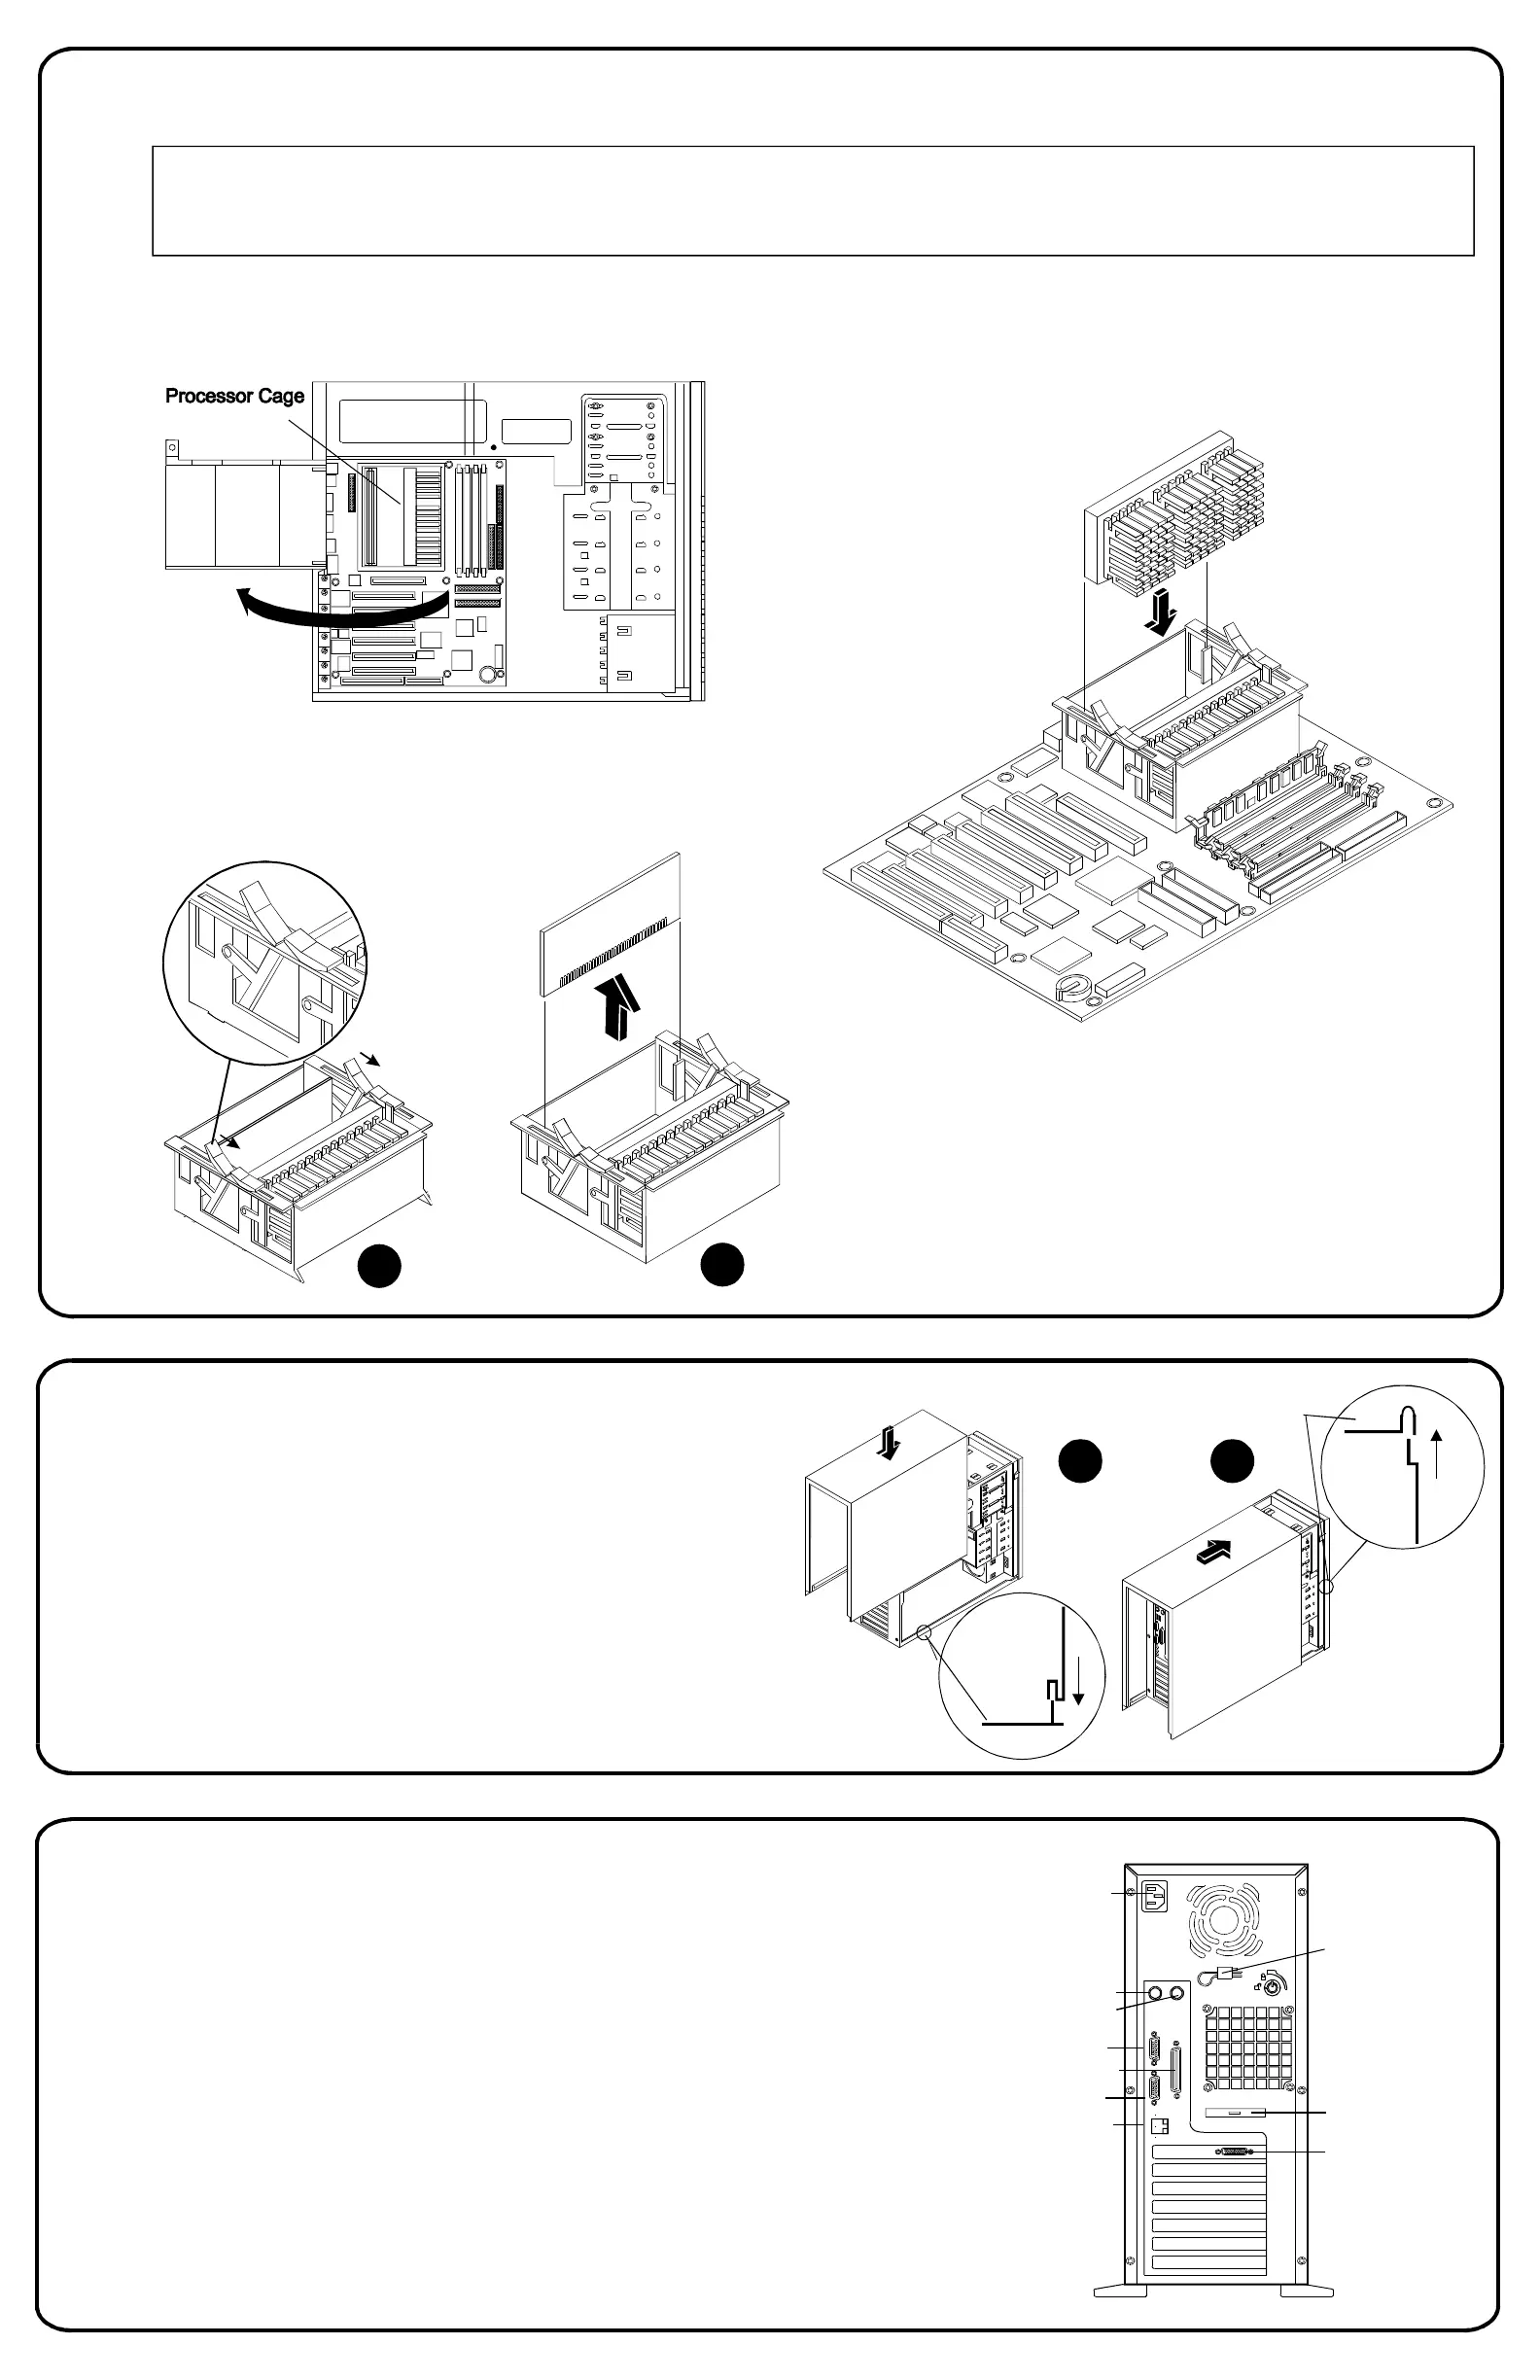
InstallaSecondProcessor
7
1.Removethecover:
Removethecoverandpreparethe
NetServerasdescribedinPart3,andlocatetheprocessorcage.
ProcessorInstallationRules
TheHPNetServerE60supportseitherIntelPentiumIIorPentiumIIIprocessors.DonotmixPentiumIIandPentiumIIIprocessorsinthe
system.Donotmixprocessorswithdifferentclockspeeds(forexample,400and450MHz)inthesystem.Notethatcompatibleprocessors
maynotbeidenticalinappearance.
3.Inserttheprocessor:
Alignthesecondprocessorovertheempty
slotwiththeheatsinkorientedthesameasthefirstprocessor,andpress
theprocessorintothesocket.Thesecuringclipswillonlylaydownflat
againstthetopoftheprocessorwhentheprocessorisfullyseated.
ExternalSCSI
Knock-out
Video
SVGA
Power
Keyboard
Mouse
SerialA
ParallelPort
SerialB
LANRJ45
4.Replacethecover: Ifyouarenotinstallingaccessoryboards,
memory,ormassstoragedevices,replacetheNetServercoveras
describedinPart8:"ReplacetheCover."
2.Removetheterminator: Rotatetheclipsopen.SeeFigureA.
Holdtheterminatorresistormodulebyitsedges,andpullitout.
A
B
BA
PowerCord
StrainRelief