2-EXT
1-LINE
1
4
5
1-LINE
2-EXT
1
8
5
10
1-LINE
1
2 3
9
2-EXT
1-LINE
6
5
7
1-LINE
1
1
3
2
4
Fax
Set up fax
1. For users in Europe
If your country or region is listed below, visit www.hp.com/uk/faxcong for setup information. Otherwise,
follow the instructions in this guide.
• Austria
• Belgium
• Denmark
• Finland
• France
• Germany
• Ireland
• Italy
• Norway
• Netherlands
• Portugal
• Spain
• Sweden
• Switzerland
• United Kingdom
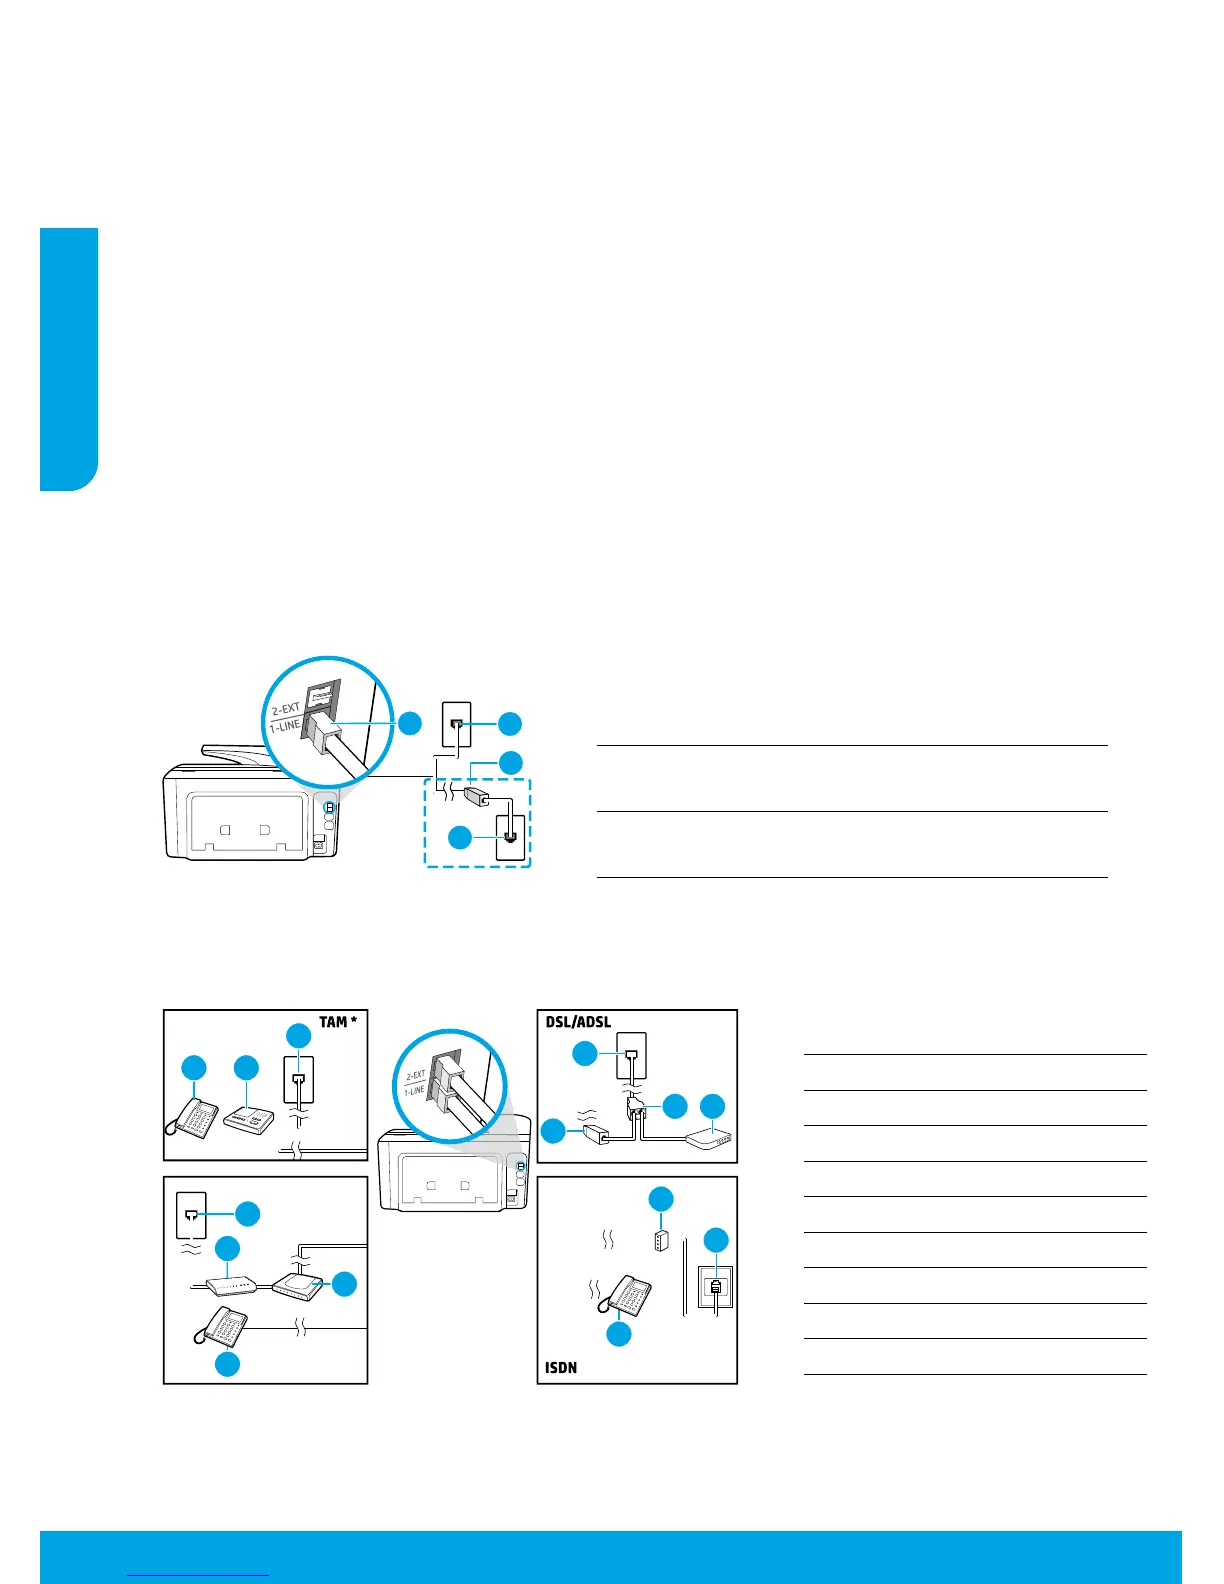
2. Connect the phone line
Using the phone line for fax only
If a phone cord is provided with the printer, HP recommends that you use this phone cord. If the phone cord is
not long enough, use a coupler and another phone cord to extend.
a. Connect one end of the phone cord to the phone wall jack.
b. Connect the other end to the port labeled 1-LINE on the back of the printer.
Note: DO NOT insert the phone cord into the port labeled 2-EXT.
c. If you have subscribed to a DSL/ADSL service, connect a DSL/ADSL lter between the printer port labeled
1-LINE and the phone wall jack
* TAM: Telephone Answering Machine
** Fax on VoIP: Fax on Voice over Internet Protocol
Fax on VoIP**
3. Connect additional devices
If you have other devices to connect, connect them as shown in the diagram below:
1
Phone wall jack
2
Fax port (labeled 1-LINE) on the back of the printer
Note: Do not insert into the port labeled 2-EXT.
3
DSL/ADSL lter (provided by the telephone company
or service provider)
1 Phone wall jack
2 Parallel splitter
3 DSL/ADSL modem
4 Telephone answering machine
5 Telephone
6 ISDN wall jack
7 Terminal adapter or ISDN router
8 Broadband modem
9 DSL/ADSL lter
10 Analog telephone adaptor
English
 Loading...