Control panel features
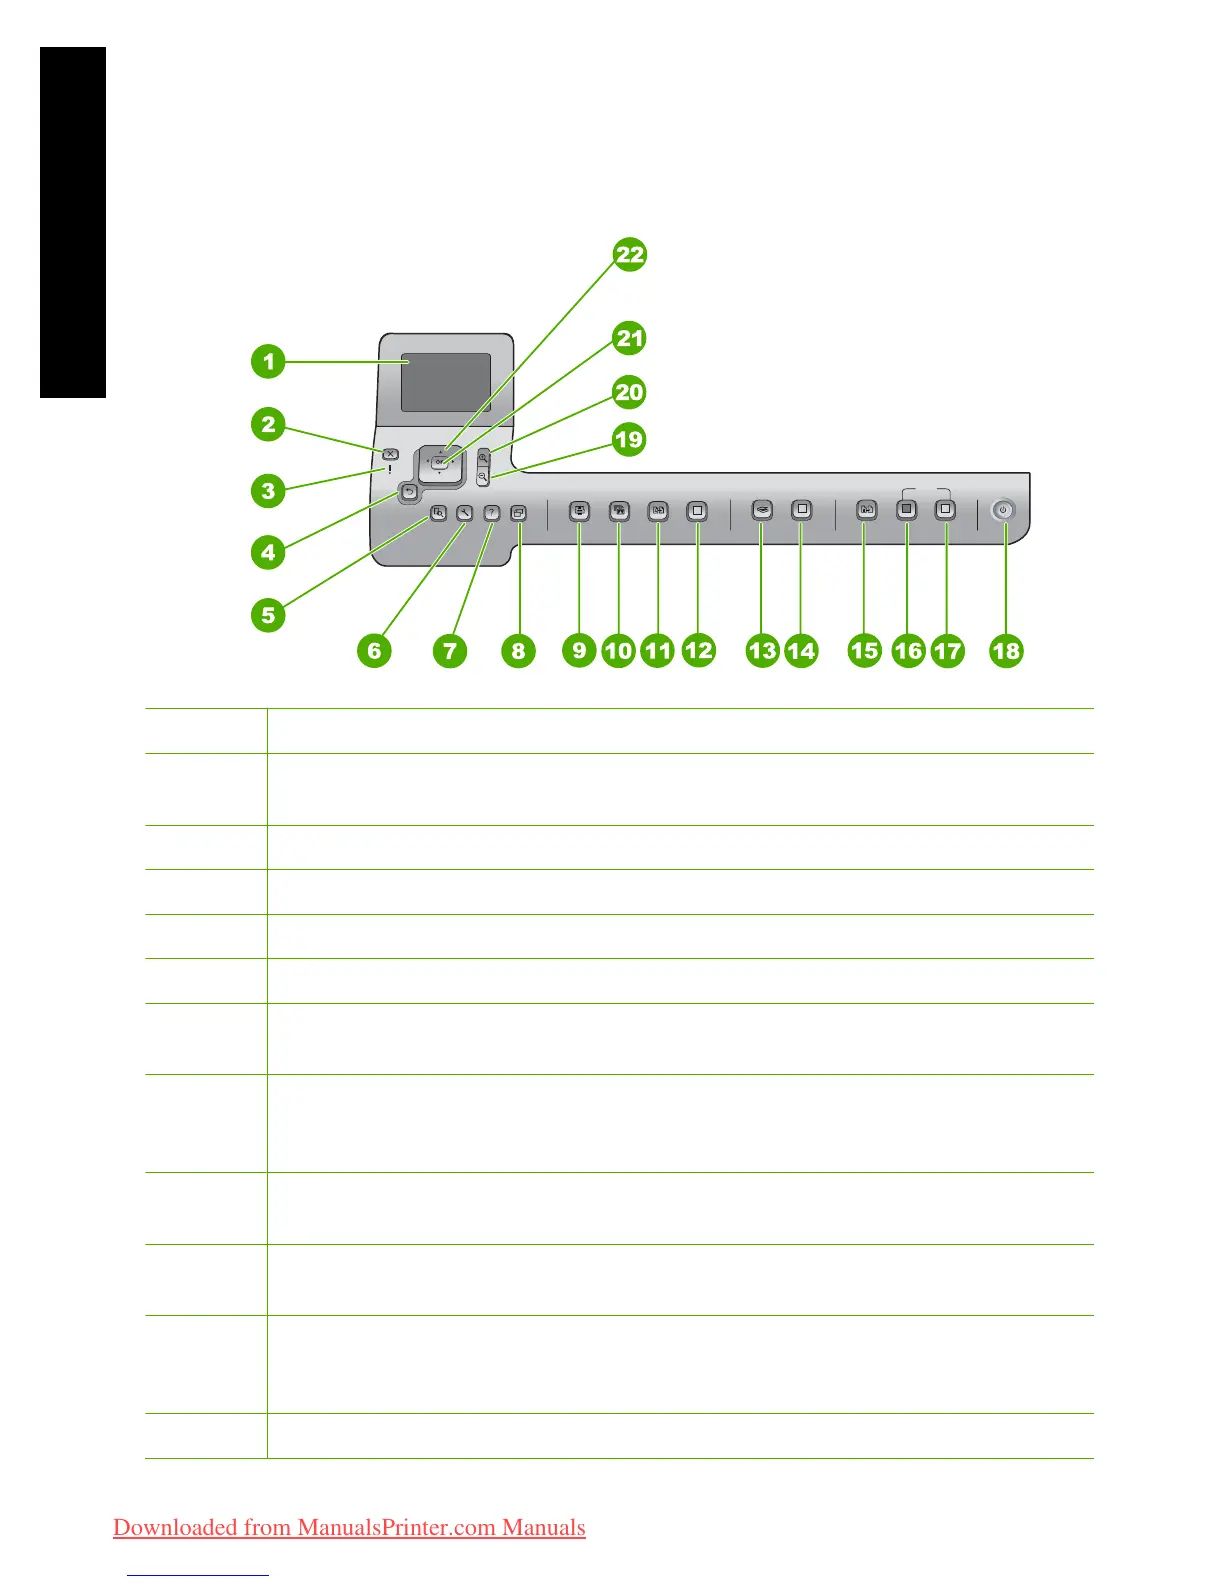
The following diagram and related table provide a quick reference to the HP All-in-One
control panel features.
Label Name and Description
1 Color graphics display (also referred to as the display): Shows menus, photos, and
messages. The display can be pulled up and angled for better viewing.
2 Cancel: Stops the current operation and returns to the main screen.
3 Attention light: Indicates a problem occurred. See the display for more information.
4 Back button: Returns to the previous screen on the display.
5 Preview: Displays a preview of a copy or photo job.
6 Setup: Presents the Setup Menu for generating reports, changing fax and network
settings, and accessing tools and preferences.
7 Help: Opens the Help Menu on the display where you can select a topic to learn
more about it. Depending on the topic you select, the topic will appear on your display
or on your computer screen.
8 Rotate: Rotates the currently displayed photo 90 degrees clockwise. Subsequent
presses continue to rotate the photo 90 degrees.
9 Photosmart Express: Launches the Photosmart Express menu for printing,
saving, editing, and sharing photos.
10 Photo Fix: Automatically adjusts a photo for viewing or printing when turned on.
Features include color effects, photo brightness, frames, and red-eye removal.
Press Photo Fix to turn the feature off and on. By default, this feature is turned on.
11 Reprints: Scans a photo and prints it.
Chapter 1
4 HP Photosmart C5100 All-in-One series
HP All-in-One overview
Downloaded from ManualsPrinter.com Manuals
 Loading...