To register your product visit the HP Registration web site at:
http://www.register.hp.com
Register your storage server
7. Tighten the thumbscrews to secure the server to the rack.
3 Power cord and cables
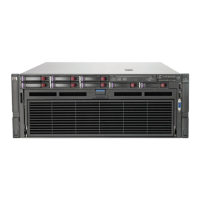
The ProLiant DL580 server can operate either on a 120-V or a 240-
VAC input. Two AC inlets are on the rear of the server, one for each
power supply installed.
WARNING: To reduce the risk of electric shock or damage to
the equipment:
•Do not disable the power cord-grounding
plug. The grounding plug is an important
safety feature.
•Plug the power cord into a grounded (earthed)
electrical outlet that is easily accessible at
all times.
•Disconnect power from the server by unplugging
the power cord from either the electrical outlet
or the server.
To connect the power cord:
1. Locate the correct voltage line cord that came with the
server. Remove any labels that cover the cord connector.
IMPORTANT: To connect the power cord, plug it into the appropriate power
supply AC inlet. The power connector is connector number one for the
primary (populated) power supply and is connector number two for the
redundant hot-plug power supply.
2. Plug the other end of the power cord into a grounded electrical
outlet or UPS, depending on power cord type.
3. Connect the peripheral device cables to the server, and then
route the power cord and device cables through the cable
management arm.
Attaching cable management arm to a
square-hole rack
1. Slide the bracket onto the rack (1).
2. Insert the bracket hooks into the square holes on the rack, and
then push down to secure (2).
3. Tighten the thumbscrew to stabilize the cable management arm
on the rack (3).
Attaching the cable management arm to a
round-hole rack
1. Remove the square-hole bracket from the cable management
arm by pulling out the spring-activated fasteners (1), and then
pulling out the bracket (2).
Attaching the cable management arm to the server
1. Loosen the thumbscrews on the front of the server to enable the
server to slide forward.
3. Secure the cables to the inside of the cable management arm
using the Velcro straps.
2. Align the keyholes on the cable management arm with the posts
on the server (1), and then secure with the thumbscrew (2).
Securing the cables to the cable
management arm
1. Align the pivot points of the cable management arm by sliding
the server as needed.
2. Pivot the arm away from the server.
4. Close the cable management arm and finish securing the cables.
The hardware installation is now complete. Please refer to the
“HP ProLiant Storage Server Installation Guide” located on the
Documentation CD for configuration and setup instructions.
Product documentation
4 Cable management arm
2. Attach the round-hole bracket by pulling the spring-activated
fasteners on the cable management arm out (1), and then
inserting the bracket between them (2).
3. Slide the bracket onto the rack (1).
4. Attach the cable management arm to the round-hole rack, and
then secure the thumbscrews (2).
Installation Instructions
Rack template
tool used during rack installation
contains:
Administration guide
Installation guide
HP Warranty fulfillment
document
provides instructions to obtain a printed
warranty
HP Important Safety
Information booklet
Safety information for HP storage, power,
networking and rack products
Documentation CD
requirements and configuration optionsInstallation Guide
rack installation poster
Administration Guide
provides administrative and procedural
instructions to manage the storage
server

 Loading...