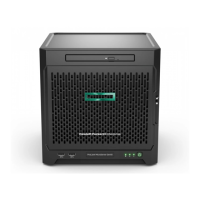
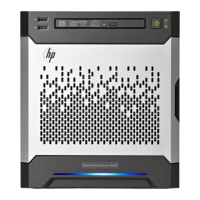
HP ProLiant MicroServer Gen8
Setup Poster
Part Number: 718897-001
June 2013
Edition: 1
© Copyright 2013 Hewlett-Packard Development Company, L.P.
The information contained herein is subject to change without notice. The only warranties
for HP products and services are set forth in the express warranty statements accompanying
such products and services. Nothing herein should be construed as constituting an additional
warranty. HP shall not be liable for technical or editorial errors or omissions contained herein.
Microsoft® and Windows® are U.S. registered trademarks of Microsoft Corporation.
*718897-001*
718897-001
Important Safety Information
Translated versions
To view, select a language:
• English
(http://www.hp.com/support/ProLiantMicroServerGen8_Poster_en)
• Français
(http://www.hp.com/support/ProLiantMicroServerGen8_Poster_fr)
• Italiano
(http://www.hp.com/support/ProLiantMicroServerGen8_Poster_it)
• Español
(http://www.hp.com/support/ProLiantMicroServerGen8_Poster_sp)
• Deutsch
(http://www.hp.com/support/ProLiantMicroServerGen8_Poster_gr)
• Português Brasileiro
(http://www.hp.com/support/ProLiantMicroServerGen8_Poster_bp)
• Русский
(http://www.hp.com/support/ProLiantMicroServerGen8_Poster_ru)
•
(http://www.hp.com/support/ProLiantMicroServerGen8_Poster_jp)
•
(http://www.hp.com/support/ProLiantMicroServerGen8_Poster_ko)
•
(http://www.hp.com/support/ProLiantMicroServerGen8_Poster_sc)
•
(http://www.hp.com/support/ProLiantMicroServerGen8_Poster_tc)
Server features
Thank you very much for purchasing a MicroServer product from our
industry-leading ProLiant server line. As the world’s leading technology
innovator, we truly appreciate your business and condence in HP.
The HP ProLiant MicroServer is a general purpose server that can provide
a platform to organize and safeguard your business information, allow
effective communication with customers and make the most of your existing
ofce equipment and resources. The HP MicroServer is a cost effective
starter server for businesses with 1-25 clients and it can take your business
to the next level of productivity and efciency.
Site requirements
Select an installation site that meets the detailed installation site
requirements described in the server user guide on the Documentation CD
and on the HP ProLiant Gen8 Server Management Information Library
(http://www.hp.com/go/proliantgen8/docs).
Identify the server box contents
Unpack the server shipping carton and locate the materials and
documentation necessary for installing the server.
The contents of the server shipping carton include:
• Server
• Power cord
• Printed setup documentation, Documentation CD, and software products
1 Install hardware options
Install any hardware options before initializing the server. For options
installation information, see the documentation that ships with the
option. For server-specic information, see the server user guide on the
Documentation CD and on the HP ProLiant Gen8 Server Management
Information Library website (http://www.hp.com/go/proliantgen8/docs).
2 Connect peripheral devices
The I/O connectors are color coded and are marked with icons.
The server has six USB connectors: four USB 2.0 connectors (two each
on the front and rear panels) and two rear USB 3.0 connectors. Note
the following when connecting USB devices:
• During the initial server setup or when conguring BIOS settings, only
the USB 2.0
connectors are enabled; the USB 3.0 connectors
are nonfunctional during these operations.
• Connect the USB keyboard and mouse to the USB 2.0 connectors.
3 Connect the Ethernet cable
The server supports the following Ethernet connectors located on the
rear panel:
• NIC 1/shared iLO connector
• NIC 2 connector
• Dedicated iLO connector
To connect an Ethernet cable:
1. Connect one end of the Ethernet cable to the NIC 1 connector.
2. Connect the other end of the Ethernet cable to a network jack.
4 Connect the power cord
WARNING: To reduce the risk of electric shock or damage to the
equipment:
• Do not disable the power cord grounding plug. The grounding
plug is an important safety feature.
• Plug the power cord into a grounded (earthed) electrical outlet
that is easily accessible at all times.
• Unplug the power cord from the power supply to disconnect
power to the equipment.
• Do not route the power cord where it can be walked on or
pinched by items placed against it. Pay particular attention to
the plug, electrical outlet, and the point where the cord extends
from the storage system.
1. Connect the power cord to the server.
2. Open the power cord retaining clip, and then thread the power cord
through the strain relief clip.
3. To secure the power cord, snap the clip into place.
4. Connect the power cord to the AC power source.
5 Power on and select boot options
1. Press the Power On/Standby button.
2. Check the server Power LED status . The LED ashes green to indicate
that the AC power connection is established.
3. During the initial server boot (POST), do one of the following:
o For advanced users, to modify the server conguration ROM default
settings, press F9 when prompted to enter the RBSU. By default, the
RBSU runs in the English language.
o To retain the HP recommended default server conguration and
install the operating system, press F10 to initiate Intelligent
Provisioning. Proceed to the next section.
For more information on automatic server conguration, see the HP ROM-
Based Setup Utility User Guide on the Documentation CD or the
HP Intelligent Provisioning Information Library
(http://www.hp.com/go/intelligentprovisioning/docs).
6 Perform the initial system setup
HP recommends using Intelligent Provisioning to install the server operating
system. All rmware, drivers, and tools required by the system are installed
during the same process.
Intelligent Provisioning provides installation help for the following operating
systems: Microsoft Windows, Red Hat and SUSE Linux, and VMware.
IMPORTANT: When installing a Windows operating system,
Intelligent Provisioning can assist with installing only the 64-bit
version of the operating system.
IMPORTANT: Installing VMware ESXi or ESX requires a custom HP
image, which includes the drivers for VMware devices not included
in the VMware base image. The image is available on the HP
website (http://www.hp.com/go/esxidownload).
Activate Intelligent Provisioning
Follow the prompts on the Set Preferences screen to activate Intelligent
Provisioning.
If you intend to register for HP Insight Remote Support, you should already
have congured an IRS host server. For more information, see the HP Insight
Remote Support and Insight Online Setup Guide for ProLiant Gen8 Servers
on the HP website (http://www.hp.com/go/insightremotesupport/docs).
Congurethedrive
If you intend to use an HP Smart Array controller card option, record the
model name for this procedure.
1. On the Intelligent Provisioning main screen, click Perform Maintenance.
2. On the Configuration tab of the ArrayConfigurationUtility screen,
select the Smart Array controller in the server from the drop-down list.
3. Click Create Array.
4. Select the check box next to the drives to include in the RAID logical
drive, and then click OK.
5. The new drive array is listed on the left side of the screen. Select the
drive array, and then click Create Logical Drive.
6. The system determines the optimum RAID conguration settings based
on the number of drives selected. To retain these settings, click Save.
For advanced users, to modify these default settings, see the
Conguring Arrays on HP Smart Array Controllers Reference Guide on
the HP website (http://www.hp.com/support/CASAC_RG_en).
7. Click ExitACU.
8. Click PREVIOUS .
Installtheoperatingsystem
1. If you are installing the OS from a disc or an external USB drive, do
one of the following:
o Load the OS image disc to the server optical drive. If an optical
drive is not installed, connect a USB optical drive to the server USB
2.0 connector.
o Connect the USB storage drive containing the OS image to the
server USB 2.0 connector.
2. On the Intelligent Provisioning main screen, select ConfigureandInstall.
3. The system detects the default hardware settings. Retain these settings or
customize them according to your requirements.
4. Follow the onscreen prompts to install the OS.