Removal and replacement procedures 30
3.
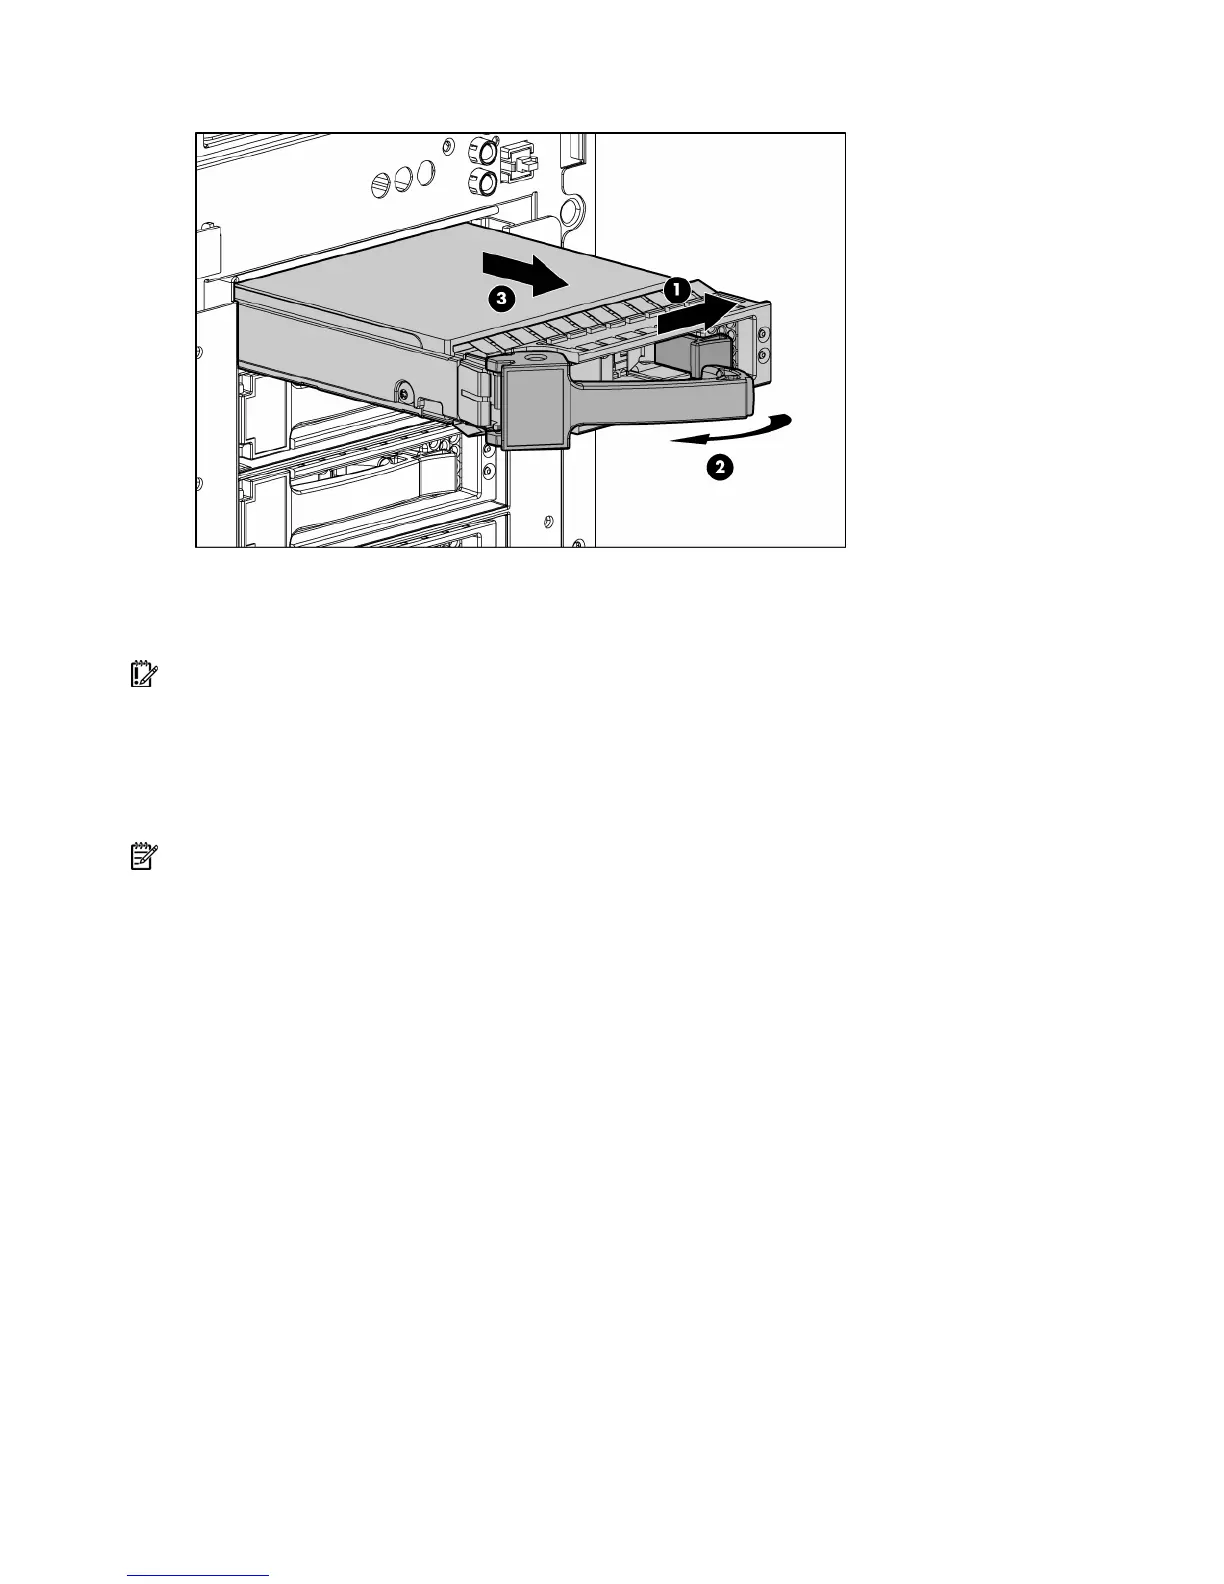
Remove the hard drive.
To replace the component:
1. Slide the drive into the cage until it clicks, locking the drive into place.
2. Close the lever.
IMPORTANT: When the drive is inserted, the drive LEDs flash for 2 seconds to indicate that the drive is
seated properly and receiving power.
3. As the drive begins to spin, be sure that the drive LEDs illuminate one at a time and then turn off
together to indicate that the system has recognized the new drive.
In fault-tolerant configurations, allow the replacement drive to be reconstructed automatically with
data from the other drives. While reconstruction is in progress, the online LED flashes.
NOTE: The SATA RAID feature supports up to two RAID volumes with up to four hard drives per RAID
volume.
Hot-plug SAS and SATA hard drive cage
To remove the component:
1. Power down the server (on page 25).
2. Remove the server from the rack, if necessary ("Remove the server from the rack" on page 25).
3. Remove the bezel ("Unlock the tower bezel" on page 26).
4. Remove the access panel ("Access panel" on page 26).
5. Remove all hot-plug hard drives ("Hot-plug SAS and SATA hard drives" on page 29).
6. Remove the hard drive cage fan and baffle ("Hard drive cage fan and baffle" on page 28).
7. Disconnect the power and data cables.
 Loading...