Removal and replacement procedures 33
NOTE: Depending on model purchased, the server may look slightly different than shown.
To replace the component, reverse the removal procedure.
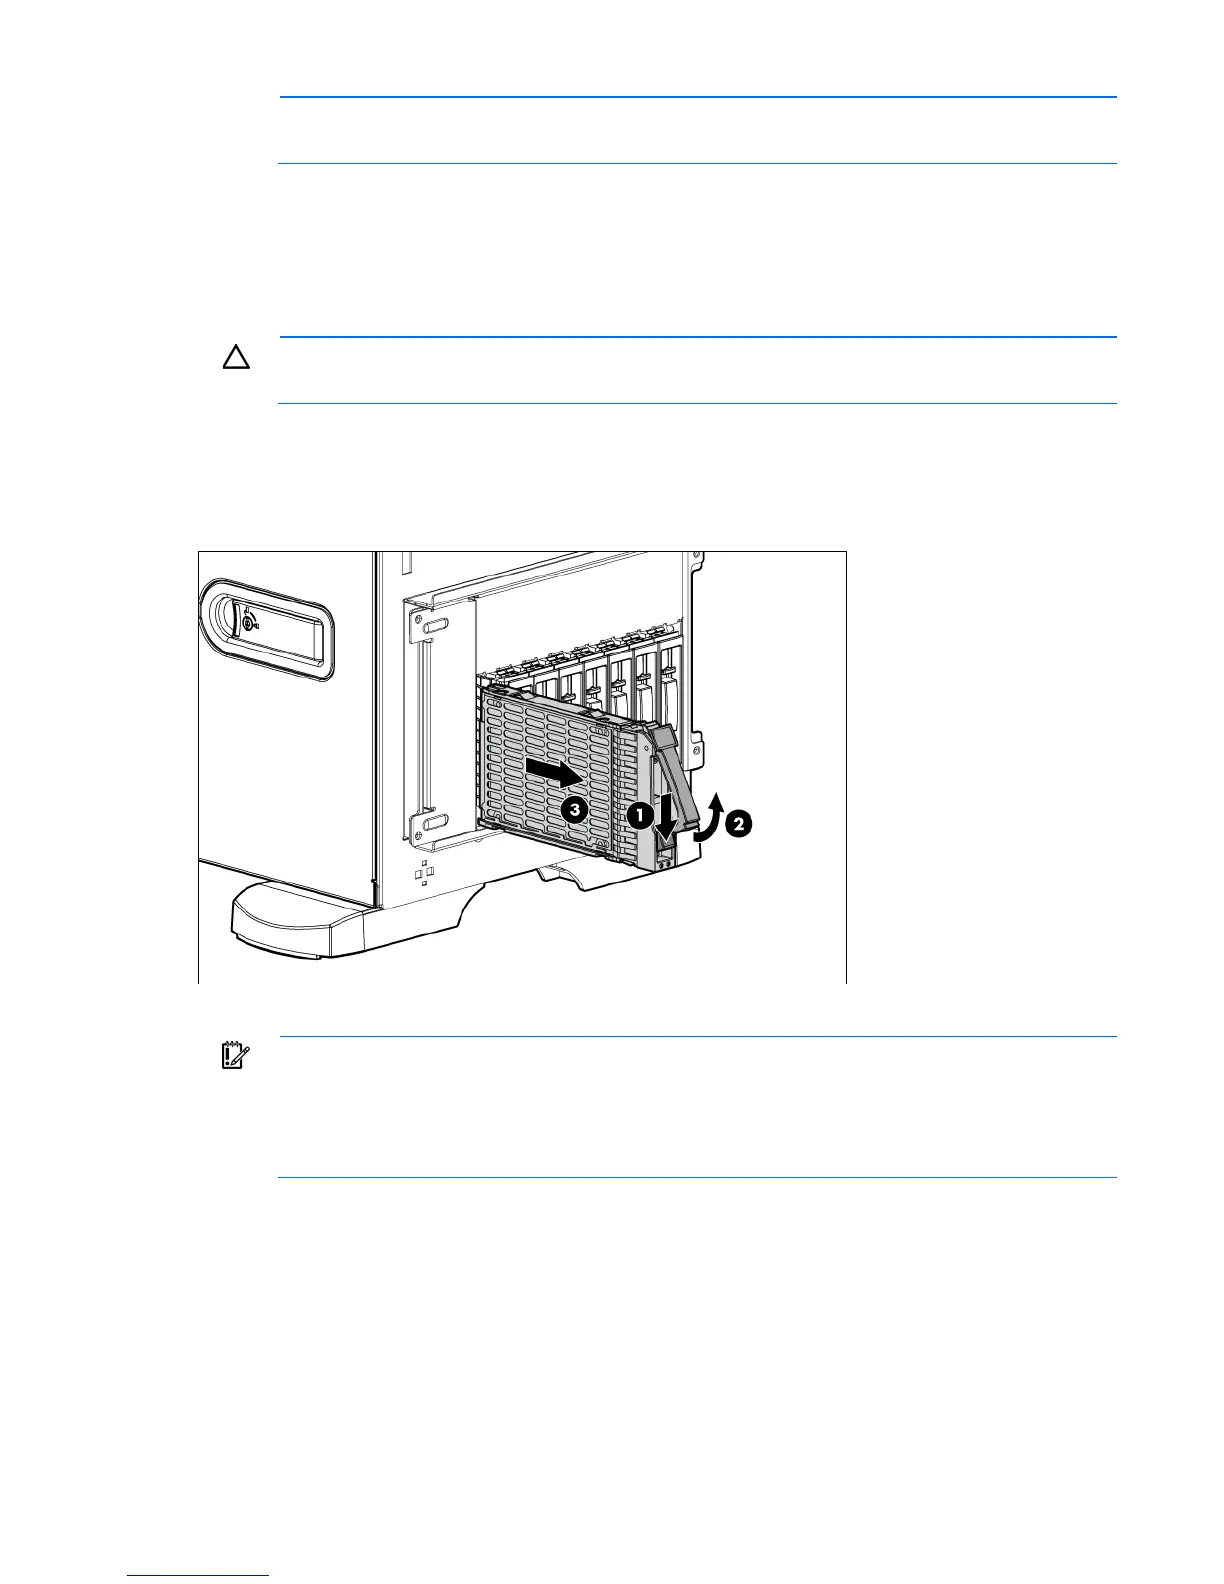
Hot-plug SATA and SAS hard drives
To remove the component:
CAUTION: To prevent improper cooling and thermal damage, do not operate the server unless
all bays are populated with either a component or a blank.
1. Determine the status of the hard drive from the hot-plug hard drive LEDs ("SAS and SATA hard drive
LEDs" on page 78).
2. Back up all server data on the hard drive.
3. Remove the hard drive.
To replace the component, reverse the removal procedure.
IMPORTANT: When installing a x3/x1 SAS cable in a SFF system, HP recommends that the x3
part of the x3/x1 cable be linked to the SAS hard drive backplane connector that corresponds to
hard drive slots 1 to 4. In this setup, hard drive slot 1 will not be available, but since hard drive
slots 2 to 4 will be connected, one continuous volume can be created. All drive slots will be
available in LFF systems.
Hard drive cage
To remove the component:
1. Power down the server.
2. Do one of the following:
o Unlock and remove the bezel ("Front bezel" on page 27).
 Loading...