To get best quality, follow
the steps using this sheet.
Para obtener la mejor calidad,
siga los pasos de esta hoja.
Pour obtenir de meilleurs resultats, suivez
la procedure indiquee sur cette feuille.
Per ottenere una qualita ottimale, attenersi
alle istruzioni fornite in questo documento.
Sie die hier auf
Macintosh Users START HERE
Macintosh
®
OS 9, OS X
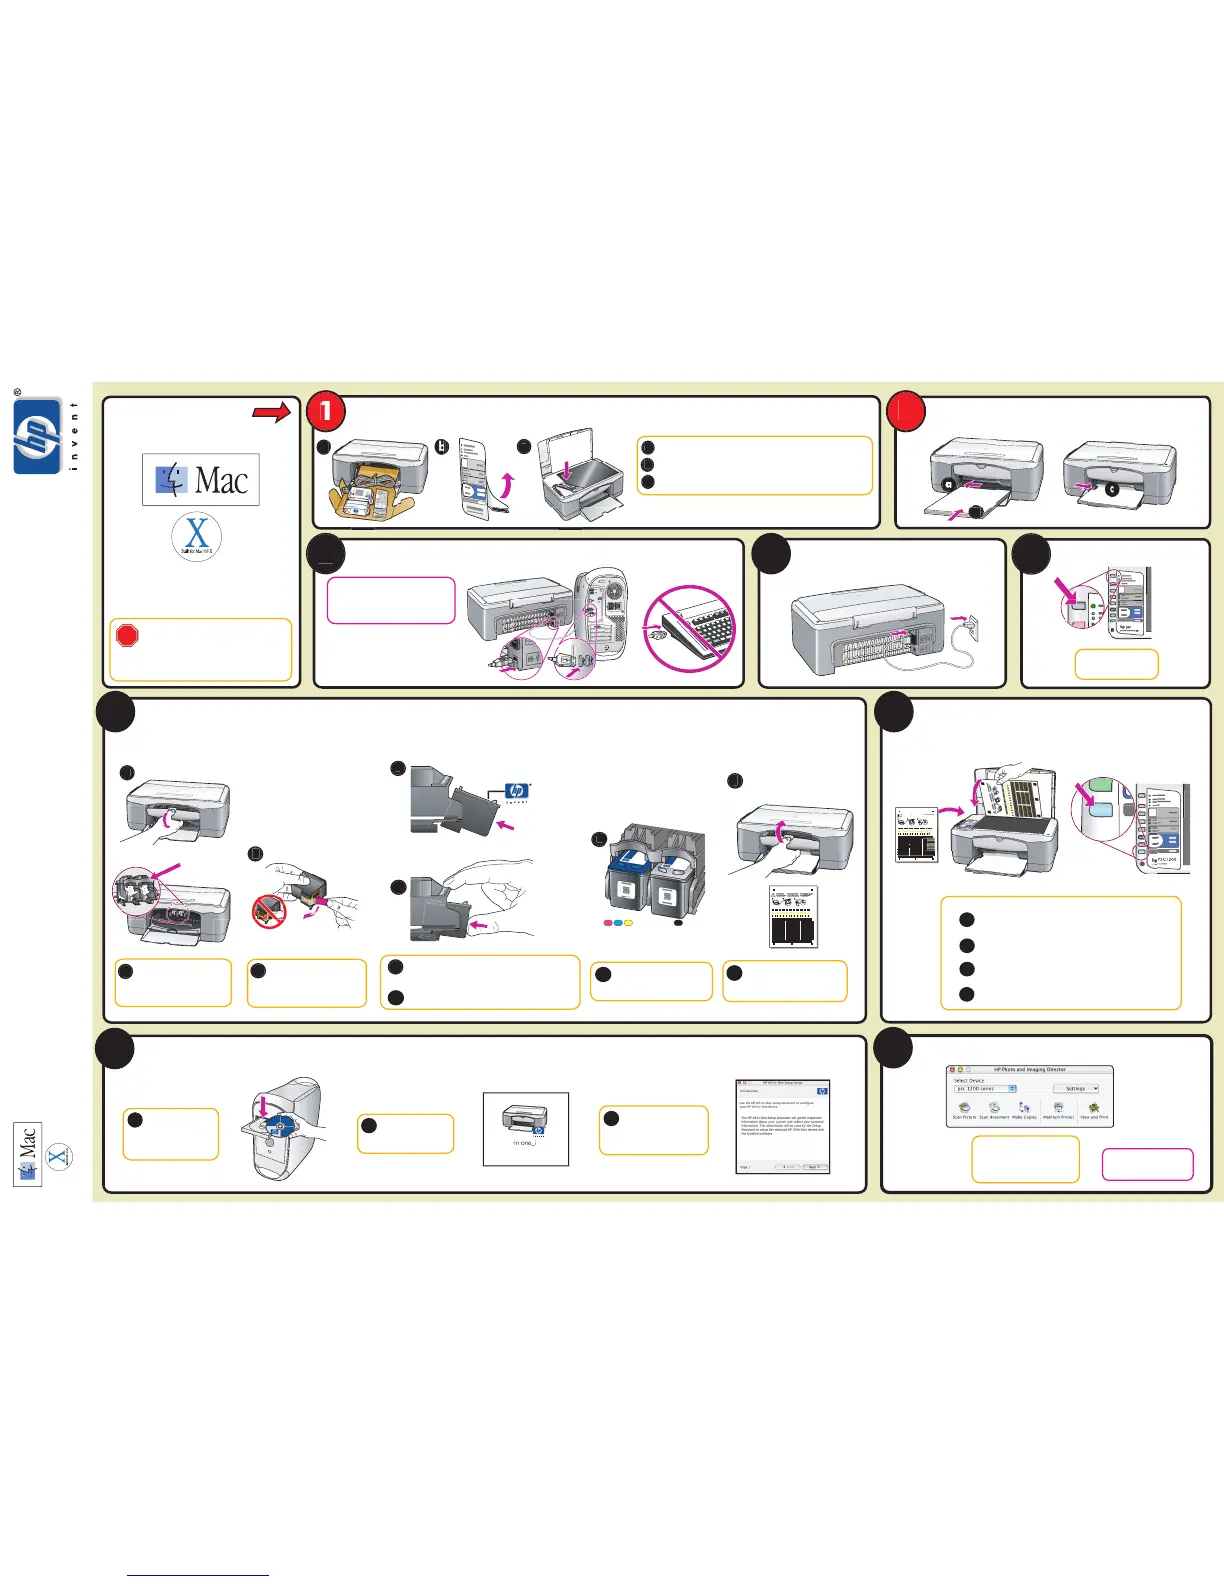
Attach the front panel overlay
Load plain white paper
If
owered
USB hub. See the reference
Insert the print cartridges
Print carria
Align print cartridges
Install the software
Turn your Macintosh on
and wait for your
Macintosh to finish
starting up. Insert the
hp psc disc.
a
Double-click the HP All-
In-One Installer icon on
your desktop.
b
Follow the onscreen
instructions. You may have
to restart your Macintosh
during setup. Be sure to
complete the setup assistant.
c
Try the HP PSC
Make sure there are five icons
in the HP Director Window. If
not, see the reference guide.
Congratulations! You are now
ready to use the
HP PSC. See the "Quick Start"
chapter in the reference guide or in
the Director, click Help.
Macintosh setup poster
hp psc 1100/1200 series all-in-one
Make sure you are using the
correct side of the poster.
Windows users: see other side.
See your box for exact contents and requirements.
Lower the input tray and the print cartridge access door. Remove the
packaging. Close the print cartridge access door.
Remove the front-panel overlay from the barcode backing.
Raise the lid. Align the overlay with the recessed area on the unit next to the
buttons. Press the overlay firmly into place.
The On li
reen. This may take a few
seconds.
a
Pull the print cartridge access
door down. Wait for the print
carriage to move to the
center.
b
Remove the bright pink tape
from the print cartridges. Do not
touch the gold-colored contacts
or re-tape the cartridges.
d
c
Hold the black print cartrid
o on top.
Slide the cartridge at a slight angle into the right side of
the print carriage. See the instructions on the print
cartridge access door.
Press firmly until the black print cartridge snaps into place.
e
f
Repeat steps c & d with the color
print cartridge. Make sure both
cartridges are secure.
Close the print cartridge door. A
print cartidge alignment page
prints. This may take up to a
minute. Use this page in step 7.
b
a
c
d
For best print quality, follow these steps:
Place the page face down on the front left corner.
Close the lid.
Press the Scan button.
After the On light stops blinking, alignment is complete. Discard or
recycle the page.
*Q1647-90232*
*Q1647-90232*
Q1647-90232
 Loading...