2
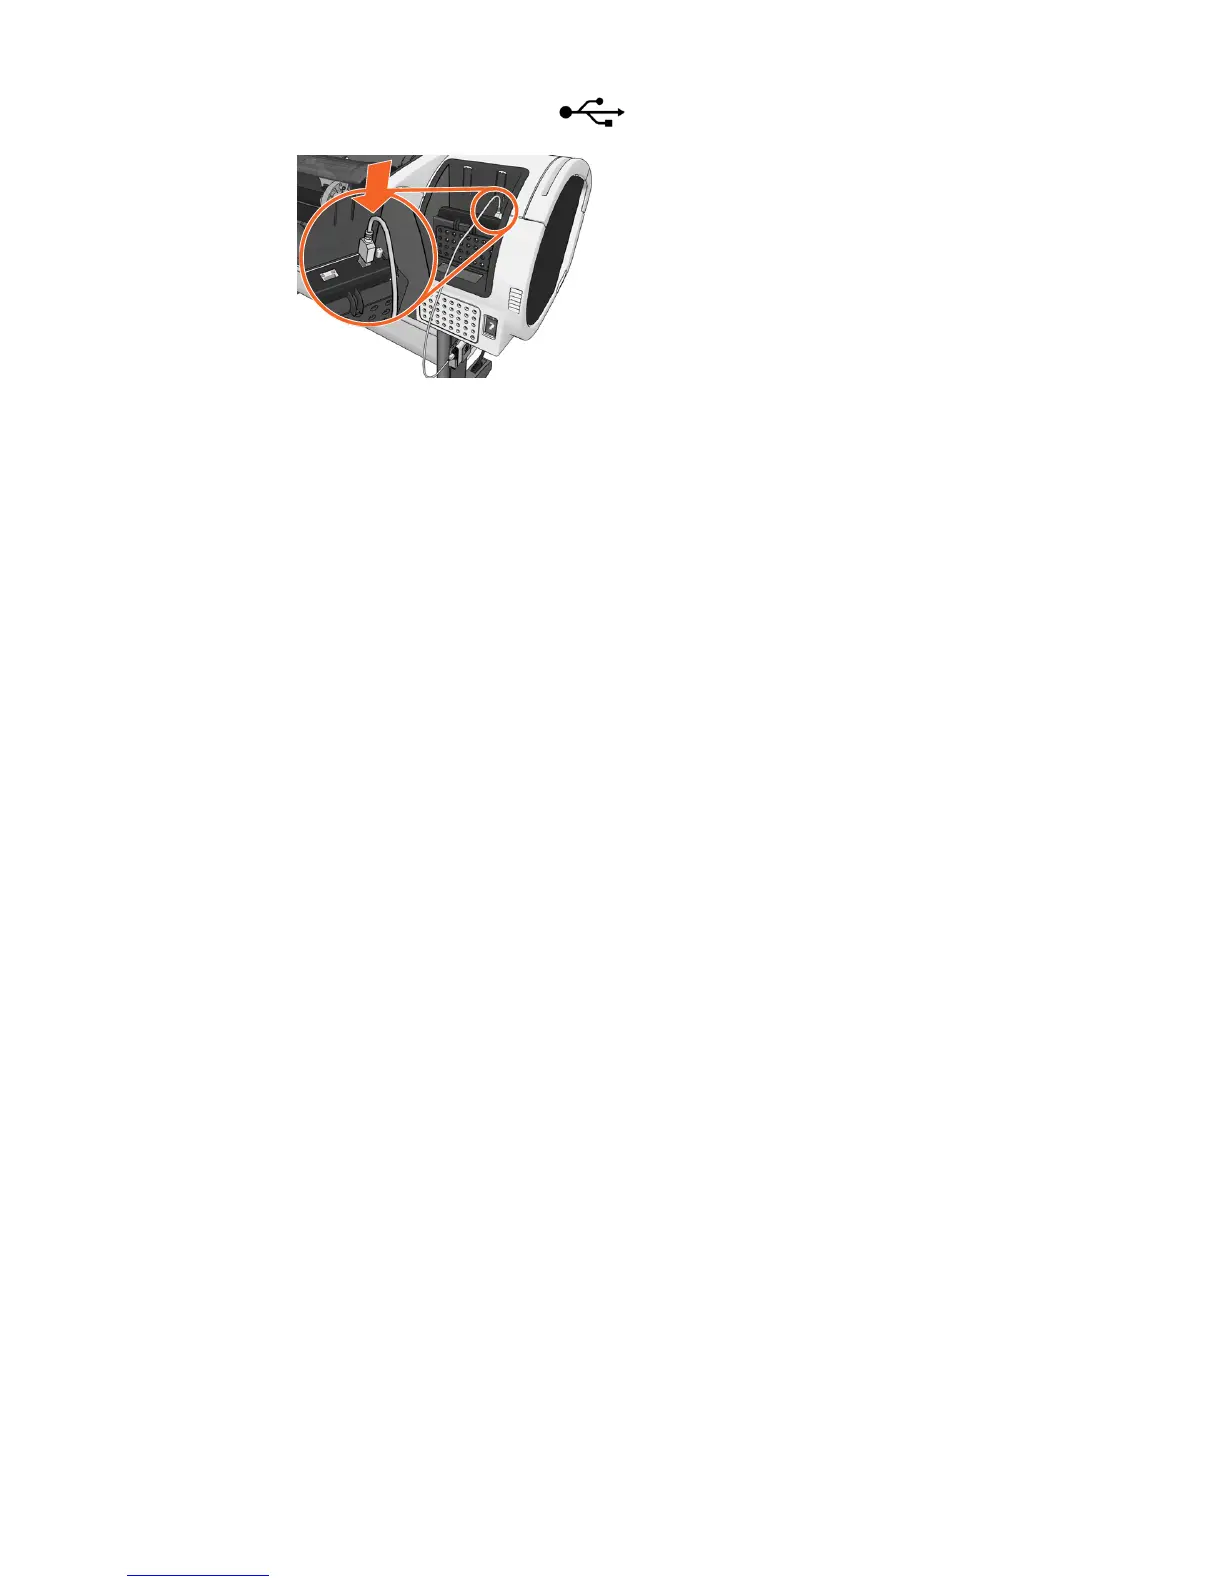
8. Connect the other end of the USB cable to the rear of the printer (left-hand side)
where you see this symbol:
9. Choose the SDE level to be applied to the printer’s internal hard disk.
“Select Secure Disk Erase Level or x to abort:
Secure Disk Erase provides three different levels of security:
• Non-Secure Fast Erase: all pointers to the information are erased. The
information itself remains on the hard disk until the disk space it occupies is
needed for other purposes, and it is then overwritten. While it remains on the
disk, it is difficult for most people to access, but may be accessed using software
designed for the purpose. This is the normal method in which files are erased on
most computer systems; it is the fastest method but the least secure.
• Level 1: all pointers to the information are erased, and the information itself is
also overwritten with a fixed character pattern. This method is slower than Non-
Secure Fast Erase, but more secure. It may still be possible to access fragments of
the erased information by using special tools to detect residual magnetic traces.
• Level 5: all pointers to the information are erased, and the information itself is
repetitively overwritten using an algorithm designed to eliminate any residual
traces. This is the slowest method, but the most secure. Level 5 meets the US
Department of Defense 5220-22.m requirements for clearing and sanitization of
disk media. This is the default security level when using Secure Disk Erase.
If you choose this level, the process can take several hours.
10. The front panel displays, “Press OK to continue with the external hard
disk installation or X to abort. The printer will restart during the
process”.
11. Choose OK.
12. The front panel displays, “External hard disk installation in progress.
Please do not remove the USB disk. This process will take a few
minutes and will reboot the printer”.
13. The printer restarts. The front panel displays a message in English, but you
should wait until it displays “Ready”.
If you connected the USB cable directly to the printer, please follow these steps:
• The front panel displays, “External hard disk detected. Press OK to
continue with External Hard Disk Installation or x to abort”.
• Press OK.
• Choose the SDE level to be applied to the printer’s internal hard disk (as
explained in step 9 above).
How to uninstall
1. Ensure that the printer is turned on.
Go to the Main Menu on the front panel.
2. Select Setup.
3. Choose External hard disk.