EasyManuals Logo

HP Z420 Series User Manual

HP Z420 Series
67 pages
To Next Page IconTo Next Page
To Previous Page IconTo Previous Page
Page #38 background imageLoading...
Page #38 background image
6. On the back of the front bezel, squeeze the HP logo mounting tabs (1) and press the logo outward
(2).
Figure 3-8 Rotating the HP logo
Rotate the HP logo 90 degrees counterclockwise, then release the logo and press it back into
place.
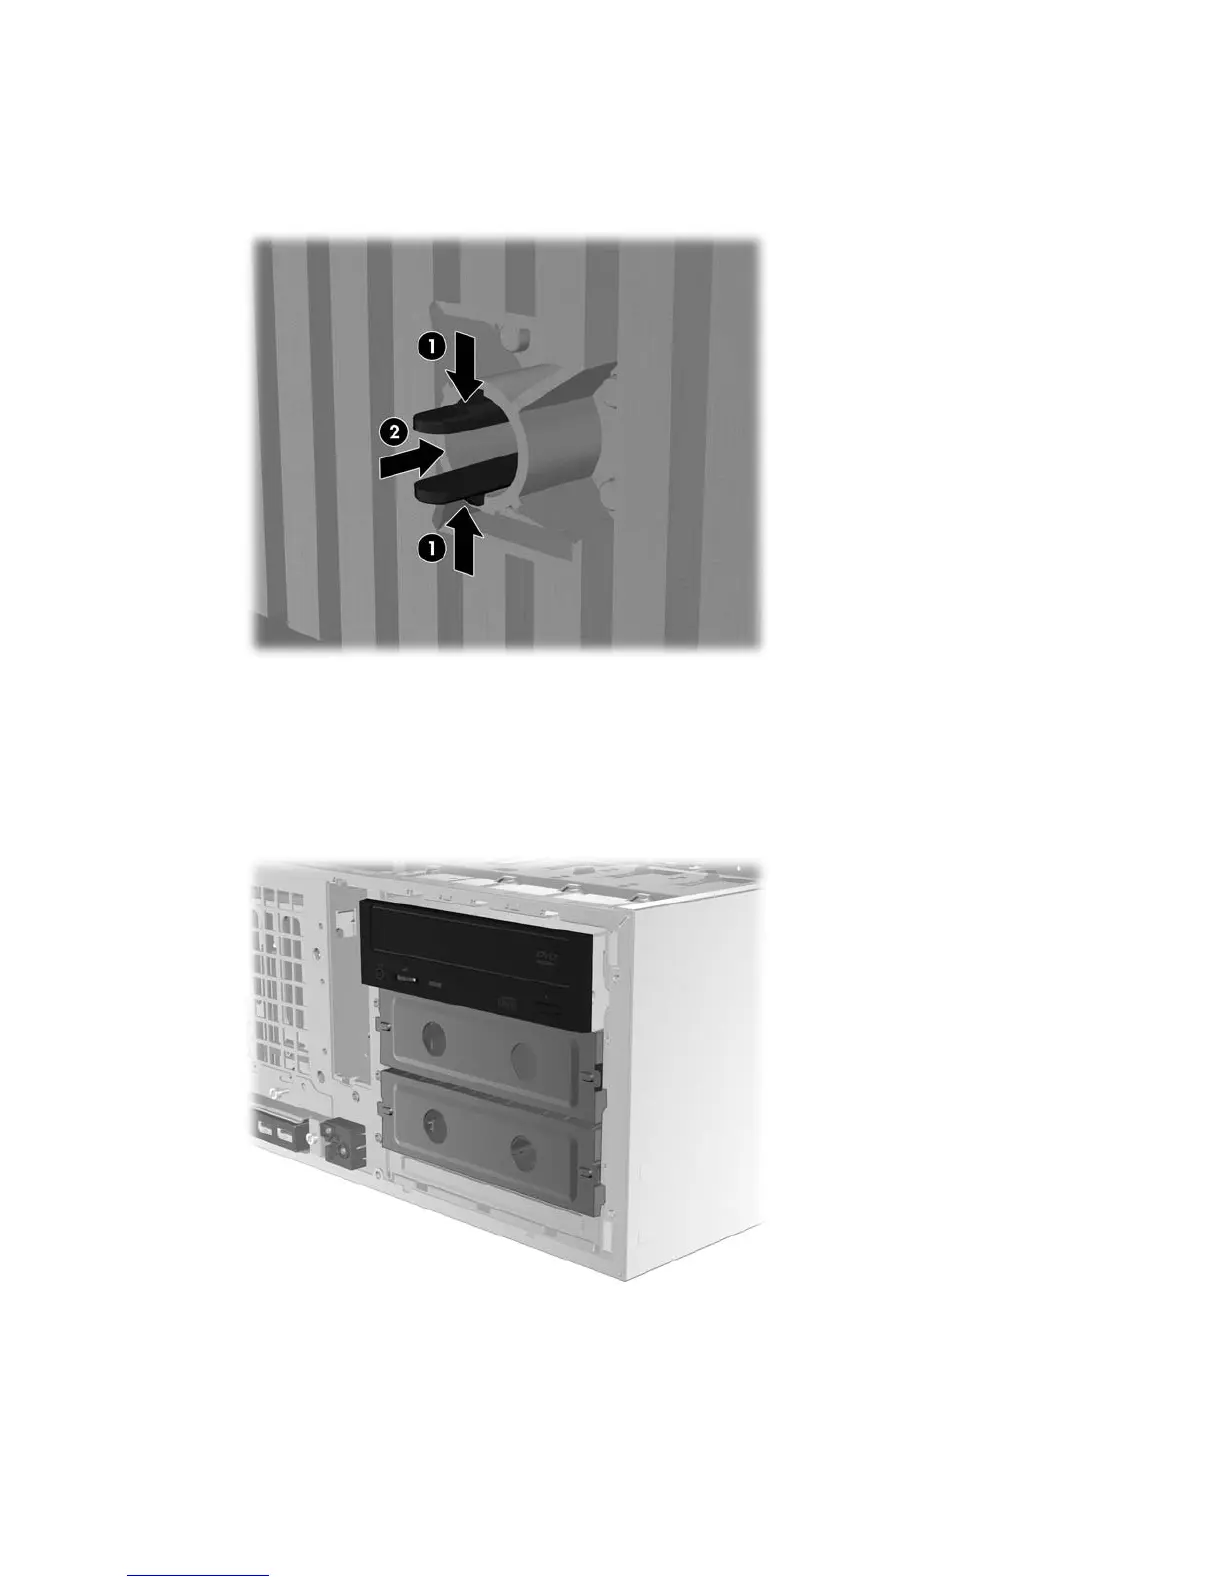
7. Remove the EMI filler panels and optical disk drive from the chassis.
8. Rotate the EMI filler panels and optical drive 90 degrees, then reinstall them.
Figure 3-9 Reinstalling the optical drive
9. Replace the front bezel and the side access panel.
30 Chapter 3 Setting up the workstation

Table of Contents

Questions and Answers:

Question and Answer IconNeed help?

Do you have a question about the HP Z420 Series and is the answer not in the manual?

HP Z420 Series Specifications

General IconGeneral
ChipsetIntel C602
Memory Slots8 DIMM slots
NetworkingIntegrated Intel 82579LM Gigabit Ethernet
Processor OptionsIntel Xeon E5-1600 and E5-2600 series
Graphics OptionsNVIDIA and AMD professional graphics cards
Power Supply600W 90% efficient, wide-ranging, active Power Factor Correction (PFC)
Form FactorConvertible Mini-tower

Related product manuals