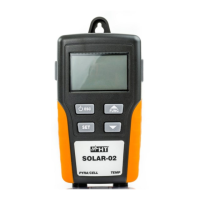
The SOLAR-02 is a remote unit designed for measuring irradiation and temperature, primarily for photovoltaic (PV) installations. It can operate independently or in conjunction with a master instrument for testing and recording the efficiency of single-phase and three-phase PV systems.
Function Description
The SOLAR-02 offers several key functions:
- Real-time display: It shows real-time values of irradiation and temperature for PV module cells and the environment.
- Sensor compatibility: It connects to various irradiation sensors (Irr-P pyranometer or Irr-S2 silicon cell sensors) and temperature probes (Tmp).
- Master instrument connectivity: It can connect to master units via USB (M-USB) or radio frequency (M-RF) for synchronized testing and recording.
- Synchronization: It synchronizes with M-USB or M-RF master units when initiating testing or recording.
- Tilting angle measurement: The unit can measure the tilting angle of PV panels.
When connected to a master instrument, the SOLAR-02 displays a calculated cell temperature (Tc) based on the Normal Operating Cell Temperature (NOCT), irradiance, and environmental temperature, using the formula:
Tcel = Tenv + (NOCT - 20) x (Gp / 800)
where Tenv is Environment Temperature, Gp is Irradiance measured, and NOCT is Normal Operating Cell Temperature. The presence of a "K" symbol next to the Tc value indicates it's a calculated value, not a measured one. When operating independently, the displayed Tc value is measured.
Important Technical Specifications
Irradiation – PYRA/CELL input:
- Range: 0 ÷ 1400 W/m²
- Resolution: 1 + INT (100 * 0.1/K) W/m²
- Accuracy: ±[1.0%reading + INT(1000 * 0.1/K) dgt]
- K = sensitivity of the probe (mV/kW/m² or µV/W/m²)
- Probe sensitivity (Input Vmax = 5V):
- K<10: Range 0.00 ÷ 15.00 mV, Resolution 0.01 mV, Accuracy ±(1.0%reading+0.1mV)
- K≥10: Range 0.00 ÷ 65.00 mV, Resolution 0.02 mV, Accuracy ±(1.0%reading+0.1mV)
Temperature – TEMP input (measured with "Tmp" temperature probe – see Table 1):
- Range: -20.0 ÷ 99.9 °C
- Resolution: 0.1 °C
- Accuracy: ±(1.0%reading + 1°C)
- Input Vmax: 5V
Tilting angle:
- Range: 0 ÷ 90°
- Resolution: 1°
- Accuracy: ±(1.0%reading +1°)
General Characteristics:
- Display: 4 LCD (2000 dots), with decimal comma and point.
- Power supply: 4 x 1.5V alkaline type AAA LR03 batteries.
- Battery duration: Approximately 480 hours.
- Auto Power OFF: After 5 minutes of idleness (not in recording operation).
- Radio module specifications:
- Frequency range: 2.400 ÷ 2.4835GHz
- R&TTE category: Class 1
- Max transmission power: 30µW
- Input connectors:
- USB port: USB 2.0 type Hypertac
- PYRA/CELL and TEMP inputs: Hypertac
- Internal memory autonomy: Approximately 1.5 hours (@ Pl master = 5s).
- Mechanical characteristics:
- Dimensions (L x W x H): 120 x 65 x 35mm (5 x 3 x 1in)
- Weight (batteries included): 215g (8 ounces)
Environmental Conditions:
- Reference temperature: 23°C ± 5°C (73°F ± 41°F)
- Operating temperature: 0°C ÷ 40°C (32°F ÷ 104°F)
- Relative operating humidity: <80%RH
- Storage temperature: -10°C ÷ 60°C (14°F ÷ 140°F)
- Storage humidity: <80%RH
The instrument complies with LVD 2014/35/EU and EMC 2014/30/EU Directives, and meets the requirements of 1999/5/CE, 2011/65/EU (RoHS), and 2012/19/EU (WEEE) directives.
Usage Features
The SOLAR-02 can be used in two main modes:
1. Independent Operation:
- Power On/Off: Press and hold the ON/OFF key (ESC) for a few seconds.
- Initial Screen: After power-on, an initial screen shows all display symbols, followed by the firmware version. If no probe is connected, a specific screen indicates this.
- Sensor Selection: Press the SET key to select the K sensitivity value of the sensor. Use arrow keys (▲/▼) to adjust the value. Confirm with SET. For Irr-P sensors, press ESC to exit. For Irr-S2 sensors, set the "Alpha" parameter (Te) using arrow keys and confirm with SET.
- Probe Connection: Connect the irradiation probe (Irr-P or Irr-S2) to the PYRA/CELL input and the temperature probe (Tmp) to the TEMP input.
- Real-time Reading: The display shows irradiation (W/m²), cell temperature (Tc in °C), and environmental temperature (Te in °C).
- Inclinometer Function: Press the FUNC/▲ key to switch from environmental temperature display to tilting angle measurement. Fasten the unit to the module surface (magnets on the rear side can be used) and read the tilting angle in degrees.
2. Operation with Master Instrument (M-USB or M-RF):
- Preliminary Check (RF Module):
- For M-USB: The internal RF module is NOT necessary. To check, press and hold FUNC/▲ while switching on. "rFOFF" should be displayed. If "rFon" is shown, turn off the unit and repeat.
- For M-RF: The internal RF module IS NECESSARY. To check, press and hold FUNC/▲ while switching on. "rFon" should be displayed. If "rFOFF" is shown, turn off the unit and repeat.
- Sensor Selection: Switch on the unit and press SET. Select the desired sensor type (as in independent mode) using arrow keys and confirm with SET.
- USB Connection (M-USB): Connect the SOLAR-02 to the M-USB master instrument via the USB cable. The "USB" symbol appears on the display.
- RF Connection (M-RF): Switch on the unit and approach it to the M-RF master instrument (max 1m distance). The RF symbol (
) blinks while searching and becomes fixed when connected. If it disappears after 30s, press the ▼ key to restart the search.
- Synchronization: When testing/recording is activated on the master instrument, the SOLAR-02 displays "Hold" and a waiting time.
- Recording: After the "Hold" phase, "Recording..." is displayed. The USB cable can be disconnected (for M-USB) or the unit can be moved away from the master (for M-RF) and placed near the PV modules. Hyphens ("- - -") indicate no probes are connected.
- Probe Placement: Place the irradiation probe parallel to the PV module surface and connect it to the PYRA/CELL input. Fix the temperature probe to the backside of the module and connect it to the TEMP input.
- Ready for Measurement: When irradiation exceeds the threshold set by the master, "READY" is displayed.
- Data Transfer: Disconnect probes and reconnect the unit to the master (USB) or approach it to the master (RF) to activate data transfer.
- End of Test: Upon receiving a stop command from the master, the unit displays "SEnd" and sends data to the master for final result determination.
Maintenance Features
- General Information:
- Observe safety recommendations during use and storage.
- Avoid high humidity, high temperatures, and direct sunlight.
- Remove batteries for long-term storage to prevent leaks.
- Replacing Batteries:
- The
symbol indicates low batteries.
- Turn off the unit, remove probes and USB cable.
- Open the battery compartment cover on the rear.
- Replace old batteries with new 4 x 1.5V AAA LR03 batteries, observing polarity.
- Close the compartment.
- Dispose of old batteries in appropriate containers.
- The instrument retains stored data even without batteries.
- Cleaning: Use a soft, dry cloth. Do not use humid cloths, solvents, or water.
- End of Life: The symbol on the accessory and batteries indicates separate and correct disposal.
Safety Precautions:
- Do not measure in humid, explosive, or dusty environments.
- Avoid contact with live circuits or exposed metal parts when not measuring.
- Do not use the instrument if anomalies (deformations, breaks, leaks, display issues) are present.
- Only use HT original accessories.
- The instrument is safe to hold during 2.4GHz RF transmission, complying with European Council 1995/519/EC and EN62311 standards.
- The RF connection of the SOLAR-02 is normally disabled by default. It must be activated for use with M-RF master meters.
- Failure to follow instructions can damage the instrument or endanger the operator.