Notes:
- When you remove the tank, do not touch any parts inside of the appliance. Doing so may
damage the product.
- Be sure to push the tank gently all the way into the appliance. Banging the tank against anything
or failing to push it in securely may cause the appliance not to operate.
- When you remove the tank, if there is some water in the appliance you must dry it.
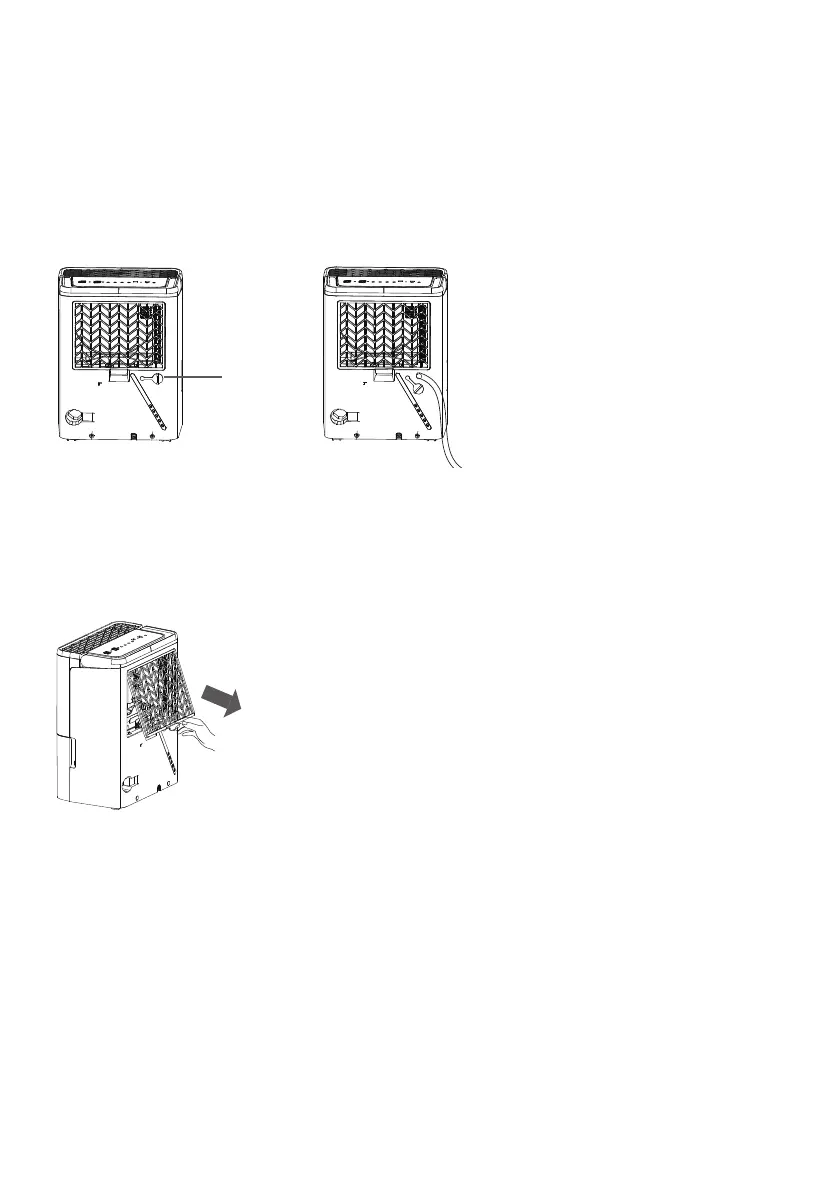
5.1.2 Continuous drainage
Remove the rubber cover from the drainage hole as indicated by “A” in Fig.1 below, then plug a
drainage tube (ID=13.5 mm) into the drainage hole (Fig.2). Make sure that the drainage tube is
placed lower than the hole to allow water to escape.
Fig.1 Fig.2
A
Note:
- Remember to replace the rubber cover when the continuous drainage is not used.
5.2 Removing the lter
The lter is located behind the air inlet grille. Grip the tab on the lter and pull it upward, then pull it
out. Wash the lter with fresh water (<40°C) every two weeks, and replace the lter after the lter
has dried in the open air.
Warning:
- Do not operate the appliance without the lter because dirt and lint clog the lter and reduce
performance.
5.3 Product care
- Clean the appliance with a soft, dust-proof cloth.
- You can use a vacuum cleaner to remove dust and lint trapped in the ventilation grilles.
- Never use harsh cleaning products. Prevent the appliance from coming into contact with acidic
substances.
- Store away from dust and freezing temperatures.
22
 Loading...