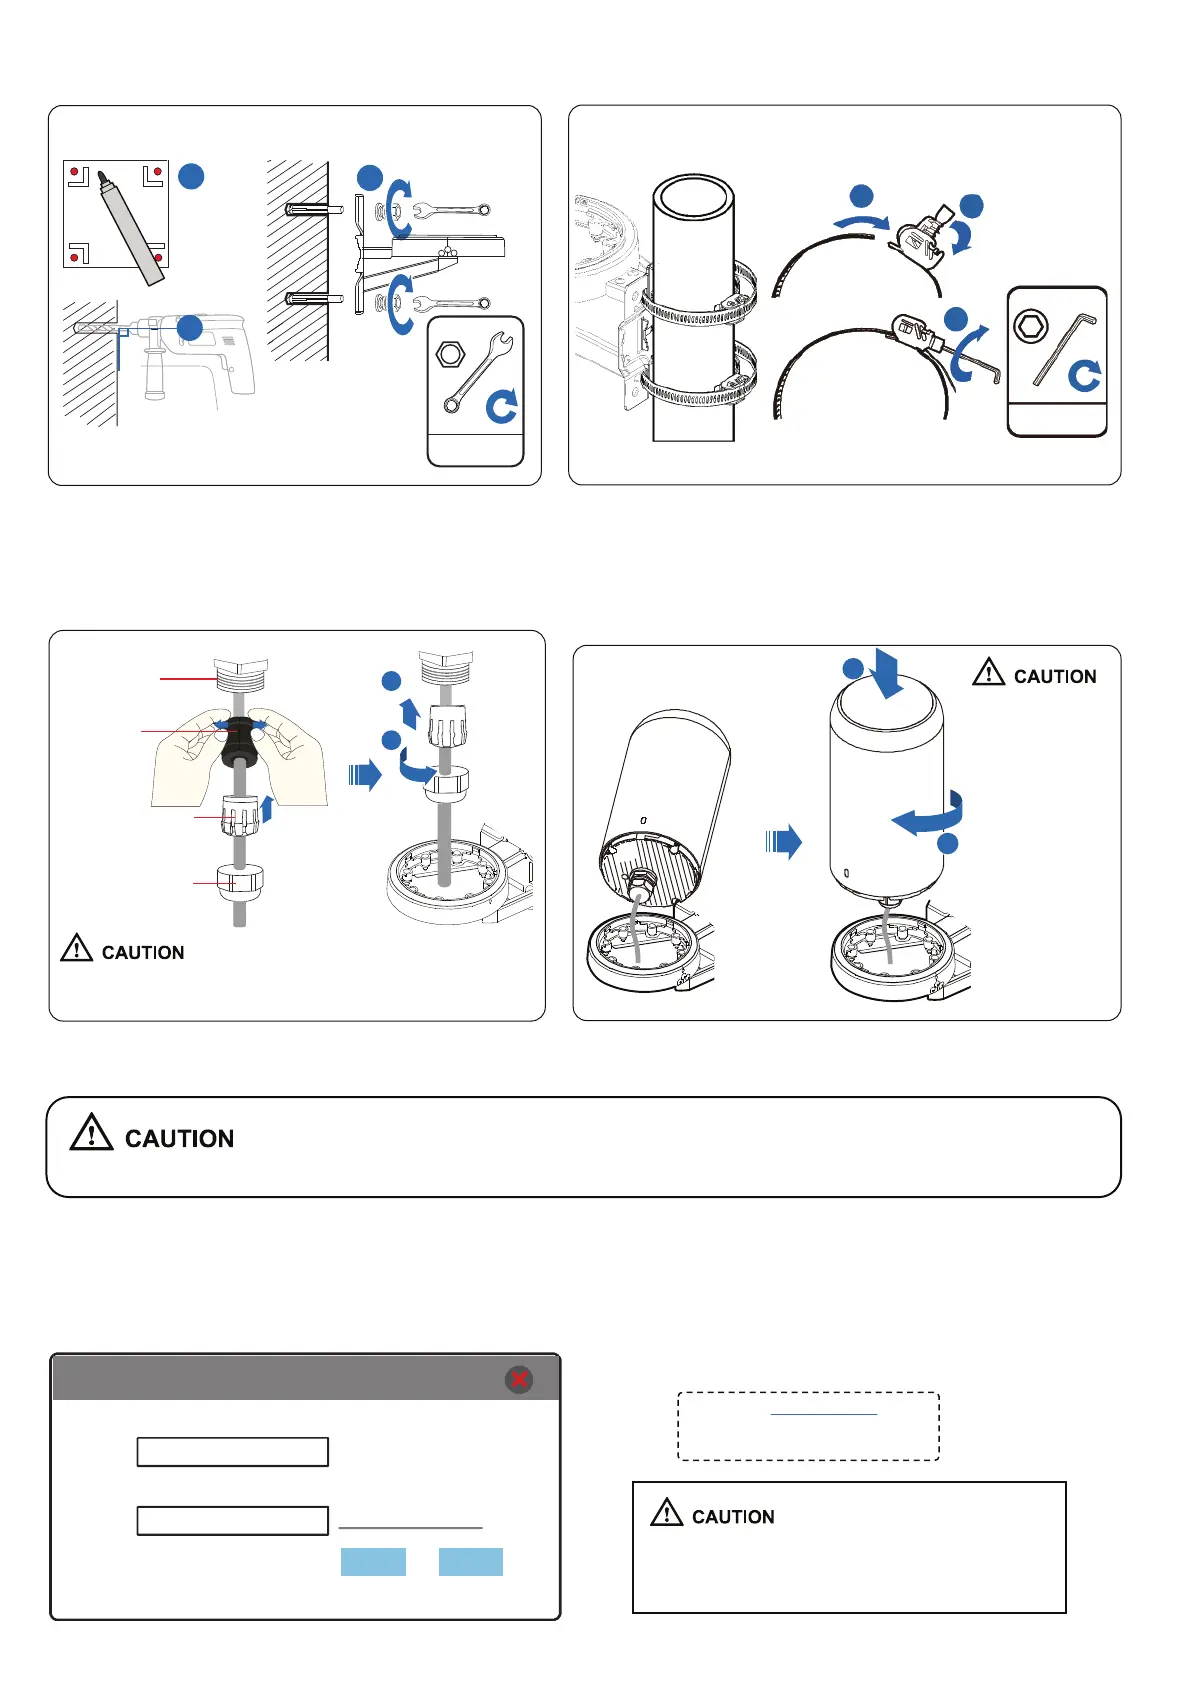
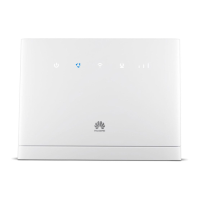
Installation scenario 1: mounting on a wall Installation scenario 2: mounting on a pole
3. ODU Installation
1. Install mounting kits. (For the board component, go to step 3 after step 1 is completed.)
4. (Optional) Conguration
Users can access the WebUI and congure the device using the following method:
Open a web browser on a PC and enter the IP address in the address bar.
Then, enter the user name and password. The information you need is as follows.
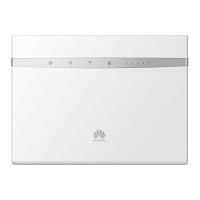
2. Connect the waterproof connector and ODU.
Install components for the waterproof connector
in the sequence shown in the following gure.
4. Connect ODU and PSU and power on the ODU. See step 3 (Connect cables and power on the device) in
part 2 Installation Location Selection.
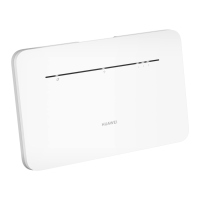
3. Align mounting kits and rotate the device clockwise
in the lock direction until it fully stops. Determine the
direction of the ODU indicator as required. You can
rotate the ODU counterclockwise to remove it.
Tighten the sealing gland nut to prevent
water from entering the ODU.
You must hear a
click to complete
installation to
avoid shedding
or damaging the
device.
Sealing gland base
2.5 N·m
Rubber
Rubber bushing
Sealing gland nut
1.8 N·m
User name
IP address: 192.168.192.1
User name: user
Password: LTE@Endusr
Password
Forgot password
7 N·m
7 N·m
!
"
#
M6
Recommended: φ8
40 mm to 45 mm
90°
@3
!
#
"
!
"
!
"
!
"
#
The ODU must be powered on within 24 hours after unpacking. The ODU must not be powered o for 24 hours or longer during maintenance.
t is strongly recommended that you change the default
login password of the WebUI to prevent unauthorized
users from changing the settings.
7 N·m
Log In Cancel
Log In