EasyManua.ls Logo

Huawei EchoLife HG8141 Series - User Manual

Huawei EchoLife HG8141 Series
16 pages
Print Icon
To Next Page IconTo Next Page
Loading...
1
EchoLife Gateway PON Terminal
Quick Start
Safety Information
Before using the device, read these precautions carefully. Follow these precautions and instructions to
ensure optimal product performance and to avoid danger and legal or regulatory violations.
Fire-proof Precautions
Keep the device away from fire or heat sources, including electric heaters, ovens, stoves, and
candles. Otherwise, the shell of the device may become hot or melt, causing fire in extreme
cases.
Replace deteriorated cables or power socket components on the power supply line or near the
device in a timely manner to eliminate safety risks.
Potentially Explosive Area
Do not place or operate the device in an environment with that contains flammable or explosive
gas or smoke.
Do not place flammable or explosive materials below or above the meter cabinet.
General Safety Precautions
Do not lead the strength member of the optical fiber or other metal parts indoors. Do not install
telephone lines, network cables, power adapters or power adapter cables outdoors. These
measures will help to prevent damage to the device and injury to people, which are especially
possible during thunderstorms.
If the power adapter is damaged from human factors, and the inside circuit is exposed, do not
touch the exposed parts. Otherwise, security risks are present.
Keep the device out of the reach of children. Components and accessories are small and could
pose a choking risk.
Looking directly at the optical port may injure your eyes.
Do not use any power adapters that are not in the standard configuration. Otherwise, the device
may be abnormal or unsafe.
If a backup power unit (BBU) is available in the packing box, do not disassemble it, refit it, or put
it in a fire. Otherwise, it may create a safety risk.
Instructions for Use
Use the device in a clean and well-ventilated indoor environment, out of direct sunlight.
Store devices and accessories in temperature 10°C to +35°C and relative humidity 30%85%
RH for at most 9 months. If the ambient temperature or relative humidity is overhigh or overlow,
the device may be faulty.
Install the device in strict compliance with the requirements of the supplier. Ensure there is at
least 10 cm space surrounding the device for heat dissipation. During installation, keep the
device away from flammable objects and electric appliances that generate strong magnetic or
electric fields, including microwave ovens, refrigerators, and mobile phones.
The described input voltage range should comply with the local power grid. For example, the
input voltage of the device is 200240 V AC for European Union; the input voltage of the device
is 100130 V AC for the United States of America.
The power supply voltage of the device must meet the requirements on the input voltage of the
device.
Before use the power adapter, please check no damage on the adapter.
Use dry hands to connect or disconnect cables. Stop using the device and switch off the power
before connecting or disconnecting cables.
When there is lightning, switch off the power and disconnect all cables, including the power
cable, optical fiber, and network cable.
Prevent objects from entering the device through the heat dissipation hole. Prevent water or
other liquids from entering the device.
Question and Answer IconNeed help?

Do you have a question about the Huawei EchoLife HG8141 Series and is the answer not in the manual?

Summary

Safety Information

Fire-proof Precautions

Precautions to prevent fire hazards from the device.

Potentially Explosive Area

Guidelines for operating the device in potentially explosive environments.

General Safety Precautions

General safety measures for device operation and handling.

Instructions for Use

Guidelines for proper installation and usage of the device.

Product Overview

Technical Specifications

Installing the GPON&XG-PON Terminal

Mounting a GPON terminal on the desk

Instructions for placing the GPON terminal horizontally on a desk.

Mounting terminal vertically on the desk

Guidance for mounting the terminal vertically using a base or support.

Mounting a GPON terminal onto the wall

Connecting Cables

Logging in to the Web Configuration Window

Configuring Wi-Fi Parameters

Indicator Description

Disposal and recycling information

Reduction of hazardous substances

FAQs

Limited Warranty

Overview

This document provides a comprehensive guide for the EchoLife Gateway PON Terminal, covering safety information, product overview, installation instructions, cable connections, Wi-Fi configuration, indicator descriptions, and disposal/recycling information.

Safety Information

Fire-proof Precautions: To ensure safe operation, keep the device away from all fire and heat sources, such as electric heaters, ovens, stoves, and candles. Exposure to such heat can cause the device's shell to become hot, melt, or even lead to a fire. It is crucial to regularly inspect power supply lines and components near the device for any signs of deterioration. Promptly replacing damaged cables or power socket components will mitigate potential safety risks.

Potentially Explosive Area: Never place or operate the device in environments containing flammable or explosive gases or smoke. Such conditions pose a severe risk of ignition. Additionally, avoid placing flammable or explosive materials directly below or above the meter cabinet to prevent accidental exposure to heat or sparks.

General Safety Precautions: To prevent damage to the device and ensure personal safety, especially during thunderstorms, do not route the strength member of optical fibers or other metal parts indoors. Similarly, avoid installing telephone lines, network cables, power adapters, or power adapter cables outdoors. If the power adapter is damaged due to human factors and its internal circuit is exposed, do not touch the exposed parts, as this presents a significant electrical hazard. Keep the device out of reach of children, as its small components and accessories could pose a choking risk. Direct exposure to the optical port can cause eye injury, so avoid looking into it. Only use power adapters that are part of the standard configuration; using non-standard adapters may lead to abnormal device behavior or unsafe conditions. If a backup power unit (BBU) is included, do not disassemble, refit, or expose it to fire, as this could create a safety risk.

Instructions for Use

Environmental Conditions: Operate the device in a clean, well-ventilated indoor environment, away from direct sunlight. For storage, devices and accessories should be kept within a temperature range of -10°C to +35°C and a relative humidity of 30%–85% RH for a maximum of nine months. Operating or storing the device in conditions with excessively high or low ambient temperature or humidity can lead to malfunctions.

Installation Guidelines: Install the device strictly according to the supplier's requirements. Ensure there is at least 10 cm of clear space around the device to allow for proper heat dissipation. During installation, keep the device away from flammable objects and electrical appliances that generate strong magnetic or electric fields, such as microwave ovens, refrigerators, and mobile phones. The input voltage range of the device must comply with the local power grid specifications (e.g., 200–240 V AC for the European Union; 100–130 V AC for the United States of America). Always verify that the power adapter is undamaged before use.

Cable Handling and Maintenance: Use dry hands when connecting or disconnecting cables. If an abnormality occurs, such as liquid entering the device, smoke emission, unusual sounds, or odors, immediately stop using the device, switch off its power, and disconnect all cables, including the power, optical, and network cables. Before cleaning or maintaining the device, ensure it is switched off, all applications are closed, and all cables are disconnected. Do not use strong chemicals, detergents, or other chemical agents for cleaning; instead, use a clean, dry, soft cloth to wipe the device shell and accessories. Keep the device dry during storage, transport, and use. Prevent the device from colliding with other objects, as this can damage the device and its accessories, leading to malfunctions.

Device Integrity and Disposal: Unauthorized disassembly or modification of the device or its accessories is strictly prohibited. The device should be installed and operated with a minimum distance of 20 cm between the radiator and your body to ensure safety. Dispose of packing materials, expired batteries, and old or abandoned devices in accordance with local laws and regulations. Recycling these items is strongly recommended. Prevent objects from entering the device through heat dissipation holes and avoid exposing the device to water or other liquids.

Product Overview

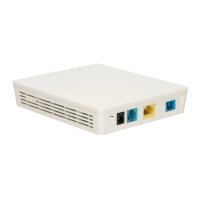
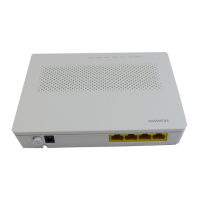
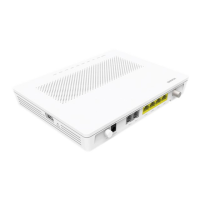
The EchoLife Gateway PON Terminal series offers various models with distinct functionalities tailored to different user needs.

Function Description:

  • HG8120 series: Equipped with 2 Ethernet ports and 1 POTS port, providing basic connectivity for internet and voice services.
  • HG8045 series: Features 4 Ethernet ports and Wi-Fi access, offering enhanced network connectivity and wireless capabilities.
  • HG8145 series: Includes 4 Ethernet ports, 1 POTS port, 1 USB port, and Wi-Fi access, providing a versatile solution for internet, voice, data storage, and wireless networking.
  • HG8141 series: Offers 4 Ethernet ports, 1 POTS port, and Wi-Fi access, suitable for users requiring multiple wired connections, voice services, and wireless internet.
  • HG8240 series: Comes with 4 Ethernet ports and 2 POTS ports, ideal for environments needing multiple wired connections and two voice lines.
  • HG8245 series: Features 4 Ethernet ports, 2 POTS ports, 1 USB port, and Wi-Fi access. The HG8245Q model specifically provides two USB ports, expanding data storage and peripheral connectivity options.
  • HG8247 series: Provides 4 Ethernet ports, 2 POTS ports, 1 USB port, 1 CATV port, and Wi-Fi access, making it a comprehensive solution for internet, voice, data, cable television, and wireless networking.
  • HN8055 series: Equipped with 5 Ethernet ports, 2 USB ports, and Wi-Fi access, offering extensive wired and wireless connectivity with additional USB functionality.
  • HN8245 series: Features 4 Ethernet ports, 2 POTS ports, 2 USB ports, and Wi-Fi access, suitable for advanced networking needs with multiple voice lines and USB peripheral support.
  • HN8255 series: Offers 5 Ethernet ports, 2 POTS ports, 2 USB ports, and Wi-Fi access, providing maximum connectivity and versatility for demanding home or office environments.

Devices supporting Wi-Fi access may be equipped with either external or internal antennas. For specific device types not listed, further information can be found on the Huawei website.

Installing the GPON&XG-PON Terminal

Installation Precautions:

  • Do not install PON terminals outdoors or in outdoor cabinets.
  • PON terminals can be mounted on a wall or placed on a workbench. Avoid installing them in other positions, such as on the ceiling.
  • The terminal cannot be connected to other devices like other GPON terminals, switches, or routers.
  • If a support is installed with the PON terminal, do not remove it unless absolutely necessary. When removing the support, apply even force to both sides to prevent damage to the PON terminal.

Mounting a GPON Terminal on the Desk: For horizontal placement, simply place the ONT on a desk as shown in the provided figure. For vertical placement (supported by some models), if the ONT has a base, place it vertically on the desk. If it has a support, install the support to the ONT and then place it vertically on the desk.

Mounting a GPON Terminal onto the Wall (Only supported by some product models):

  1. Mark Positions: Mark the positions for two mounting holes on the wall, ensuring they match the spacing of the ONT's mounting holes.
  2. Drill Holes: Select a drill bit appropriate for the outer diameter of the screws. Use a hammer drill to create holes at the marked positions. Clean the wall and insert two expansion bolts.
  3. Fasten Screws: Use a screwdriver to fasten the screws into the expansion bolts, leaving the screw heads protruding 3 mm or 8 mm from the wall.
  4. Install Terminal: Mount the GPON terminal onto the protruding screw heads.

Note: XG-PON terminals like the HN8245 series cannot be horizontally placed on a desk or mounted onto the wall. When installing ONTs horizontally against the wall, leave screw heads 3 mm over the wall. For vertical installation, leave screw heads 8 mm over the wall. This terminal is primarily designed for horizontal desk placement. If mounted on a wall, the indicator silkscreen will be reversed. For specific silkscreen requirements, a different terminal may need to be purchased.

Connecting Cables

The ports on GPON terminals vary by type. Connect cables according to the specific ports supported by your device. If your external device differs from those shown in the figures, refer to its documentation for connection details. This document illustrates connections for typical devices.

Important Notes for Cable Connection:

  • The optical fiber connector used with the optical port on the wall may vary depending on actual conditions.
  • To ensure proper fiber operation, maintain a fiber bend radius greater than 30 mm.

Typical Connections (e.g., HG8247H5):

  1. Optical Port: Connect the optical fiber from the wall to the PON port on the device.
  2. Power Port: Connect the power adapter to the device's power port and then to a power socket.
  3. POTS Ports (TEL1, TEL2): Connect telephones or fax machines to the POTS ports.
  4. Ethernet Ports (LAN1-LAN4): Connect PCs, IP STBs, or other network devices to the Ethernet ports using network cables.
  5. CATV Port: Connect a TV set to the CATV port.
  6. USB Port: Connect a USB storage device for data access.
  7. Wi-Fi Terminal: Wireless devices can connect via Wi-Fi.

HN8255Ws Specifics: To remove the protective cover of an optical fiber, place two fingers at the arrows, press down slightly, and slide outwards. The HN8255Ws includes multiple LAN ports, two USB ports, and dedicated TEL ports, offering extensive connectivity options for various devices.

HN8245Q Specifics: The HN8245Q features multiple LAN ports, two USB ports, and two POTS ports, along with Wi-Fi capabilities, catering to comprehensive networking and communication needs.

Caution for Optical Fiber Connection: After connecting the optical fiber to the ONT's optical port, route the fiber out through the hole on the fiber port cover before installing the cover. Failure to do so may damage the fiber and the ONT.

Logging in to the Web Configuration Window

Step 1: Set PC IP Address: Configure your PC's IP address to be in the same subnet as the PON terminal's management IP address. The default management IP address can usually be found on the device's nameplate.

Step 2: Access Login Window: Open Internet Explorer, enter the PON terminal's management IP address in the address bar, and press Enter. The login window will appear.

Step 3: Log In: In the login window, select your preferred language. Enter the user name and password (typically printed on the device's nameplate). Click "Login." Once authenticated, the web configuration window will be displayed.

Notes for Login:

  • For some devices, if the IP address, user name, and password are not printed on the nameplate, use 192.168.100.1 as the IP address, root as the user name, and adminHW as the password.
  • If no operations are performed for five minutes after logging in, the system will automatically log out and return to the login interface.
  • The system will lock if an incorrect user name or password is entered three consecutive times. It will unlock after one minute.
  • It is recommended to change the initial password after logging in for the first time.

Configuring Wi-Fi Parameters

Step 1: Navigate to WLAN Basic Configuration: Choose the "WLAN" tab and then select "WLAN Basic Configuration." For the HN8245Q, navigate to "Advanced Configuration > WLAN" tab and select "2.4G Basic Network Settings" (or "5G Basic Network Settings" for 5G Wi-Fi).

Step 2: Set Wi-Fi Parameters: In the pane, select the "Enable WLAN" option box. In the displayed dialog box, configure the basic Wi-Fi parameters:

  • SSID Name: Enter the desired name for your wireless network (e.g., WirelessNet). This is the name that Wi-Fi terminals will search for.
  • Authentication Mode: Select "WPA Pre-Shared Key."
  • Encryption Mode: Choose "TKIP."
  • WPA PreSharedKey: Enter the password for your wireless network. This password will be used by Wi-Fi terminals to access the network.

Step 3: Apply Settings: Click "Apply" to save your Wi-Fi configuration.

Notes for Wi-Fi Configuration: The coverage of a wireless network from an ONT supporting Wi-Fi is affected by the number, thickness, and positions of walls, materials, ceilings, and other objects that radio signals must traverse. Material type and background radio frequency (RF) noise also impact coverage. To maximize wireless network coverage:

  1. Decrease Obstacles: Reduce the number of walls and ceilings between the ONT and other network devices. Each wall or ceiling can reduce coverage by 1 to 30 meters. Install the ONT in a location that minimizes obstructions.
  2. Observe Straight Line Rule: Signals traveling at a 45° angle through two 0.5-meter-thick walls can effectively cover only about one meter. For better signal reception, install devices where signals can travel directly through walls or ceilings.
  3. Consider Building Materials: Certain building materials, such as metal doors, aluminum walls, FRP products, metal products, insulative walls, filing cabinets, bricks, and concrete, can significantly weaken radio signals. Install access points, wireless routers, and computers to allow signals to traverse walls or open passageways.
  4. Avoid Interference: Keep the ONT away from devices that produce RF noise (maintain a distance of more than 2 meters). This includes 2.4 GHz wireless mobile phones or X-10 devices (e.g., microwave ovens, home security systems, Bluetooth devices, refrigerators), which can greatly weaken or eliminate radio signals. Even if a 2.4 GHz wireless mobile phone is not connected to a wireless network, its base station can still emit signals that interfere.
  5. RF Exposure Limits: To comply with European radio frequency exposure limits, maintain a minimum distance of 20 cm between humans and the equipment.

Indicator Description

The device's indicators provide visual feedback on its status and functionality.

CATV Indicator:

  • Always on: CATV function is enabled, and signals are being received.
  • Off: CATV function is disabled, or no CATV signals are being received.

WPS Indicator:

  • Steady on: WPS function is enabled.
  • Blinking: A Wi-Fi terminal is accessing the system.
  • Off: WPS function is disabled, or the indicator is turned off.

WLAN Indicator:

  • Steady on: WLAN function is enabled.
  • Blinking: Data is being transmitted on the WLAN port.
  • Off: WLAN function is disabled, or the system is not powered on.

USB Indicator:

  • Steady on: The USB port is connected and operating in host mode, but no data is being transmitted.
  • Blinks twice a second: Data is being transmitted on the USB port.
  • Off: The system is not powered on, or the USB port is not connected.

TEL1-TEL2 Indicators:

  • Steady on: The terminal is registered with the softswitch, but no service flows are being transmitted.
  • Blinking: Service flows are being transmitted, or the terminal cannot be registered with the softswitch.
  • Off: The terminal is not powered on, failed to register with the softswitch, or the POTS port is not enabled.

LAN1-LAN4/10G LAN Indicators:

  • Steady on: The Ethernet connection is in the normal state.
  • Blinking: Data is being transmitted on the Ethernet port.
  • Off: The Ethernet connection is not set up.

LOS/PON Indicator:

  • Refer to Table 1-2 for detailed status descriptions.

POWER Indicator:

  • Steady green: The terminal is powered on.
  • Off: The power supply is cut off.

LOS/PON Indicator Status Description (Table 1-2)

| Status No. | PON Status | LOS Status | Description

Huawei EchoLife HG8141 Series Specifications

General IconGeneral
WAN InterfaceGPON
Operating Temperature0°C to 40°C
Storage Temperature-40°C to 70°C
Humidity5% to 95% (non-condensing)
Product TypeONT

Related product manuals