Installing an Indoor PI
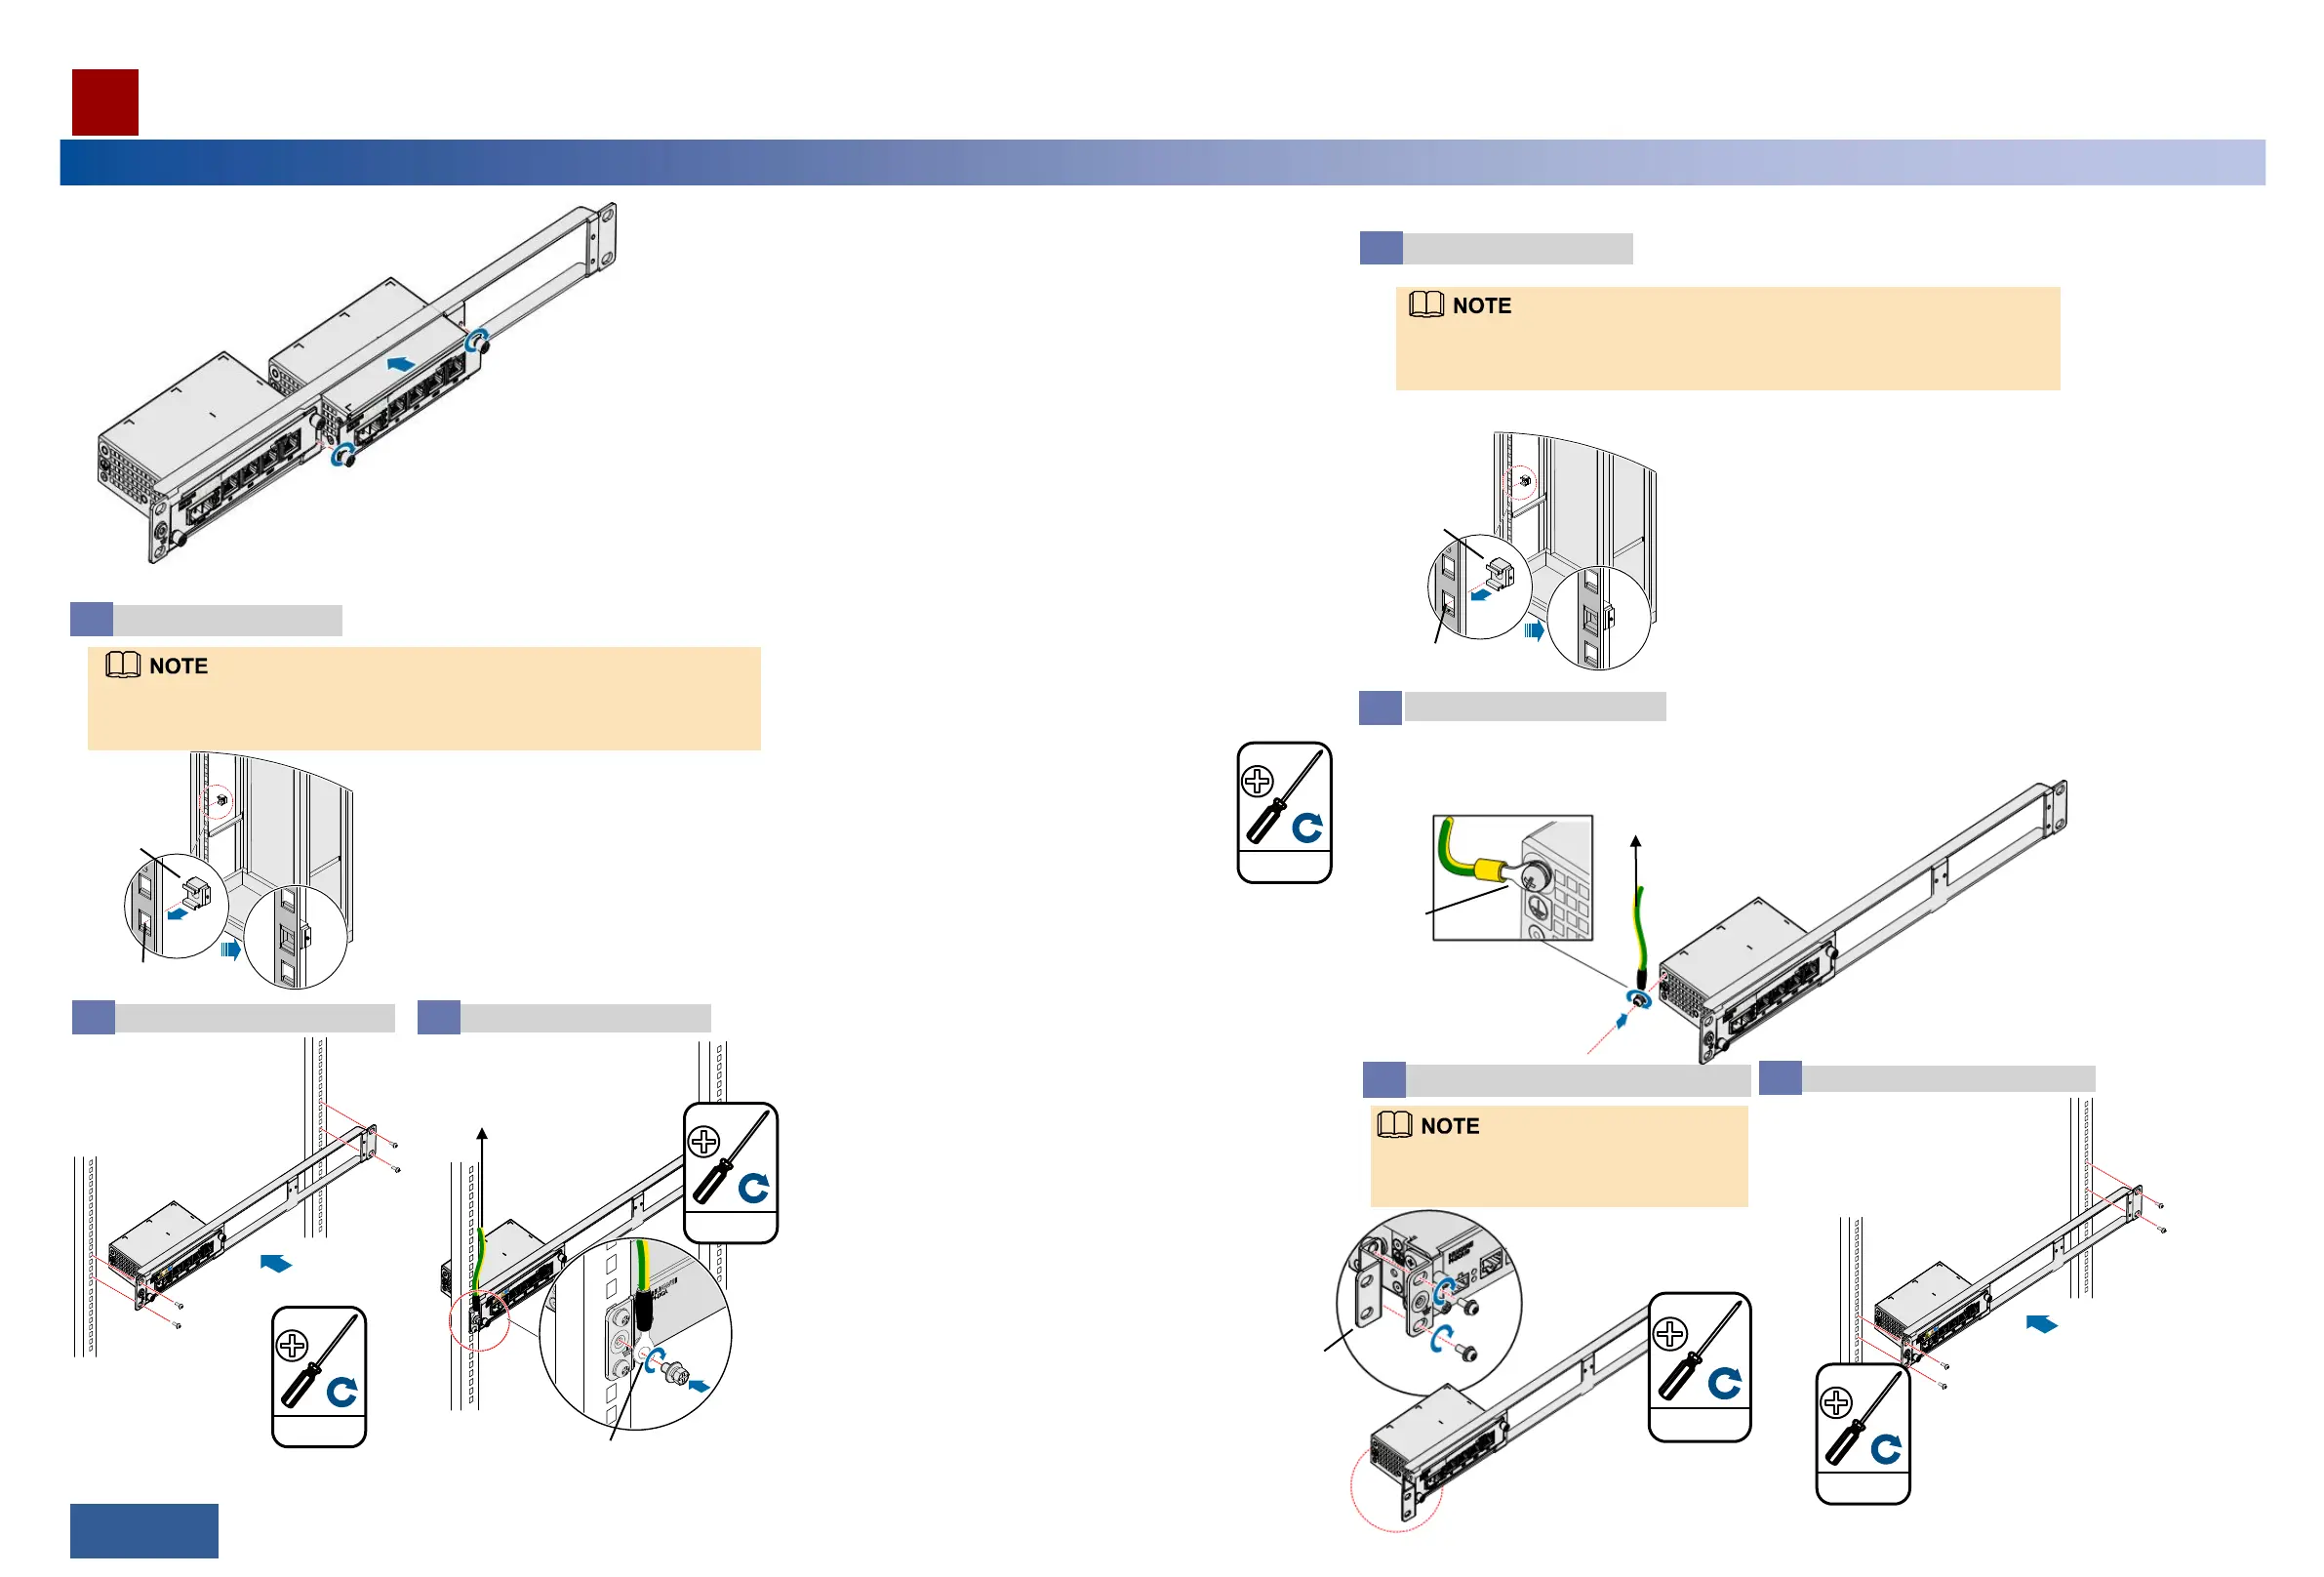
Insert a PI into a slot on the auxiliary mounting bracket and
tighten the captive screws on the mounting ears.
Tighten floating nuts.
1
When you tighten floating nuts, reserve a heat dissipation space of at least 25 mm
on the left and right sides of the auxiliary mounting bracket.
Floating
nut
Optional: Installing a PI in a 19-Inch Cabinet
Mounting hole
2.0±0.2 N·m
M6
1.4±0.14 N·m
M4
Connect the PGND cable to
a ground point on a cabinet
column or to an indoor
ground bar.
Install the PGND cable using a
ground screw (M4).
Install the chassis in the cabinet.
2
Install the PGND cable.
3
Mounting
ears
Before installing the chassis in an ETSI cabinet,
adjust the holes for installing mounting ears
based on the cabinet type.
3.0±0.3 N·m
M6
Optional: Installing a PI in an ETSI Cabinet
Install mounting ears.
3
Floating
nut
Connect the PGND cable to a
ground point on a cabinet column
or to an indoor ground bar.
2.0±0.2 N·m
M6
Install the PGND cable using a
ground screw (M4).
Install the chassis in the cabinet.
2
Install the PGND cable.
4
Tighten floating nuts.
1
46/47 >>
Installation Reference
When you tighten floating nuts, reserve a heat dissipation space of at least 25 mm
on the left and right sides of the auxiliary mounting bracket.
1.4±0.14 N·m
M4