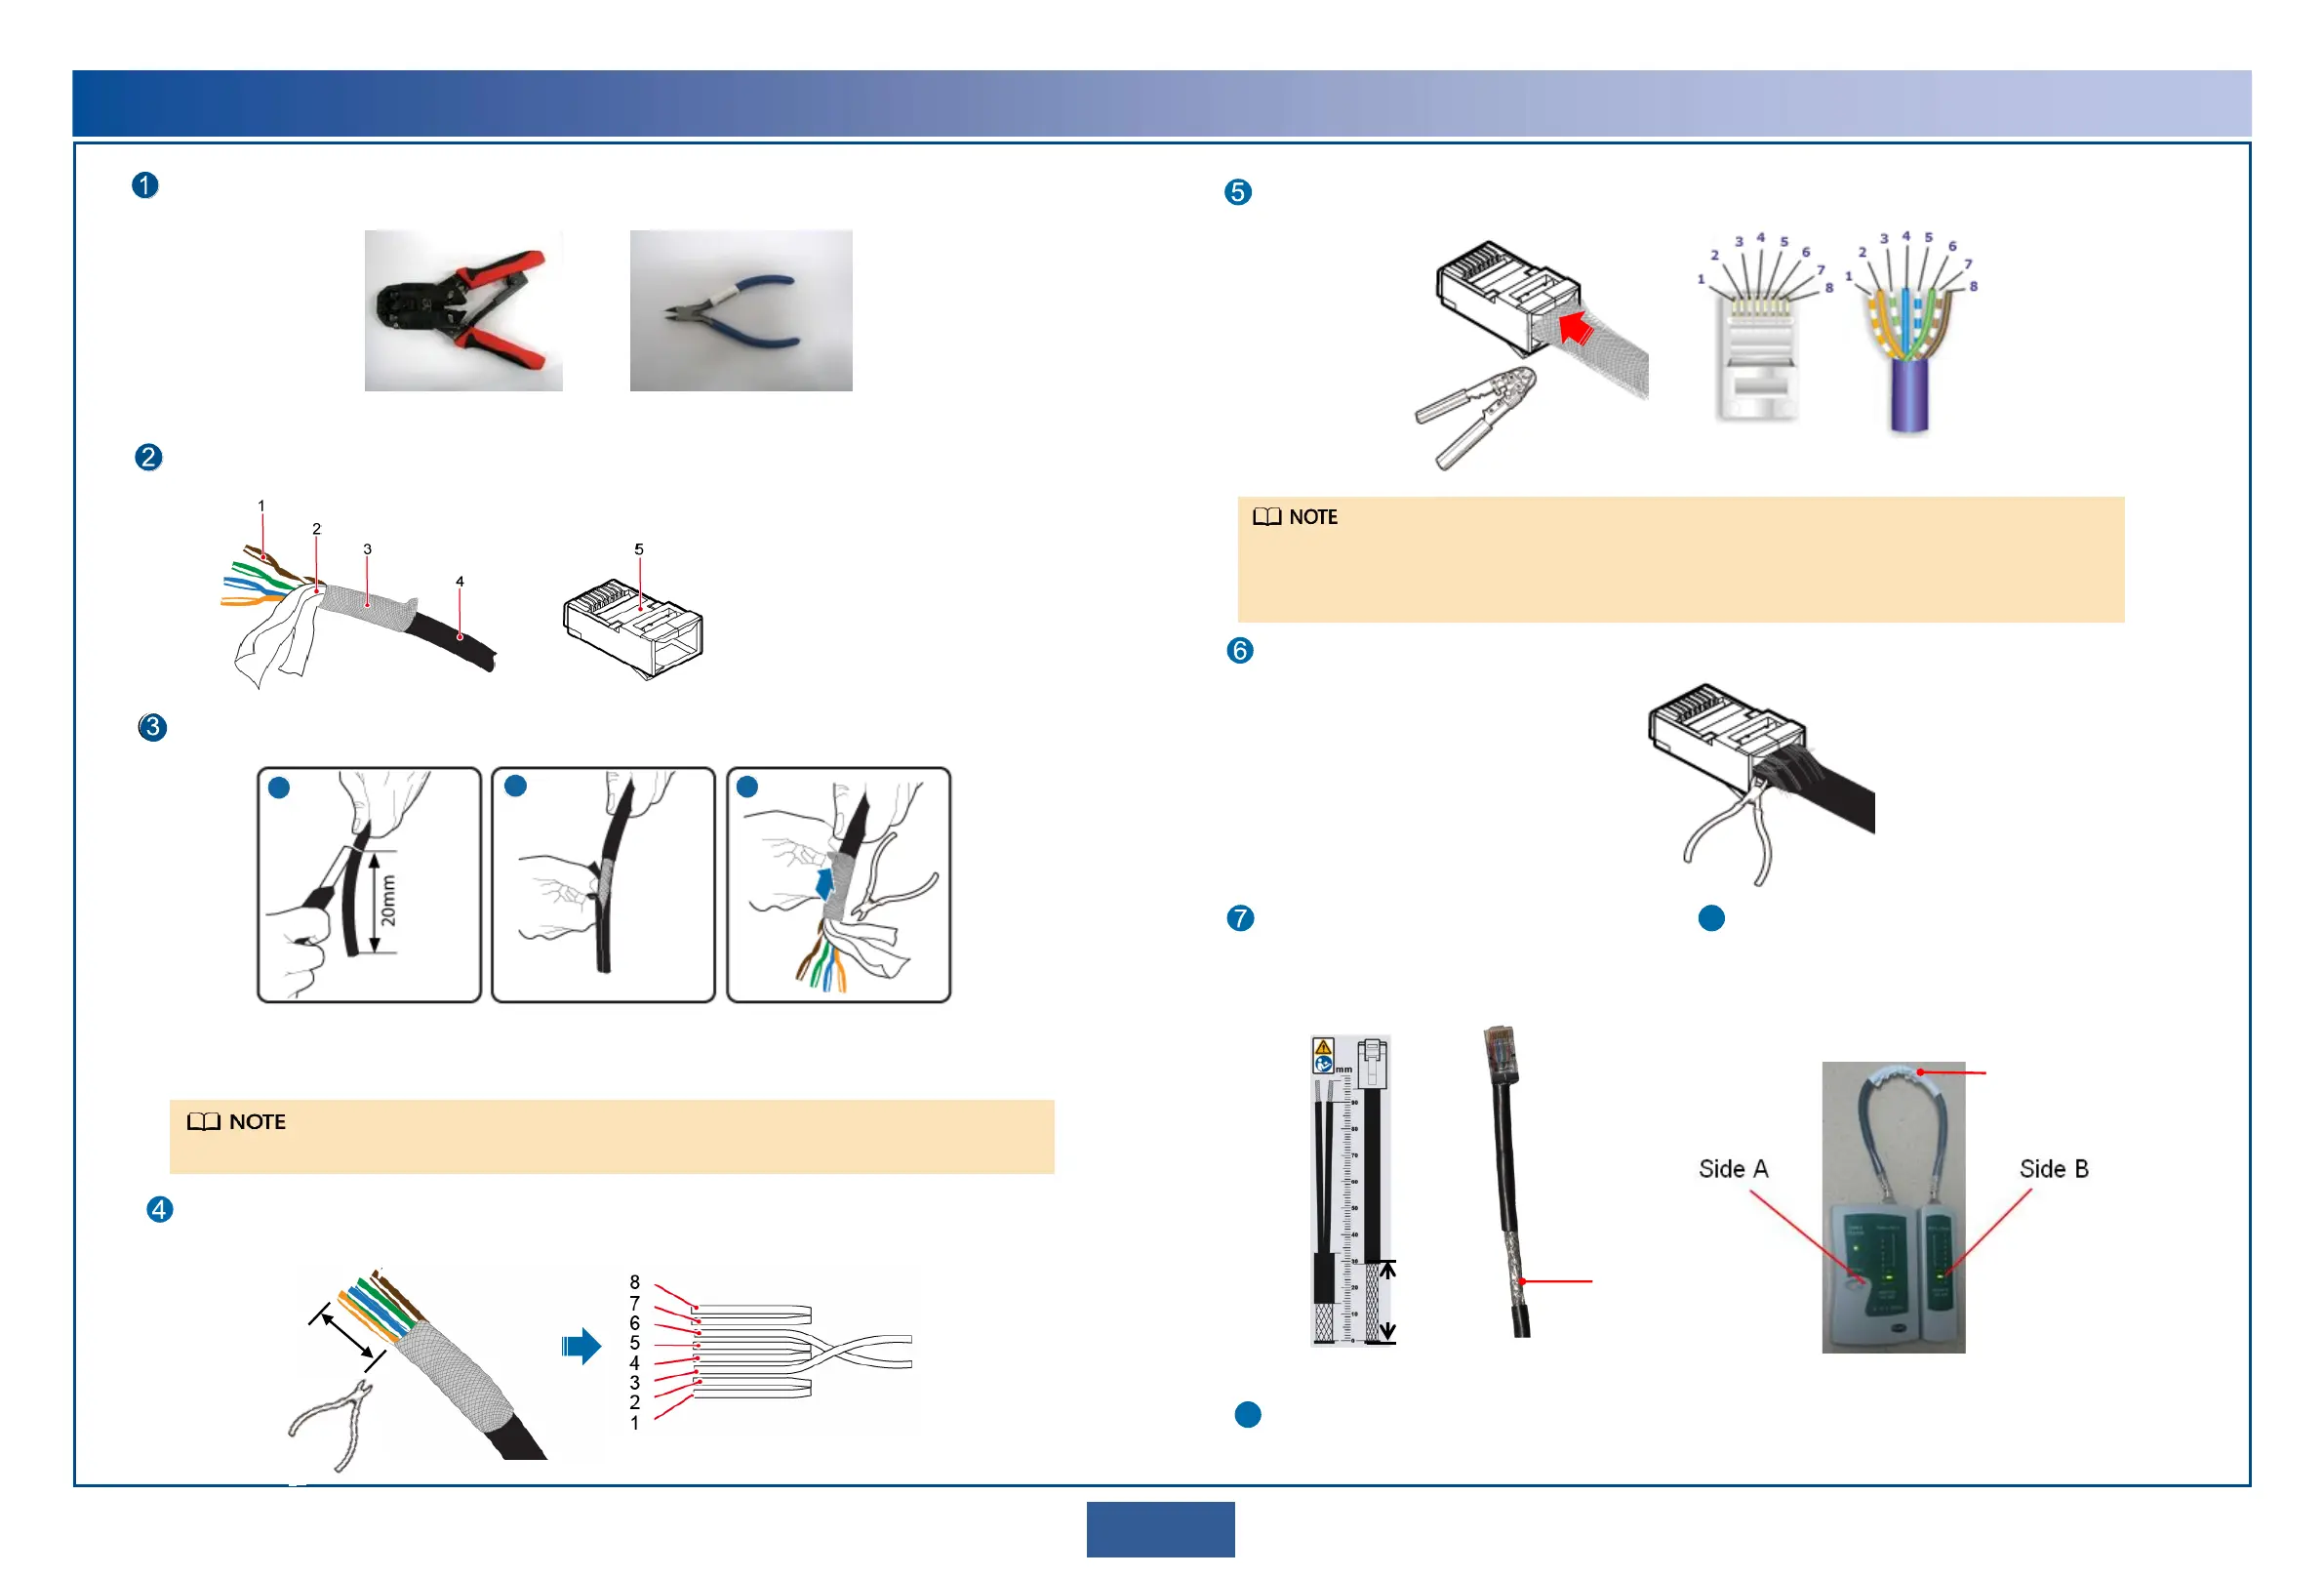
Terminate a connector on the other end of the network
cable, and then test the cable for continuity using a
network cable tester.
The pin assignments of the connectors at the two
ends must be the same. Outdoor network cables are
straight-through cables.
Optional: Use a multimeter to measure the impedance of core wires. The impedance difference between
core wires must be less than 5%.
8
9
Strip off the sheath of the cable according to the
peeling indicator on one side of the equipment
to expose the shield layer.
Peeling indicator
29 mm
Stripped
cable
6
Terminating an Outdoor Network Cable with Shielded RJ45 Connectors
RJ45 connector crimping tool Diagonal pliers
Prepare the following tools.
Prepare an outdoor network cable and shielded RJ45 connectors.
1. Core wire
2. Aluminum foil
3. Braid shield
4. Outer jacket
5. Shielded RJ45 connector
Strip the cable.
Length of the stripped
cable: 20 mm
Strip off the braid shield and
cut the aluminum foil and
unwanted materials.
Remove the outer
jacket.
Arrange the core wires according to the pin assignments and cut them neatly (exposing a length of 12 mm).
8: brown
7: white and brown
6: green
5: white and blue
4: blue
3: white and green
2: orange
1: white and orange
a
b
c
When stripping off the outer jacket, take care not to damage the braid shield or aluminum foil.
12 mm
Cut the core
wires neatly.
Length of each exposed core wire: 12 mm
Insert the arranged core wires into an RJ45 connector according to the pin assignments and crimp the
connector with the crimping tool.
Pin assignments of an RJ45 connector
Before crimping, ensure that the core wires are fully inserted in the RJ45 connector.
Use the crimping tool to crimp the connector with force.
After crimping, verify that the connector has been crimped tightly.
Crimp the RJ45 connector.
Cut off the exposed braid shield and materials along the edge of the connector.
Cut off the exposed braid shield and materials.
Outdoor network cable