Installation Reference
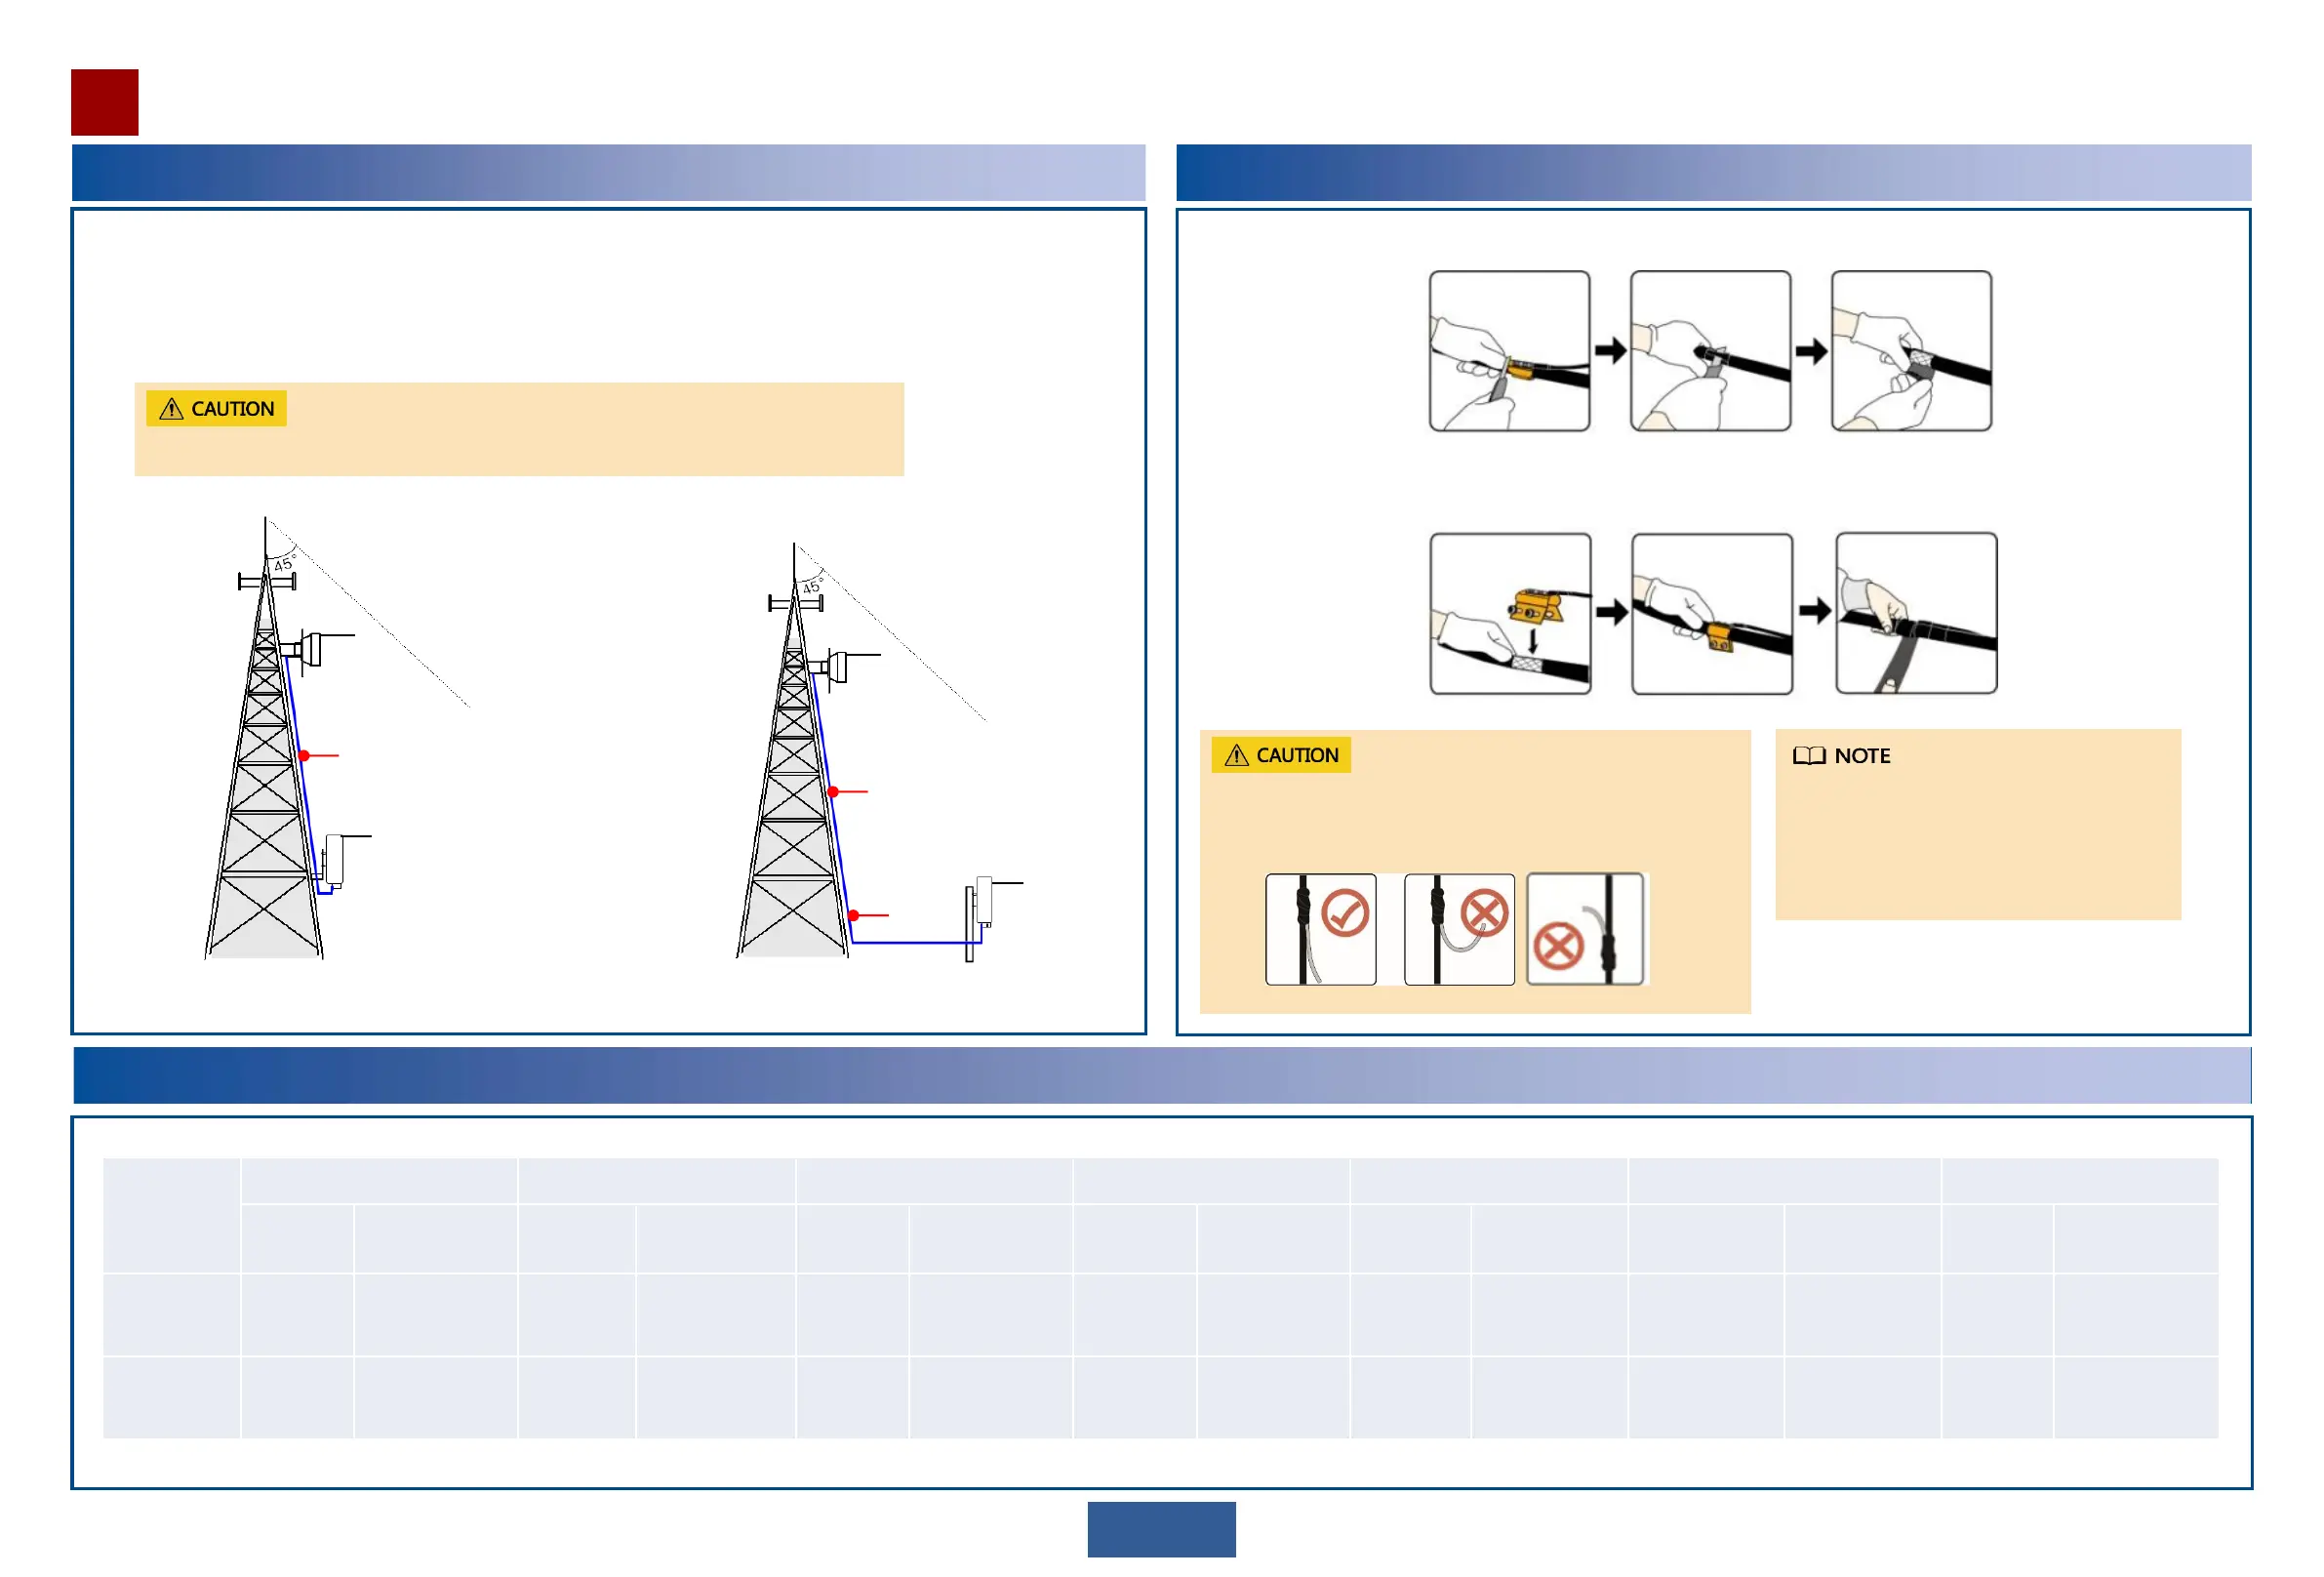
Select ground points for the IF cable.
Ground the IF cable at the following positions:
1. (Optional) Middle of the cable on the tower if the cable section on the tower is longer than 60 m
2. About 1 m before the cable leaves the tower and runs toward the outdoor cable tray
OAU 2F
ODU
ODU
OAU 2F
1
2
1
17
Selecting ground points
If the IF cable is longer than 60 m, one more ground point is required for every extra 30 m.
Mapping Between the OAU 2F and the PIs
Device Type
PI-DC B10 PI-DC B11 PI-DC A10 PI-DC A11 PI-AC B20 PI-DC B20 PI-DC B21
(Yes/No)
Power Supply
Mode
OAU 2F
(DC option)
No - No - No - No - Yes DC No - No -
OAU 2F
(P&E option)
No - No - No - No - Yes Force mode only Yes Force mode only Yes Force mode only
Installing a ground clip
Install and waterproof the ground clip. (See the appendix for the waterproofing method.)
Use a box cutter to strip off a section of the cable sheath. Take care not to damage the shield layer.
If a ground clip is installed on a thin cable,
secure the ground clip by using the binding
wire delivered with the ground clip.
For details about how to install ground clips,
see the use instructions delivered with the
ground clips.
Ensure that the angle between a PGND cable and a power cable is
15 degrees or less. If the power cable is routed vertically, route the
PGND cable from the top downwards. Do not route the ground
cable upwards.
 Loading...