3
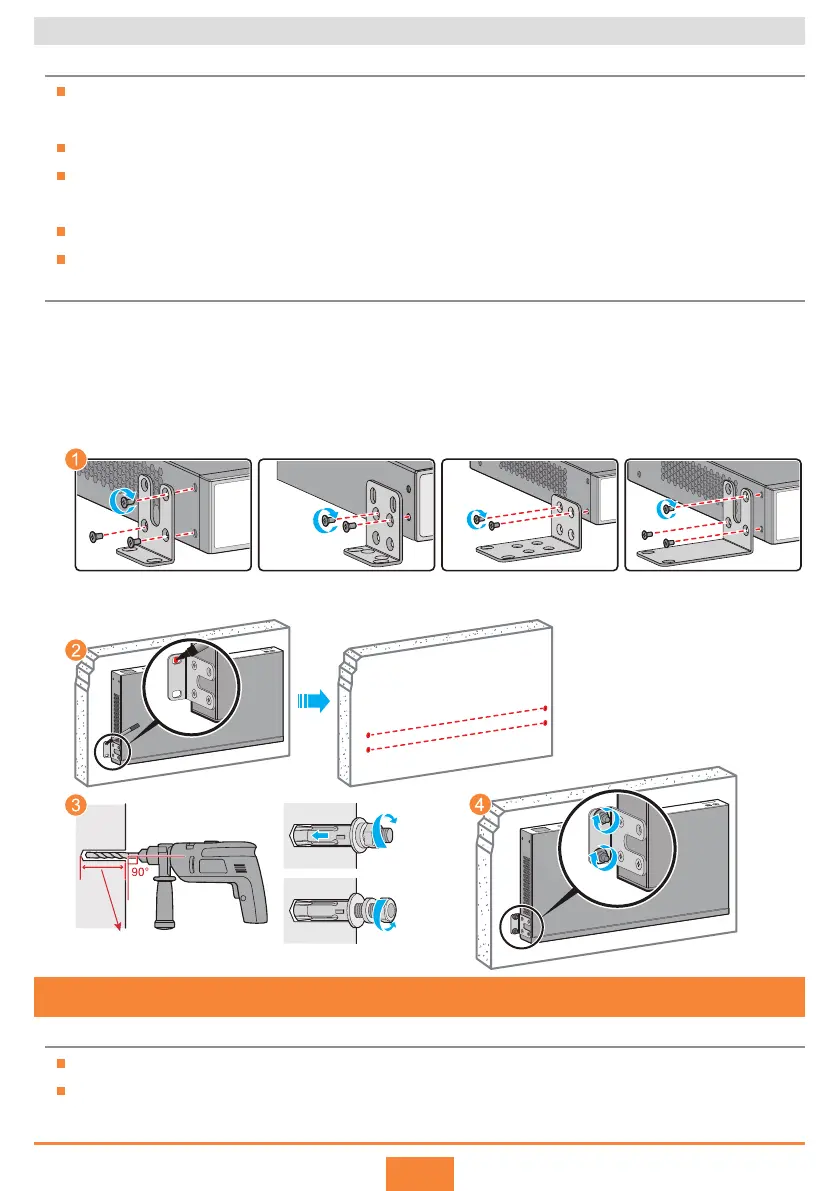
Installation Procedure
Step 1
Step 2
Step 3
Step 4
Before You Start
Scenario 3: Installing the Switch on a Wall
35 mm-40 mm
Installing mounting
bracket A
Installing mounting
bracket B
Installing the middle
mounting bracket
1
2
3
4
5
6
7
8
9
10
11
12
13
14
15
16
25
26
27
1G
27
1G
1G/STACK-5G
Installing a long mounting
bracket
5 Connecting a Power Cable
Huawei switches must use optical modules that have been certified for use on Huawei switches.
The jack next to the AC power socket is reserved for an AC terminal locking latch. The AC terminal
locking latch is not delivered with a switch.
Before You Start
To prevent injuries, ensure that there is no electrical wire at the locations to be drilled before drilling
holes in the wall.
The panel with ports must face down to protect the ports from water.
Ensure that there are no flammable or explosive materials near the switch and no obstructions within
100 mm around the switch.
The expansion bolts need to be purchased separately.
An S1700-16R switch is used as an example here to illustrate the wall-mounting procedure.
Fix mounting brackets to both sides of the panel with ports using M4 screws.
Use a marker to mark the positions of mounting holes according to the size of the chassis and
positions of the mounting ears.
Install the expansion bolts in the wall.
Install the chassis on the wall.
 Loading...