Rev 1.0 8/16
press a “Number” key and then the “Enter” key. To leave “Clear”
mode, press the “Esc” key.
Send camera to its “Home” PTZ Position
o Press the “Home” key. Note: When in Pelco-P or –D, this button
will call preset 0, instead of Home. Pelco-P and –D do not provide
for a “Home” position. You must first set preset 0 to use this
feature with Pelco)
Notes on using presets with VISCA:
For your convenience, the HC-JOY-G2 uses the same preset numbers
whether ‘set’, ‘called’ or ‘cleared’ via hand-held IR remote, VISCA, Pelco-P
or Pelco-D. This is in contract to Sony’s traditional offset of -1 between IR
remote commands and VISCA commands. If you are used to Sony’s
traditional method, you no longer need to make this adjustment.
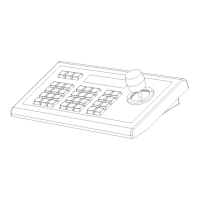
Keyboard/Joystick Configuration - LCD Menu
Go to Main Menu or Backup up one Menu Level
o Press “Esc” key to return to main menu. Note: Repeated presses
may be required depending on how deep you are in a menu.
Obtain Product Information
o Press the “Info” key.
o Use Joystick “Up” and “Down” to scroll through info (Model, Serial
Number, Keyboard ID, Key Sound setting).
Configure Keyboard/Joystick
o Press and Hold the “Setup” key for 3 seconds.
o Enter the password. “8888” is the default password.
o Press the “Enter” key.
Keyboard Menu
o “Set >>” Menu
o Move joystick “left” and “right” to select between 1(CAM) or
2(SYS)
o Press “Enter” key to confirm the choice.
o “SET >>CAM” : Menu
Move Joystick “left” and “right” or simply type camera ID to
select camera to configure.
Press “Enter” key to confirm the choice.
Move Joystick “up” and “down” to choose between setting
either the control protocol or baud rate settings.
 Loading...