ASSEMBLY FOR MIST BLOWER OPERATION
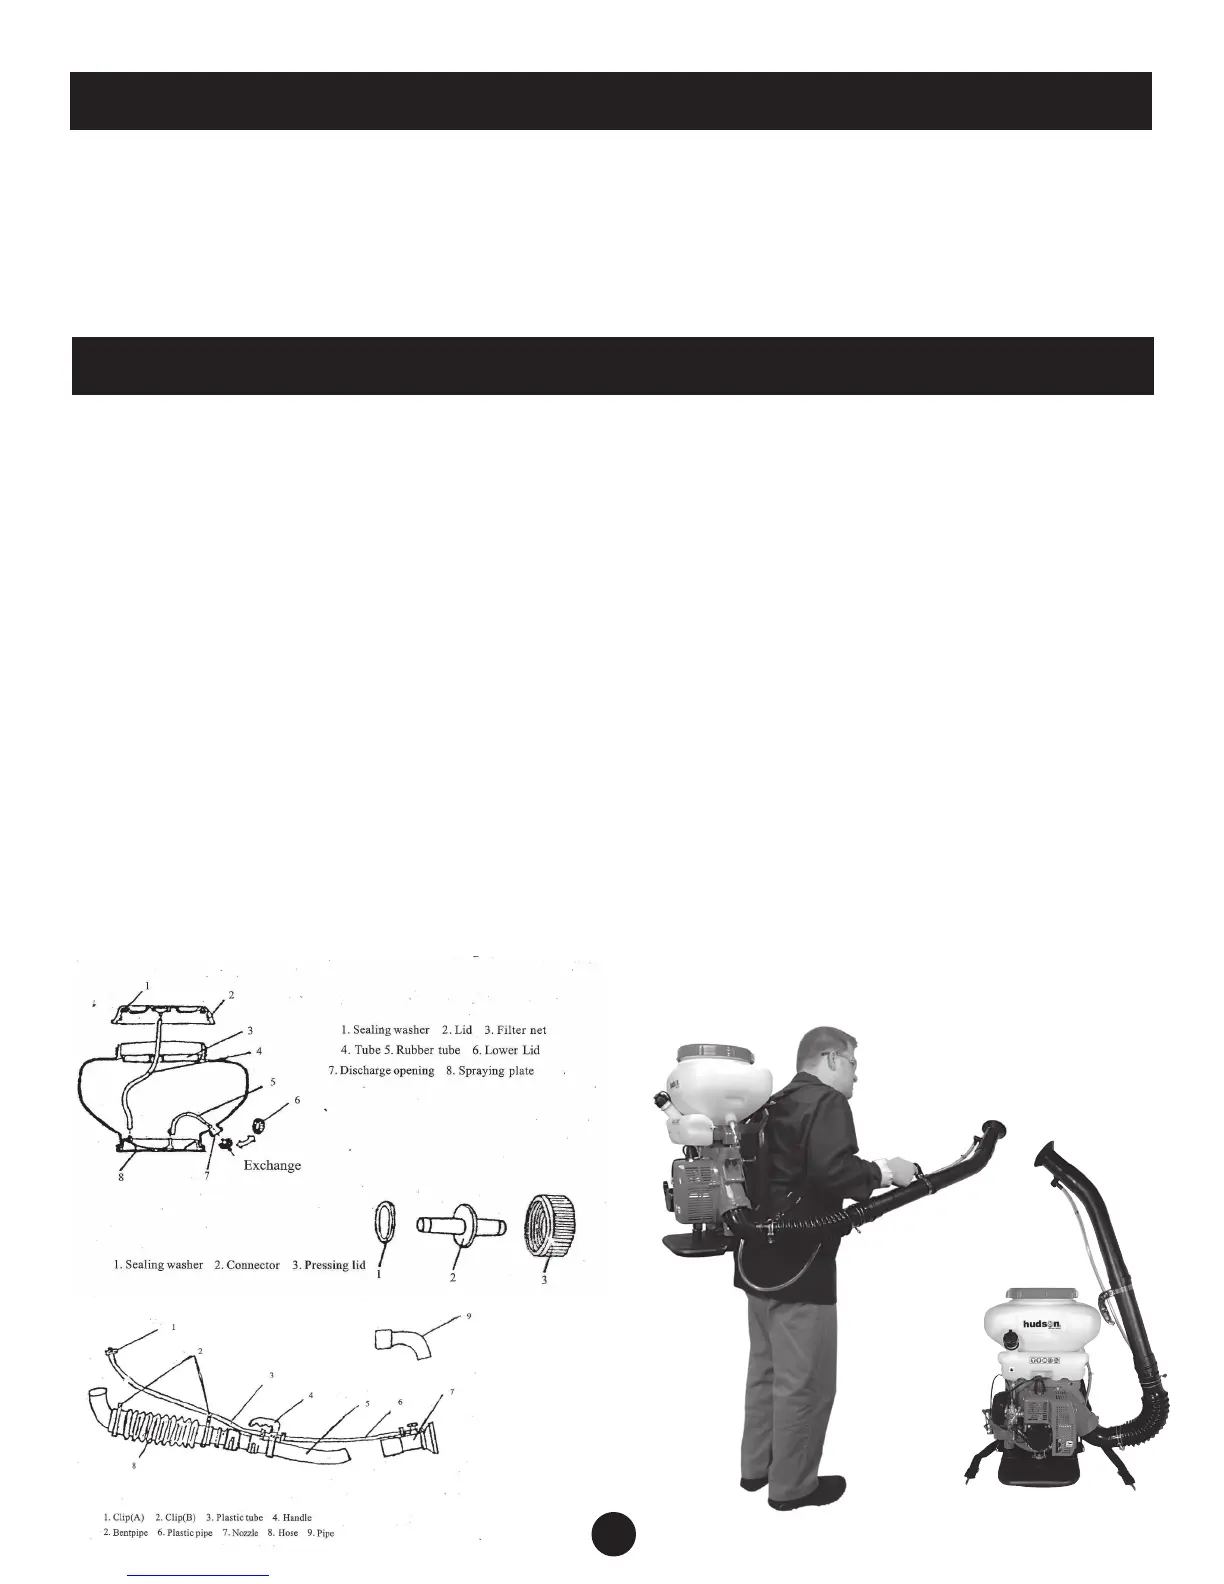
Changing spray plates.
Remove the filler cap from the tank. Remove the two 13mm hex nuts that hold the chemical
tank to the frame. Lift tank off the frame. Remove the dusting plate from frame and replace
with the spraying plate. There is an arrow molded on the spraying plate and it should point
toward the back of the engine.
Tank preparation.
Remove the tank plug and replace with hose connector, gasket, and retainer nut. Attach the
small black rubber hose to hose connector. The collared end of the hose should be attached
to the small pin on the spray plate. The open end of the hose should be placed over the spray
plate well. The clear air hose from the filler cap should be attached to the large barb on the
spray plate.
Hose preparation.
Loosen up the main tube thumb clamp. Insert the mounting plate of the fluid on/off switch
under the thumb clamp band. Retighten thumb clamp. Assemble the 17” bent discharge tube
to the main tube. Assemble the spray nozzle to the bent tube. Attach one end of the shorter
clear fluid hose to the inlet side of the on/off switch. Fasten with spring clamp. Attach the
other end to the hose connector on the tank. Fasten with spring clamp. Attach the longer clear
fluid hose to the outlet side of the on/off switch. Fasten with spring clamp. Attach the other
end to the spray nozzle. Fasten with the larger spring clamp from the tool kit.
INITIAL ASSEMBLY
Assemble the larger end of the flexible hose to the engine elbow with a thumb clamp. The 16”
main tube comes next. The smooth end of the main tube with 4 internal ribs is inserted into
the small end of the flexible hose and secured with a thumb clamp. Slide the metal band of the
handle onto the main tube. Slide your arms through the shoulder straps and lift sprayer onto
your back. Adjust straps for comfort. Set the handle in a comfortable position and tighten the
screws.
3