32 TRANSMISSION—OVERDRIVE
Where the ball bearing in the adapter requires replace-
ment, remove the large snap ring in the bearing adapter.
Tap out the main shaft and bearing from the adapter.
Remove the oil baffle from the adapter. Then remove the
main shaft snap ring and press the bearing from the main
shaft.
Removing the Clutch Shaft
Remove the clutch shaft from the rear of the transmission
case and remove the 14 needle bearings and oil baffle.
Removing Countershaft and Reverse Idler Gears
The countershaft and reverse idler gear shaft are a press
fit into the case. They are also locked into position at the
rear by Woodruff Keys.
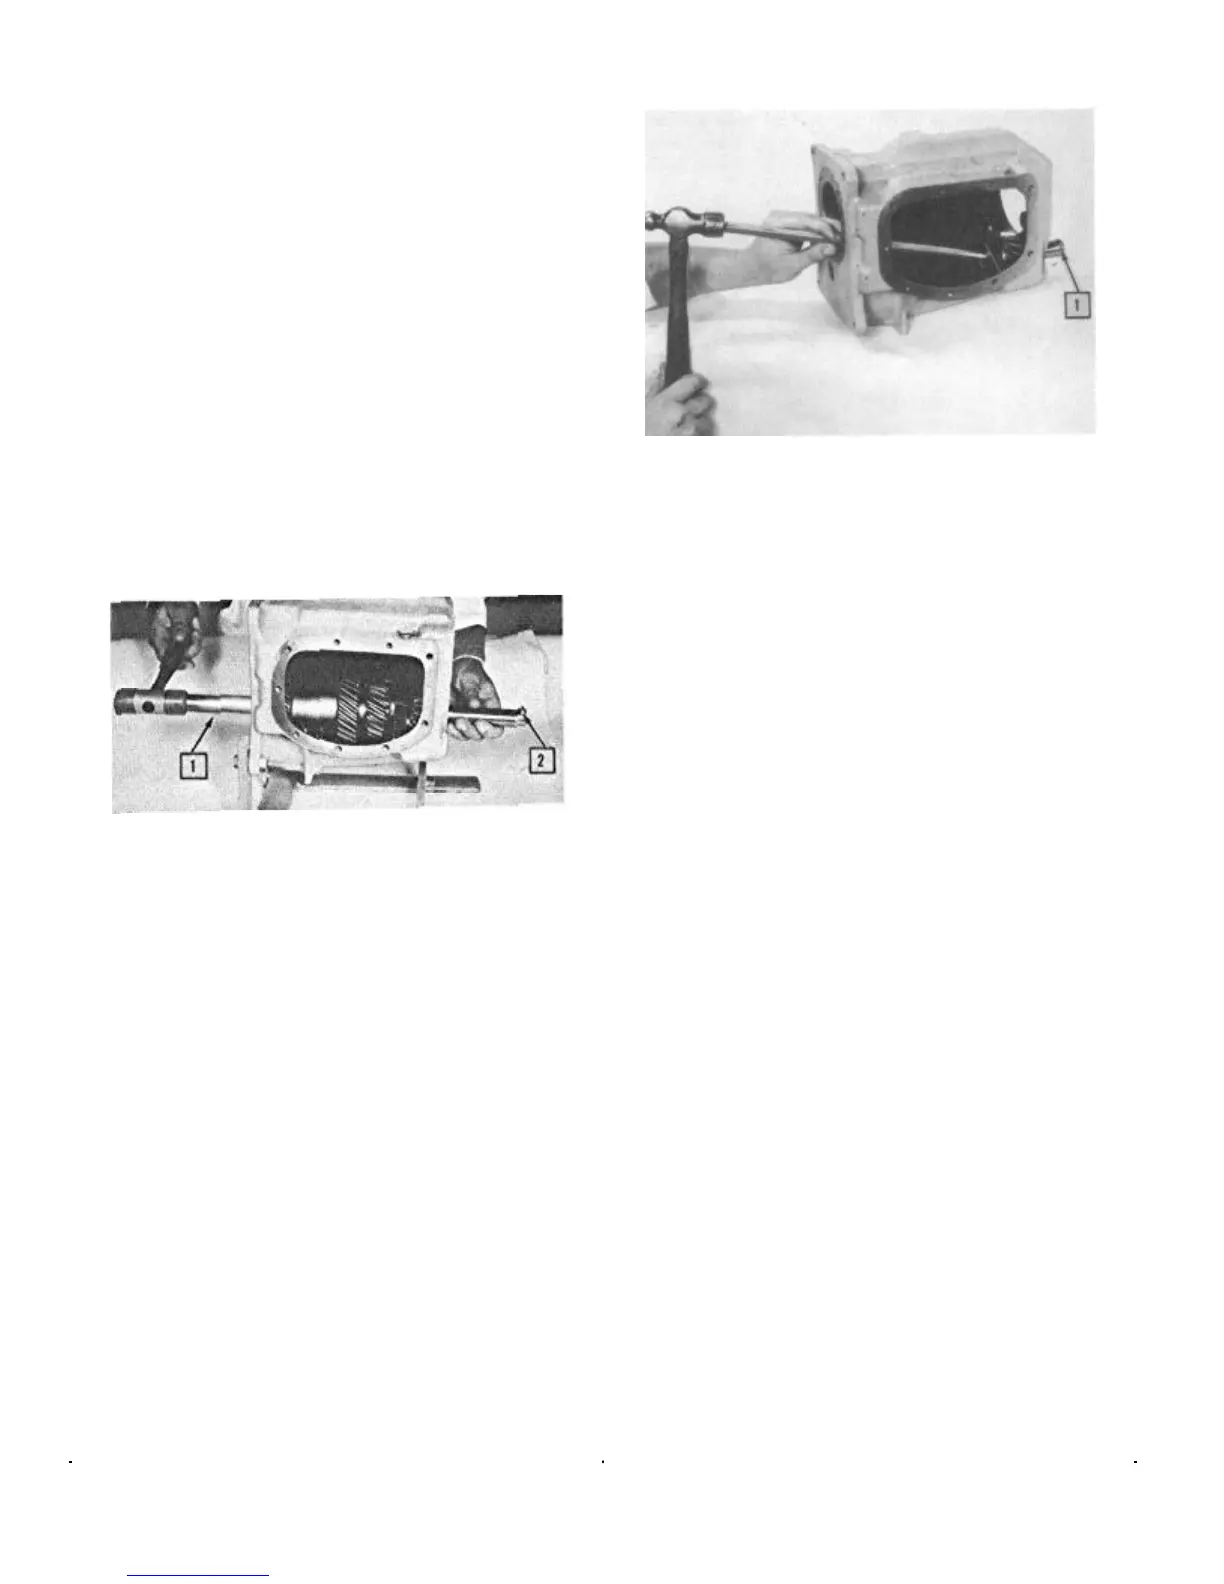
To maintain the position of the 80 needle bearings in
the countershaft gear, drive the countershaft out of the
rear of the case using a dummy shaft machined to .870" x
81/B" (Fig. 26).
1. Dummy Shaft 2. Woodruff Key
FIGURE 26—Removing Countershaft
With the countershaft removed, the countershaft gear
will drop to the bottom of the case. The countershaft gear
with needle bearings, spacer, washers, and thrust washers
may then be removed through the rear of the transmission
case as an assembly. If necessary, disassemble for inspec-
tion and parts replacement.
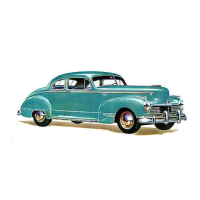
With the use of a brass drift, knock out the reverse
idler gear shaft through the rear of case (Fig. 27).
CLEANING AND INSPECTING PARTS
With the transmission completely disassembled, all parts
should be carefully cleaned so that they can be thoroughly
examined.
Gears
Wash all gears in a cleaning solution. Inspect for worn or
chipped teeth. Slide each gear onto a new shaft. If it
appears to be loose, it must be replaced.
NOTE: Whenever any transmission gear re-
quires replacement, the gear with which it
meshes should be replaced also.
1. Woodruff Key
FIGURE 27—Removing Reverse Idler Gear
Bearings
Bearings must be handled with great care. Wrap them in
a clean cloth or paper until they can be washed.
To wash a bearing, submerge it in a cleaning solution
that is absolutely free of dirt and rotate it to flush away all
oil and dirt. Dry the bearing with care.
Carefully examine each bearing for cracked races,
worn, or scored balls.
Main Shaft
Install the gears onto the main shaft to be sure they slide
on and off easily. The should fit smoothly without exces-
sive play between the splines. If the fit is tight, look for
burred edges on the splines.
Synchro-Clutch and Friction Rings
Carefully inspect the synchro-clutch and friction rings.
Slide the rings on the cones of the second speed gear and
the clutch shaft. Replace rings if there is excessive wear
on the taper.
Transmission Case
Examine the surfaces of the bearing recesses in the trans-
mission case for wear or scoring which indicates that the
bearing has been revolving in its housing. Examine the
case for cracks or other defects.
Be certain that all parts of the case are thoroughly clean
before and during assembly.
Clutch Housing.
Examine the housing for cracks or other defects.
Check the rear face of the clutch housing with a dial
indicator. The total run-out should not exceed .005".
The total run-out of the clutch housing bore should not
exceed .003".
 Loading...