11
42699-01 • 06/30/10 • Hunter Fan Company
11
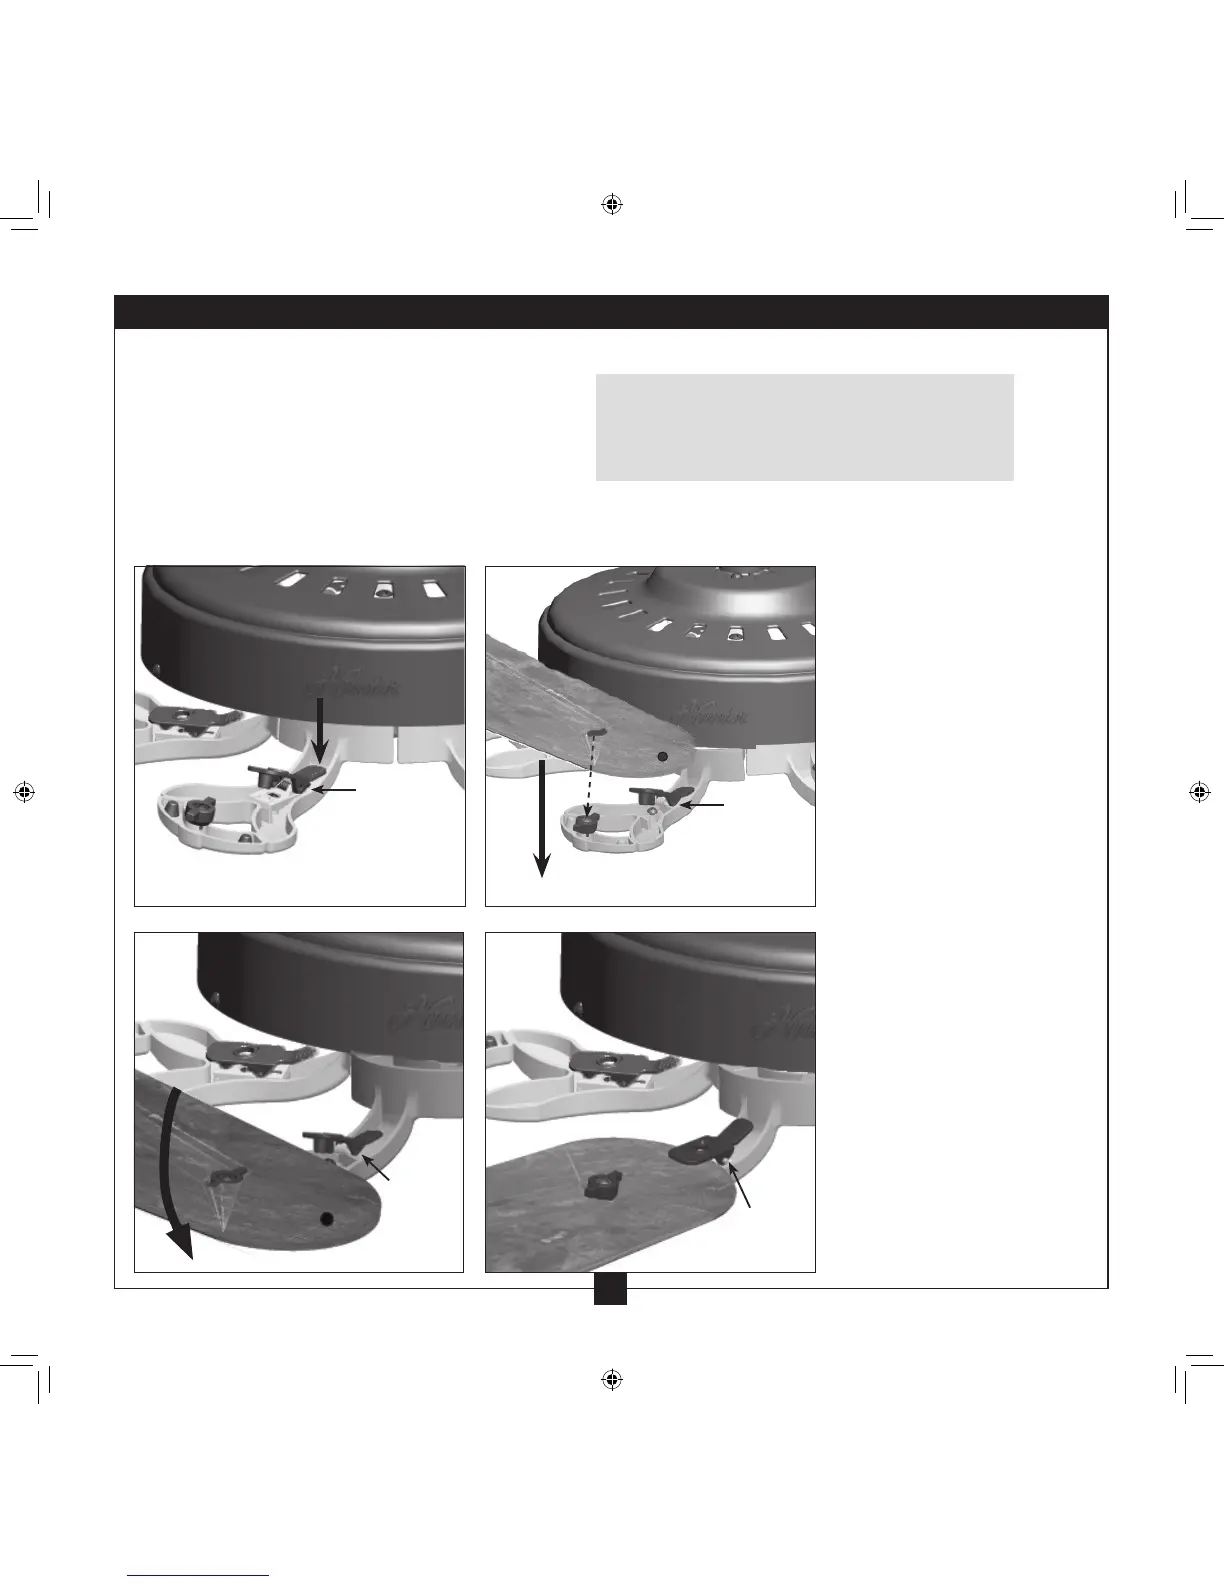
Our blade assembly enables you to lock the blades in place without tools and to remove the blades easily for
cleaning.
6-1. Open the locking mechanism.
6-2. Align the hole in the blade with the blade iron.
6-3. Rotate the blade until you hear the locking mechanism pop into place
6-4. Repeat steps 6-1 through 6-3 until all blades are installed.
Step 6-1
Open
Locking
Mechanism
Step 6-3
Locking
Mechanism
Step 6-3
Locking
Mechanism
Step 6-2
Locking
Mechanism
Note: e blades may appear loose being
locked into place. is leeway helps to
reduce noise and enhance Hunter’s quiet
performance.
Note: e blades on this fan
have been treated with Hunter’s
Dust Armor protection, making
the blades less likely to attract
dust and dirt. Use a dry or
slightly damp lint free cloth
to clean the blades. Do not
use a furniture polish or any
other cleaners that leave any
residue, as they will damage the
protective Dust Armor on the
blades.
6 • Assembling the Blades