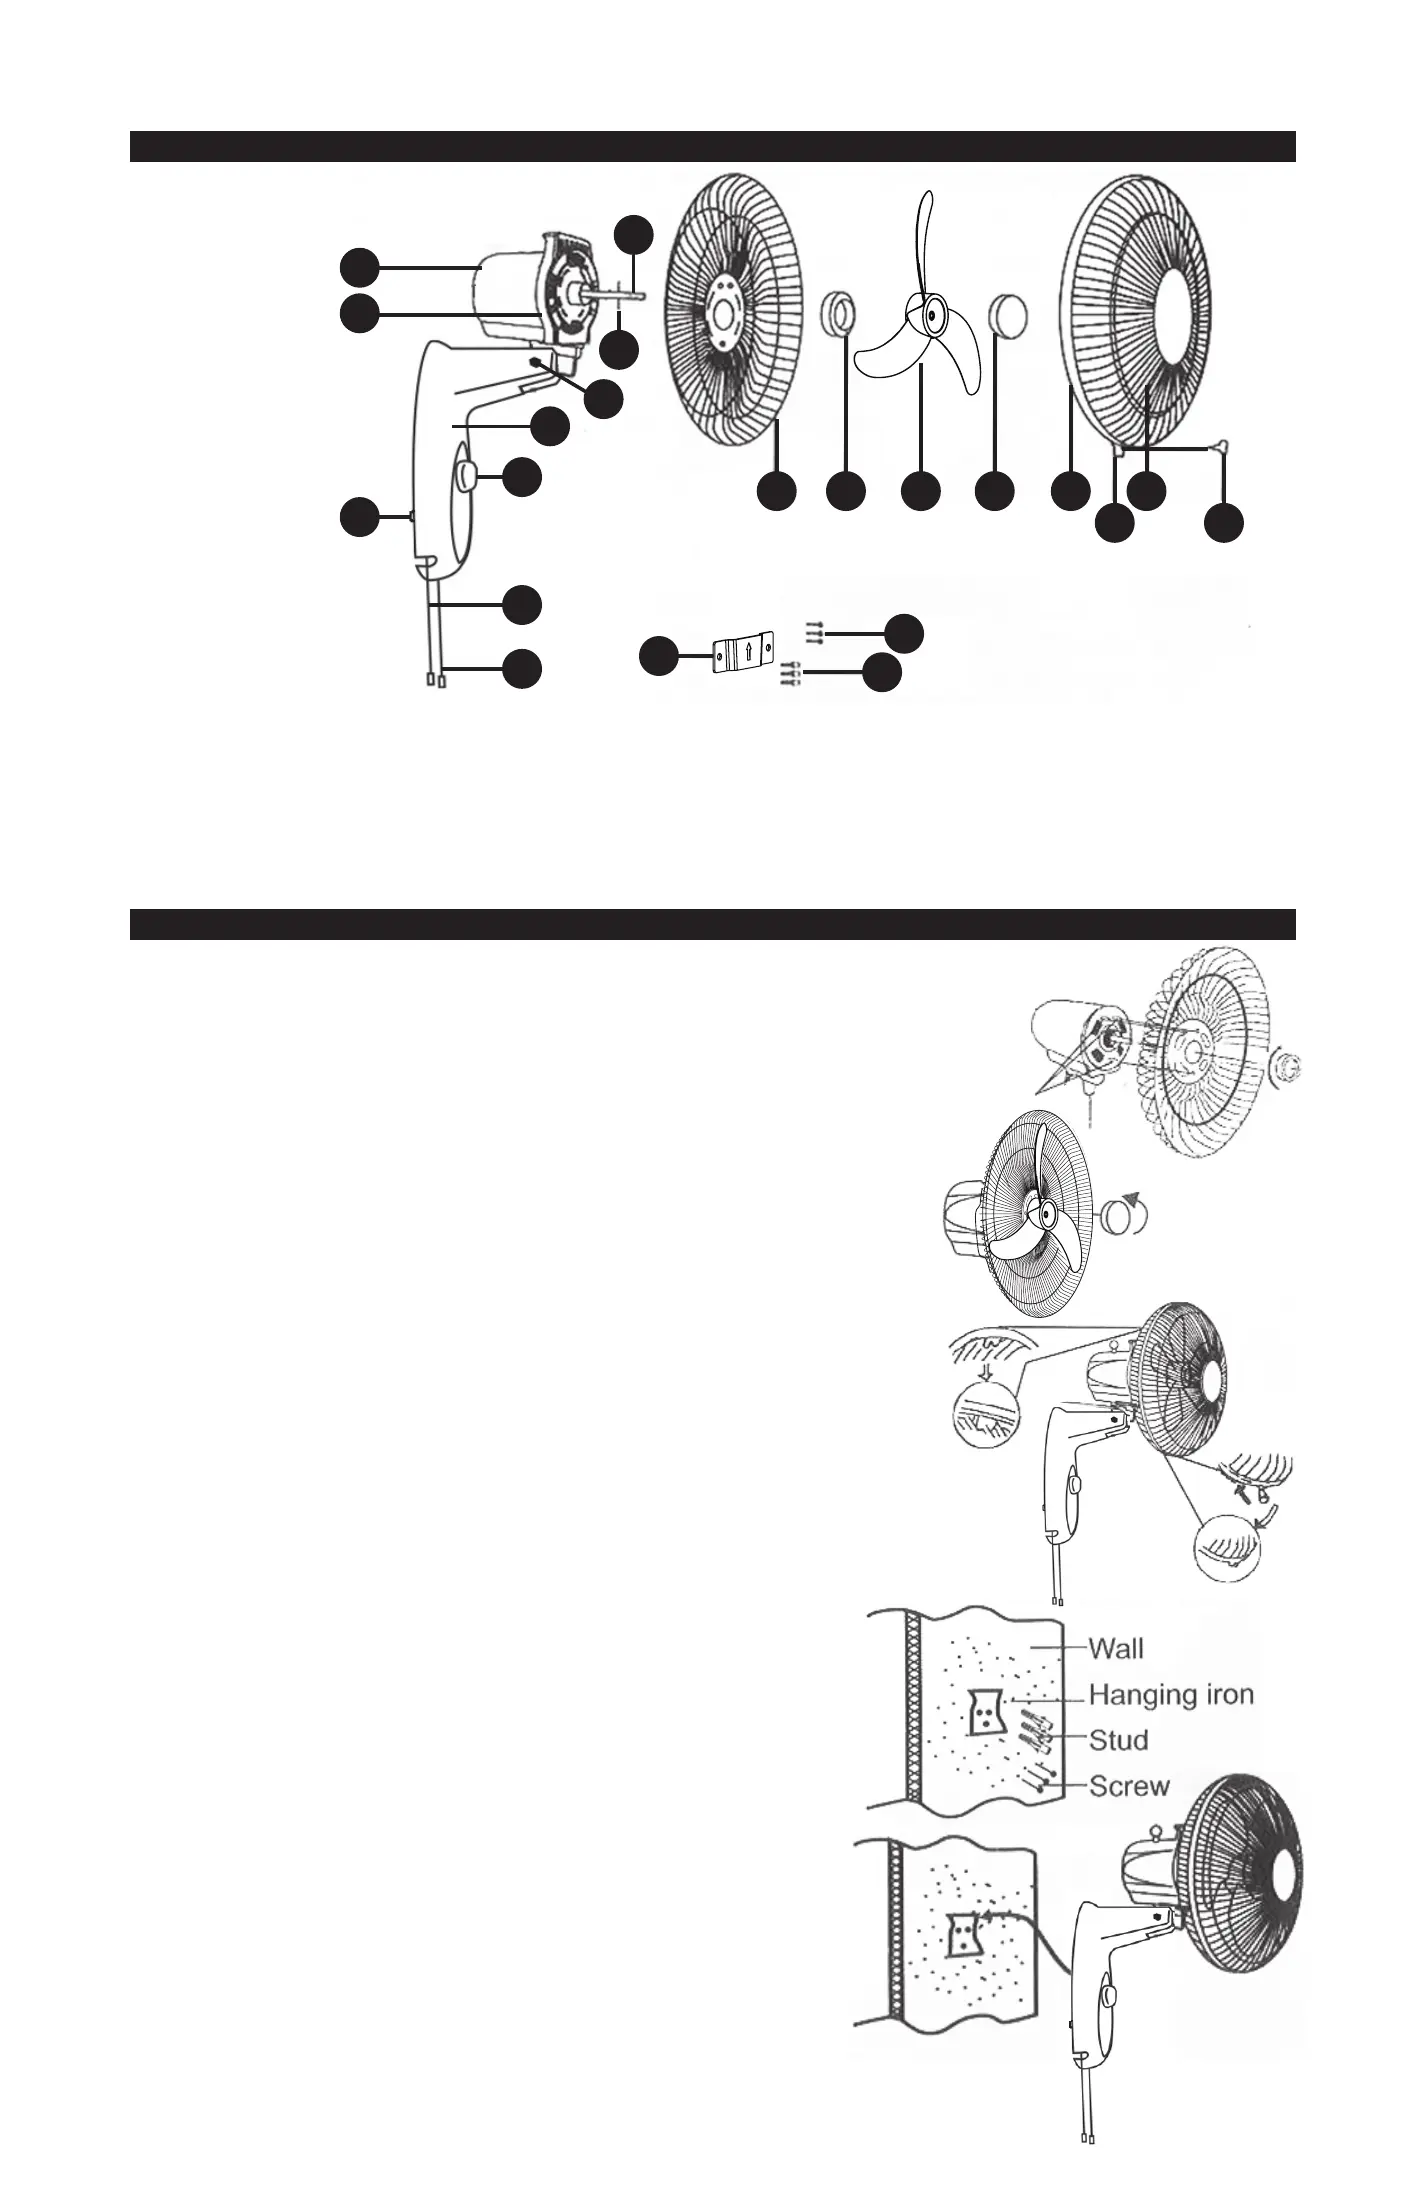
COMPONENTS
ASSEMBLY
Follow these assembly instructions carefully.
1. Rear guard assembly
• Turn blade cap clockwise and remove. Turn guard
lock counterclockwise and remove.
• Install the rear guard by aligning it with the
three posts on the front motor cover.
• Secure rear guard with the guard lock.
2. Fan blade assembly
• Slide fan blade onto motor shaft. Rotate fan
blade down onto the shaft stop.
• Rotate blade cap counterclockwise onto motor
shaft to attach fan blade securely.
3. Front guard assembly
• Align front guard onto rear guard. Slide guard
ring onto both the front guard and rear guard.
• Tighten guard clip screw into guard ring to secure
the front guard and Rear guard together.
4. Hanging iron installation
• Find where the stud is in the wall and
drill holes.
• Fasten the hanging iron securely to the
wall with the supplied screws.
• NOTE: For cement walls, please contact
your local hardware store for an
appropriate fastener.
5. Fan installation
• Hang fan on wall by sliding metal
hanger on the back of the fan down
onto hanging iron.
HOW TO REMOVE FRONT GUARD
• Loosen guard clip screw.
• Carefully pull off guard ring and front guard
to access fan blade.
OPERATING FEATURES
SPECIAL PRECAUTIONS
Make sure the
outlet voltage
complies with
specifications
on the fan.
Do not bend or pull power cord with
force. Check power plug and cord for
damage
before using.
To avoid shock,
make sure hands
are dry before
unplugging or
plugging in the
power plug.
Do not use fan
before it has
been completely
assembled.
Do not place fan in
contact with curtains
or where fan can not
work properly.
Do not use fan in an
environment with a
temperature of more
than 104˚F. Fan may overheat
and fail to work properly.
Do not leave children unattended
with fan and don’t allow fan to blow
directly on anyone for too long.
Do not spray insecticide, any
type of resin or paint into fan
as it will result in damage.
1
2
6
8
7
11
3
5
12 14 15 16
17 18
19
12 Guard lock
13 Fan blade
14 Blade cap
15 Guard ring
1 Rear motor cover
2 Front motor cover
3 Motor shaft
4 Rotor pin
5 Swivel screw
6 Base cover
7 Leg
8 3-speed dial
9 Speed switch pull
10 Oscillation switch pull
11 Rear guard
16 Front guard
17 Guard clip
18 Guard clip screw
19 Hanging iron
20 Hanging iron screw
21 Stud
4
9
10
20
21
Pull oscillation cord once for oscillation.
Pull oscillation cord again to stop oscillation.
The fan can
be angled
up or down
incrementally.
Pull speed cord to
change speeds and
turn off.
This fan
has 3 fan
speeds
13
 Loading...