Assembly (continued)
8
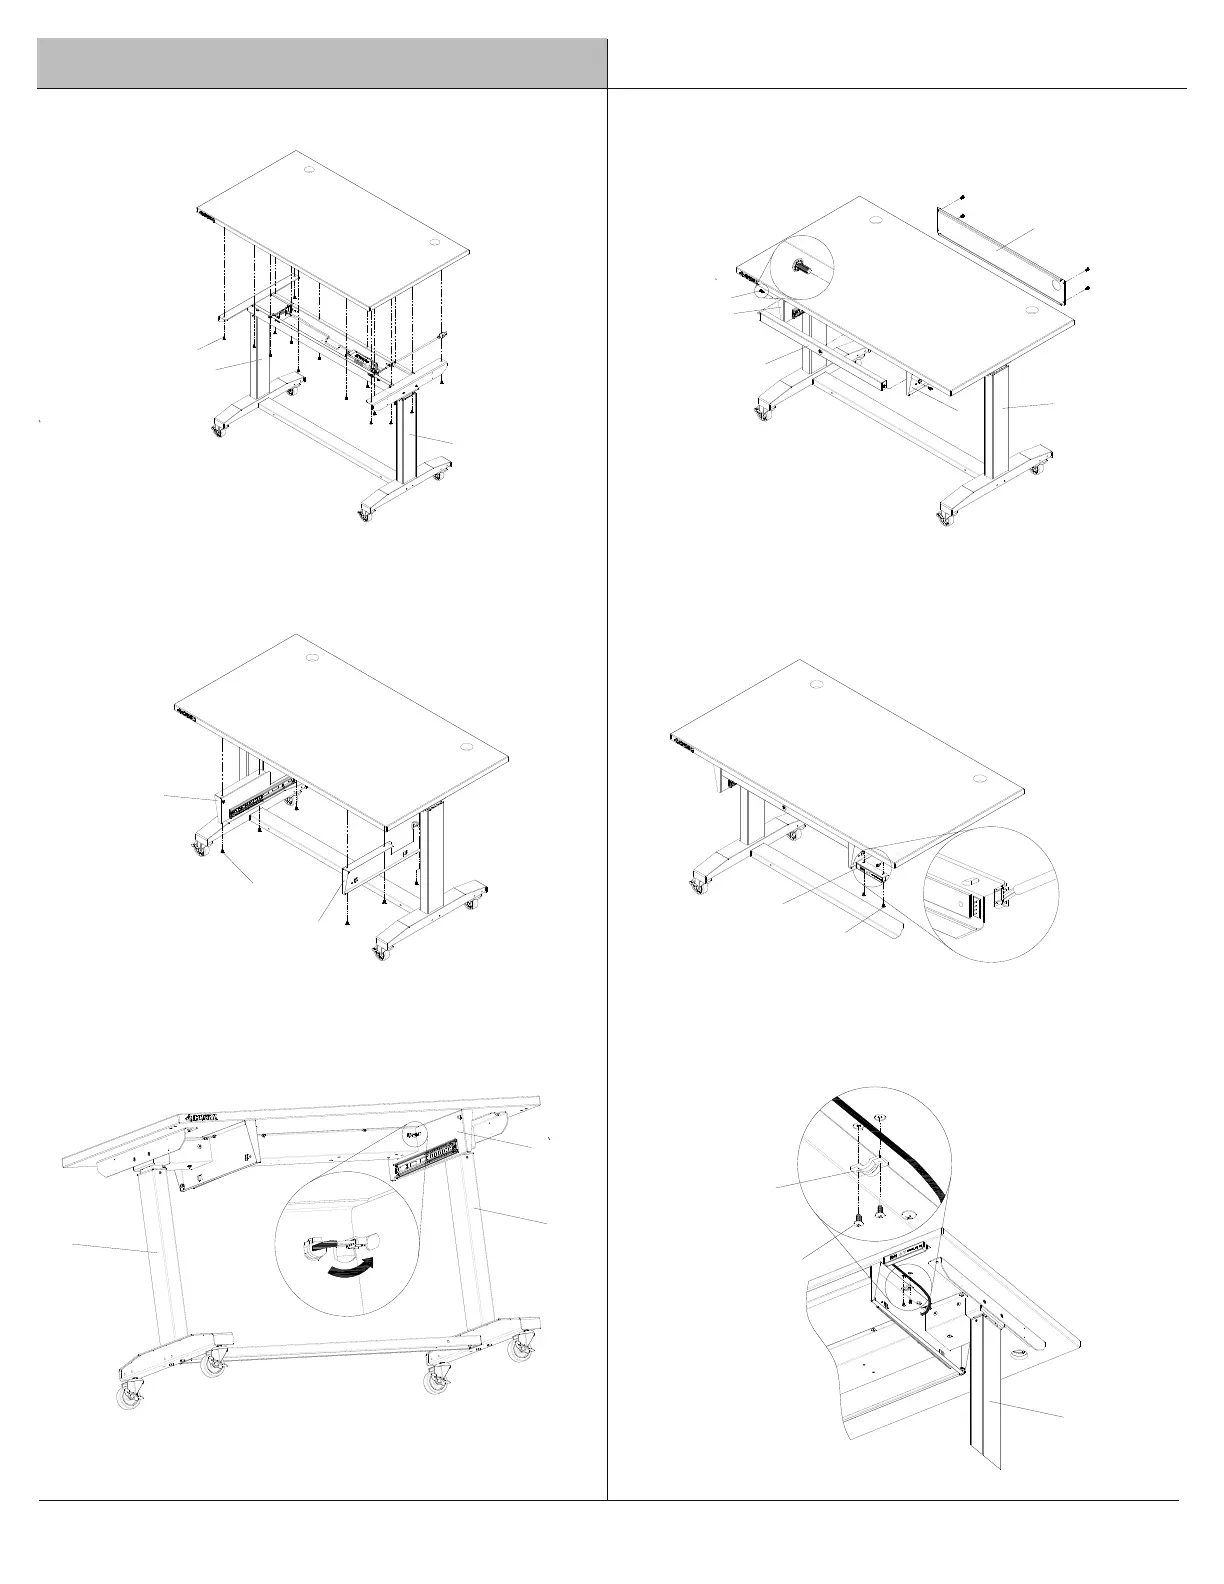
9. Attach the wood top (A) to the leg frame with sixteen M6 x 15L
screws (AA).
10. Attach the drawer side panel (D) and (H) to the wood top (A)
with six M6 x 15L screws (AA).
11. Insert the wire for control button set through the hole on drawer
side panel (H).
12. Attach the front panel (F) and back panel (N) to the drawer side
panels (D) and (H) with six M6 x 15L screws (CC).
K
B
AA
A
A
K
B
H
CC
F
K
N
D
H
13. Attach the control button set (P) to the wood top (A) with two
M6 x 15L screws (AA). Connect the wire to the hole in the back
of control button set.
14. Attach the wire clip (O) to the wood top (A) to fix wire with two
M4 x 10L screws (BB).
K
O
BB
A
P
AA
AA
D
H