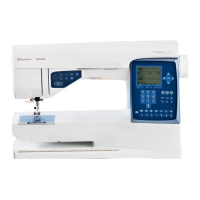
Do you have a question about the Husqvarna Viking Lily 540 and is the answer not in the manual?
| Type | Electronic |
|---|---|
| Maximum Stitch Width | 5 mm |
| Maximum Stitch Length | 4 mm |
| Buttonhole Styles | 1-Step |
| Feed System | Drop Feed |
| Bobbin Type | Class 15 |
| Needle Threader | Yes |
| LCD Screen | No |
| Speed Control | Yes |
| Free Arm | Yes |
| Accessories Included | Seam Ripper, Screwdriver, Bobbins |
| Presser Feet | All-Purpose Foot, Zipper Foot, Buttonhole Foot |
To reduce the risk of electric shock.
To reduce the risk of burns, fire, electric shock, or injury to person.
Instructions for winding a bobbin while the machine is threaded.
Procedure for winding a bobbin using a vertical spool pin.
Visual examples and explanations of proper and improper thread tension.
Setting the needle to stop up or down in the fabric.
Using the STOP button to fasten thread and end a stitch.
Tying off stitches at the beginning or end of a seam.
How to delete programmed stitches.
Combining stitches and letters from different menus.
Adjusting stitch length, width, or mirroring.
Changing or replacing stitches/letters in a program.
Applying mirror image side-to-side and end-to-end.
Using STOP to automatically end stitch programs.
How to view programmed stitches and letters.
Removing individual stitches or entire programs.
Connecting and using the buttonhole sensor foot.
Changing stitch density for buttonhole columns.
Sewing buttonholes to match specific button sizes.
Step-by-step process for sewing buttonholes.
Instructions for sewing buttons with two or four holes.
Technique for sewing buttons with a shank.
Using zipper foot E for sewing zippers.
Checking the needle for proper insertion and condition.
Addressing unattractive stitches due to tension or threading.
Diagnosing and fixing upper and bobbin thread breaks.
Resolving irregular thread tension and bobbin winding.
Resolving problems with the machine not feeding fabric.
