Do you have a question about the Husqvarna WS220 and is the answer not in the manual?
Illustrations and explanations of safety symbols found on the machine.
Details the three levels of warning messages (WARNING!, IMPORTANT!, CAUTION!) used in the manual.
Welcome message and introduction to Husqvarna products and services.
Outlines owner's duties regarding operator training, safety, and manual understanding.
States limitations regarding manual information updates and product design modifications.
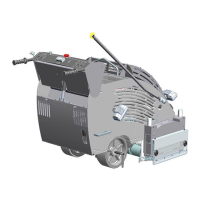
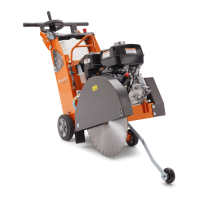
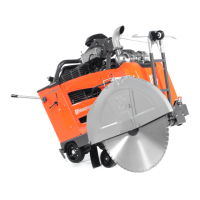
Describes the WS 220 wall saw, its capabilities, and key design aspects for user-friendliness.
Lists specific features of the WS 220, including remote control, short blade-to-track distance, and blade brake.
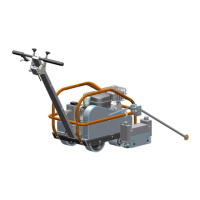
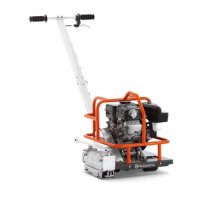
Details the components included in the complete sawing system, stored on a compact transport trolley.
Identifies and lists all numbered parts of the wall saw system shown in the diagram.
Overview of machine safety equipment, its purpose, and necessary checks and maintenance.
Instructions for checking blade guard function, adjustment, and locking mechanisms.
Ensuring correct mounting and assembly of rails, wall mounts, and power pack safety features.
Description of the remote control's stop button function for halting the saw unit.
Details essential personal protective equipment (PPE) and other safety gear required for operation.
Basic safety directions for machine use, emphasizing manual reading, training, and avoiding unsafe conditions.
Guidelines for safe electrical practices, avoiding shocks, and proper cable management.
Ensuring a safe working environment: checking utilities, securing the area, and excluding personnel.
Advisories on operator concentration, avoiding distractions, and safe lifting practices.
Instructions for proper use, maintenance, and care of the machine and its components.
Procedures for safely transporting and storing the equipment and its components.
Pre-sawing checks including site manager consultation, area safety, and utility checks.
Guidance on selecting appropriate diamond blades based on material and cut depth.
Step-by-step guidance on fundamental working techniques for efficient and safe sawing.
Recommendations on adjusting cutting depth and feed speed for optimal performance and blade life.
Procedures and considerations for cutting large blocks, including support and securing methods.
Visual guide demonstrating a suitable work procedure for sawing with a 3-section division.
Step-by-step guide to assembling the wall bracket components.
Instructions for marking and fitting the wall mounts onto the rail and wall.
Procedure for mirroring wall brackets to improve access to locking screws.
Detailed steps for connecting multiple rail sections using splice connectors and ex-center bolts.
Instructions on assembling the rail onto wall brackets, ensuring correct alignment and tightening.
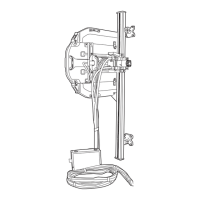
Diagram and list identifying the various parts of the saw unit.
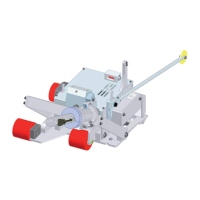
Procedure for securely mounting the saw unit onto the assembled rail system.
Step-by-step guide for correctly fitting the diamond blade onto the saw unit.
How to adjust the blade angle against the concrete surface using wall bracket screws.
Instructions for assembling the three sections of the blade guard.
Procedure for mounting the assembled blade guard onto the saw unit.
Steps to align blade guard runners with guide tracks and push the guard over the blade.
Connecting the water hose between the saw body and the guide flange for water cooling.
Instructions for setting up the saw for flush cutting, including blade attachment and wall bracket adjustment.
Detailed steps for connecting the power unit, saw unit, and remote control.
Essential checks to perform before operating the machine, including safety and mounting verification.
Explanation of the remote control's functions for blade rotation, feed, and arm feeding.
Steps to activate the power unit and remote control to start the sawing operation.
How to select and change the blade's direction of rotation via the remote control.
Guidance on performing guide cuts, subsequent cuts, and depth adjustments.
Procedures for safely stopping the saw unit and turning off the power unit.
Instructions for safely dismantling the saw, cleaning components, and storing them.
Information on required servicing, including scheduled maintenance and dealer contact.
Routine checks and cleaning tasks to be performed daily for optimal machine performance.
Procedure for adjusting guide wheels to ensure stable and straight cutting.
Steps to adjust the blade guard guide rollers for even running and proper blade centering.
Key technical specifications of the WS 220, including weight, dimensions, and power.
Table and warning regarding recommended blade speeds for different blade sizes and materials.
Detailed diagrams showing the physical dimensions of the saw unit and its components.
Details the terms, conditions, and procedures for making warranty claims.
Outlines the warranty period and coverage for Husqvarna equipment and components.
Lists items and conditions not covered by warranty, and common wear items.