USER MANUAL - L6A, L6P, LS18A & LS218A POWERED LINE ARRAY
PAGE 11PAGE 10
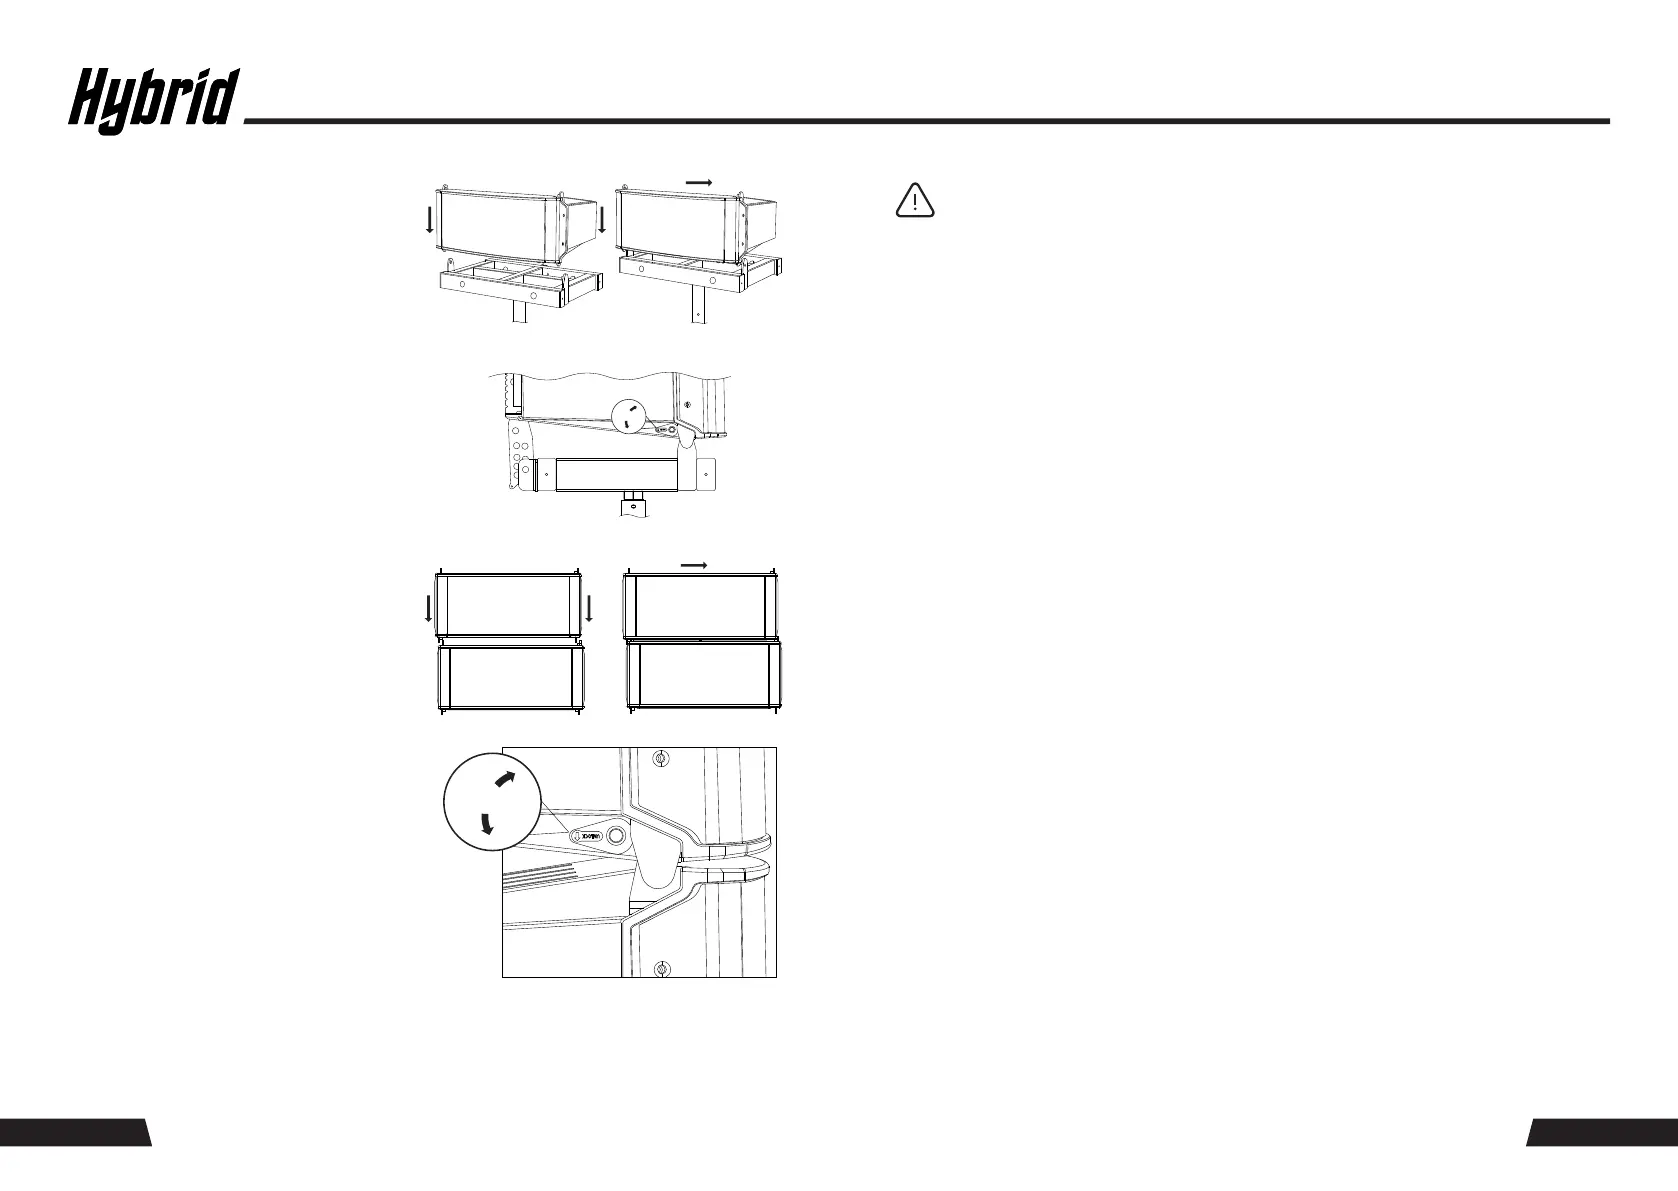
LOCK
UNLOCK
4:
5:
6:
Splay Bar
Fly Frame
L6F
L6F
L6A L6A
Locking Machnism - Locked Postion
L6A L6A
L6P L6P
Locking Machnism - Locked Postion
Align the front-end rigging holes of the
Hybrid L6A with the front-end rigging holes
of the L6F fly frame. Slide the L6A cabinet to
the right until the units are correctly coupled.
Activate the locking mechanism located on
the front end of the L6A.
Lift the rear of the L6A cabinet and align the
desired angle of the integrated splay bar
with the fly frame using the quick-release
self-locking pins attached to the L6A.
Align the front-end rigging holes of the
Hybrid L6P with the front-end rigging holes
of the L6A. Slide the L6P cabinet to the right
until the units are correctly coupled. Activate
the locking mechanism located on the front
end of the L6P.
Connect the audio source (mixer or other source) to the LS18A XLR input connector using
a balanced XLR–XLR audio cable (not supplied). Then, using the supplied 2m balanced line
XLR–XLR input cable, connect the LS18A link XLR to the L6A input XLR (#8).
TIP: It is recommended to make all input and loop-though connections before
powering up your system and to mute the input signal from the audio source. This
will avoid unexpected “thumps” when powering up your system and prevent abnormal
high input signals that may overload your speaker. Furthermore, it is advisable to
always use balanced line inputs as opposed to unbalanced inputs, ensuring a +6dB
gain structure and noise reduction throughout your system.
7:
8:
9:
Using the Speakon cable supplied with the L6P, connect the L6A speaker output (#4) to the
L6P speaker input.
With the 2m Powercon link mains cable supplied with the L6A, connect the LS18A mains
output to the L6A mains input (#1).
Connect the LS18A to the mains outlet using the Powercon mains cable supplied with
the LS18A and then power up the LS18A and L6A powered speakers by switching the power
switches ON (#2).
LOCK
UNLOCK
10: Test the system by applying an input signal via the mixer or other music source at a low
volume. Ensure that all speakers are functional before increasing the volume to the desired
SPL.
Lift the rear of the L6P cabinet and align the
desired angle of the L6A integrated splay bar
with the fly frame using the quick-release
self-locking pins attached to the L6A.
Preset 5 – CURVED; MID -6dB EQ, BASS and TREBLE +3dB: ground stack, club genre
PRESET GUIDE
Preset 1 – FLAT; 0dB: flown applications, near field
Preset 3 – CURVED; MID -3dB EQ, BASS and TREBLE 0dB: ground stack, vocals/live/rock
Preset 4 – CURVED; MID -3dB EQ, BASS and TREBLE +3dB: ground stack, club genre
Preset 2 – FLAT; +3dB: flown applications, far field
11: Choose the desired preset for the genre of music/application by pressing the preset selection
switch (#7) located on the rear panel of the L6A.
PAGE 11PAGE 10
 Loading...