USER MANUAL - L6A, L6P, LS18A & LS218A POWERED LINE ARRAY
PAGE 17PAGE 16
It is recommended that the hoist and shackles that are used for suspending the line array be
rated with an 8x safety margin of total load for indoor applications and a 16x safety margin of
total load for outdoor applications.
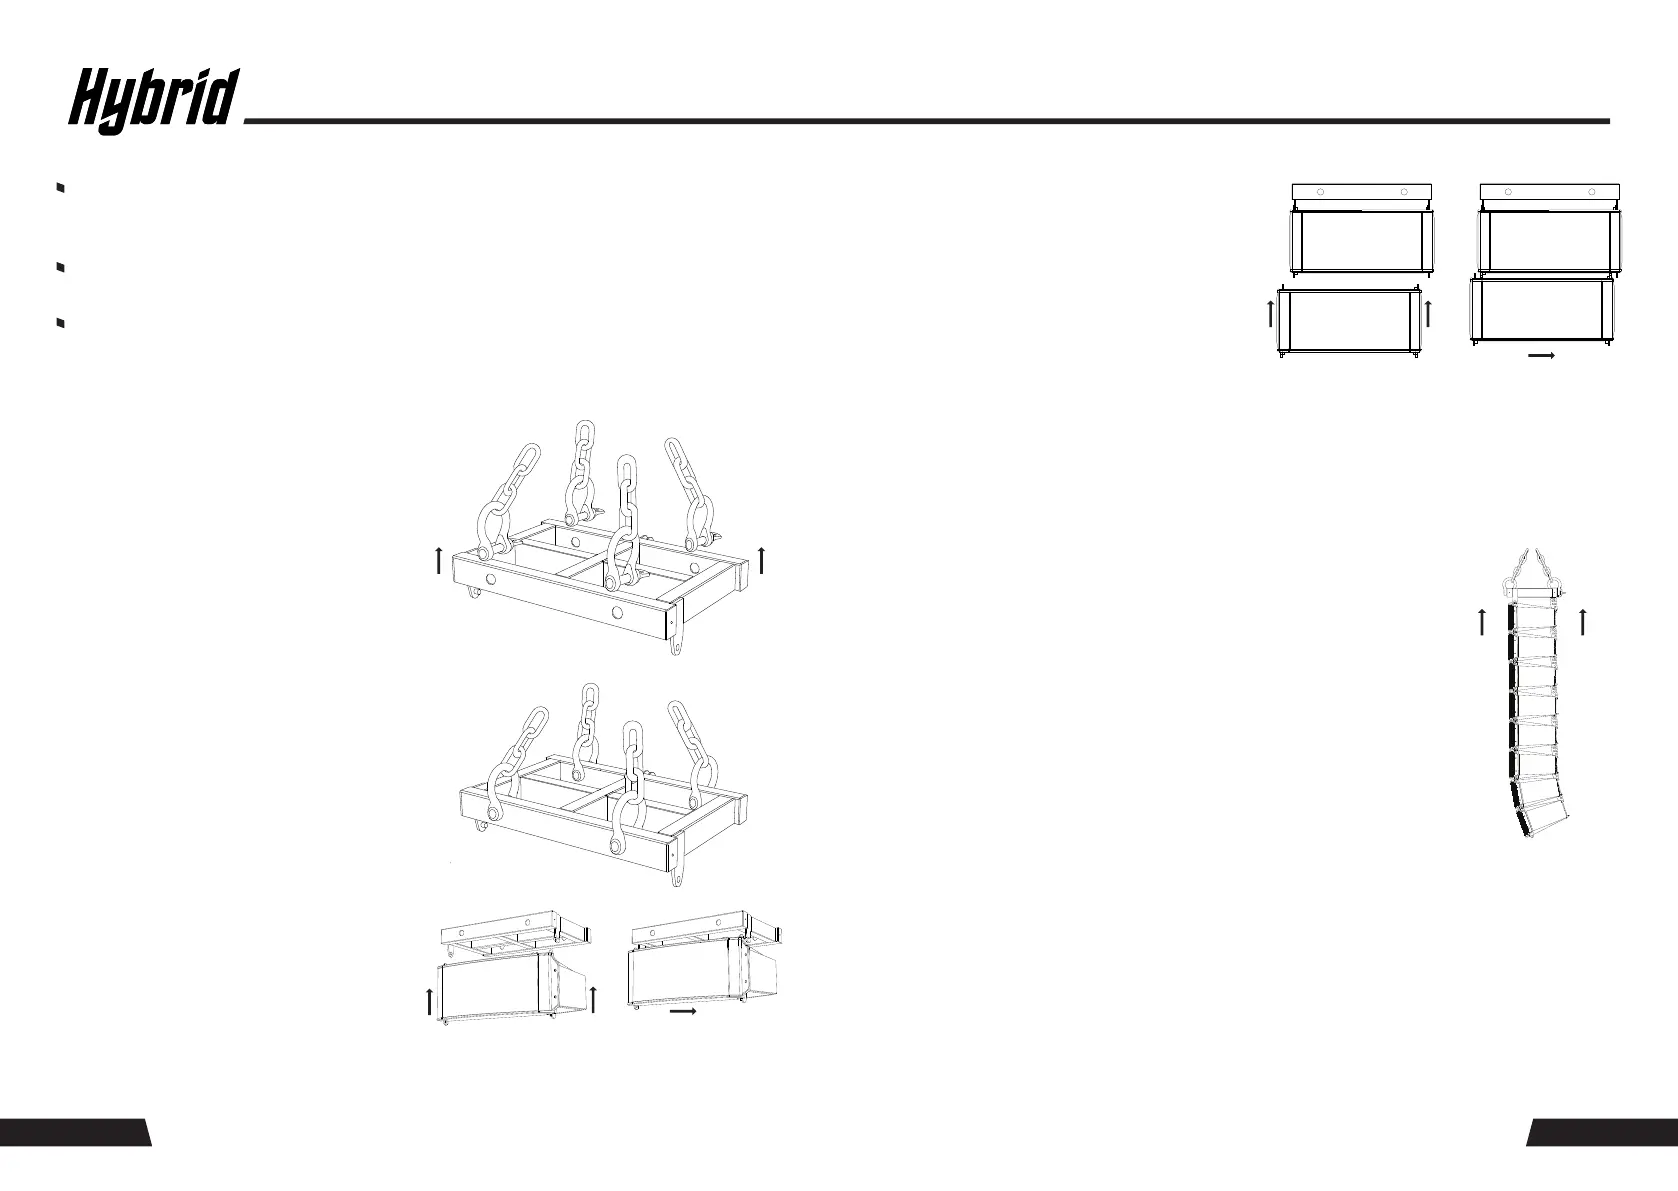
STEP PROCEDURE FOR FLYING APPLICATION
L6F
Never suspend the L6A or L6P line arrays above the audience or technical crew, especially
when using the line array for a temporary event.
Always suspend the L6A and L6P line arrays with the inclusion of safety chains that are not
taut, with as little falling distance as possible required for the safety chain to hold the load.
1:
2:
Attach the four fly frame shackles securely to
the fly frame.
Attach the lifting hoist securely to the shackles.
L6F
L6P
L6P
L6F
3: Align the top front-end rigging holes of the
Hybrid L6P with the front-end rigging holes
of the L6F fly frame. Slide the L6P cabinet
into the fly frame until the units are correctly
coupled. Activate the locking mechanism
located on the front end of the L6P.
4: Align the top front-end rigging holes of the
next Hybrid L6A or L6P cabinet to the bottom
front-end rigging holes of the L6A already
hung. Slide the L6A or L6P cabinet into the
hung L6A cabinet until the units are correctly
coupled. Activate the locking mechanism
located on the front end of the L6A or L6P.
Lift the back-end of the L6A or L6P cabinet
and attach the integrated angle splay bar of
the L6A or L6P using the quick-release
self-locking pins attached to the cabinet.
L6A
L6A
L6P L6P
L6F
L6F
5: Follow step 4 for the next L6A/L6P cabinets to be installed until the complete line has been
hung. Please note that the L6A and L6P are small format line array cabinets, and it is not
recommended to hang more than 12 cabinets in a line.
6: Once the complete array has been hung, lift
the array slightly off the ground until is it freely
suspended and ensure that the overall angle of
the complete array is correct.
L6P
L6P
L6P
L6P
L6A
L6A
L6A
L6A
L6F
7: If a combination of L6A and L6P speakers are to be used, it is recommended that the ratio
between the two models is 1:1, i.e., alternating between the two models and starting with an
L6P at the top of the array. Continue this alternate model hanging until the array is complete.
8: Make all input connections between the array cabinets, linking all L6A active cabinets (#8
and #9) with balanced line input cables. Remember to allow for the main input from the
mixer or other source to be connected to the bottom L6A cabinet.
9: Make all output connections between the L6A active cabinets (#4) to the L6P passive
cabinets, using the 4 core Speakon link cables supplied with the L6P cabinets. A maximum
of two L6P cabinets can be powered by one L6A active cabinet, but it is recommended that
only one passive cabinet be connected to one active cabinet for flown applications.
PAGE 17PAGE 16
 Loading...