1. PRESS THE RESET BUTTON.
The reset buon is the small round white recessed buon on the right side of the mer face. Use a pointed object
to reach it in order to erase all previous programming.
2. SET THE CLOCK.
HOUR: Press the clock buon and simultaneously press the HOUR buon unl you arrive at the correct hour. (Be
aware of AM and PM hours.) MIN: Again pressing the CLOCK buon, simultaneously press the MIN buon unl
you arrive at the correct minute. WEEK: Press the clock buon and simultaneously press the WEEK buon unl you
arrive at the current day of the week.
3. PROGRAM YOUR SETTINGS.
Each event is numbered and has a me to come on and a me to go o. You can set 1, 2, or up to 8 dierent events
using the PROG (program) buon. The PROG display will start at 1 ON. As you keep pressing the buon, the display
will cycle through all the events: 1 ON, 1 OFF; 2 ON, 2 OFF; 3 ON, etc. up to 8 OFF. For each event you must set
WEEK, HOUR, and MIN. First select which days of the week this parcular event will funcon (WEEK buon.) As
you press the buon, it will cycle through all the possibilies which include: MoTuWeThFrSaSu (every day of the
week); Mo, Tu, We, Th, Fr, Sa, Su (each individual day of the week); MoTuWeThFr (only week days); SaSu (only
weekends); MoTuWeThFrSa; MoWeFr; TuThSa; MoTuWe; or ThFrSa. Aer selecng the desired day(s) your event
will funcon, select the ming for the event to come on or go o using the HOUR and MIN buons. (Be aware of
AM and PM hours.)
4. SET TO AUTOMATIC.
Use the ON/OFF/AUTO buon to set to automac. The buon cycles through ON, AUTO, OFF, and AUTO as
you keep pushing it. If, according to the schedule you have programmed, it is supposed to be o at that me of
day (and day of the week), you cycle it through to OFF just before AUTO. If, according to the schedule you have
programmed, it is supposed to be on at that me of day, you cycle it through to ON just before AUTO. If you
are using the mer for subtle equipment like CO
2
and you want to test your programmed schedule, you can try
plugging in something more obvious like a light or a fan so that you can see the changes more easily.
NOTE: Daylight Savings Mode‐‐IF you press HOUR and MIN at the same me you will get Daylight Savings
mode which will delay your sengs by one hour automacally. This will be shown as a clock symbol over the
black dot in the right lower corner of the display. Press HOUR and MIN simultaneously to remove the Daylight
Savings mode. Random Mode‐‐If you press WEEK and HOUR simultaneously, the display will show an “O”
above the clock symbol which will ash when funconing. This is random mode. The on and o ming will be
delayed from 2 up to 32 minutes randomly. This seng is probably not useful for gardening purposes. One use
of this seng is for lights, to fool would‐be burglars when you are not home. Again press WEEK and HOUR
simultaneously to remove this mode. If you nd no display on LCD, please plug mer into power to recharge for
5 minutes,then reset the mer before seng the programs and current me.
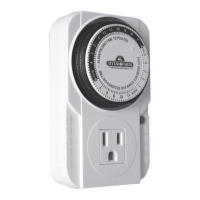
INSTRUCTIONS
SINGLE OUTLET DIGITAL 7-DAY TIMER
www.hydrofarm.com
TM01715