EasyManua.ls Logo

Hydrotek 1120 User Manual

Default Icon
9 pages
To Next Page IconTo Next Page
Page #1 background imageLoading...
Page #1 background image
HYDROTEK® 1000 / 2000 SINGLE STATION CONTROLLER INSTALLATION /
TROUBLESHOOTING
CONTROLLER FUNCTIONS
1. TIME DIAL - Rotates one clockwise revolution every 24 hours. Controller is
programmed for automatic (AUTO)operation with the insertion of timing pins in the
time dial holes. Once properly set, correct time of day is shown by the alignment of
the arrow labeled "TIME" with the time time shown on the time dial.
2. DAY WHEEL AND RETAINED PIN ASSEMBLY - Has 14 pin locations for a 2
week program. Controller will operate in AUTO only on the days programmed by the
depression of the day wheel pin. Once properly set, correct day is shown by the
alignment of the arrow labeled "DAY" with the day shown on the wheel.
3. AUTO-OFF-ON SWITCH KNOB - Indicates the function of the controller by
turning to ON, for manual operation, AUTO, for automatic operation and OFF,to stop
manual (ON) and automatic (AUTO) functions.
4. CHASSIS SCREWS - Secures controller chassis to enclosure.
5. ELECTRICAL CONNECTION STRIP (2000 SERIES) - Allows for input and
output electrical connection. Consult Electrical Circuit and Connection Diagrams
prior to wiring.
SETTING AND OPERATION INSTRUCTIONS
z
TO SET DAY OF WEEK AND TIME OF DAY:
Turn the Day Wheel until correct day is indicated by arrowed labeled "DAY" .
Turn the Time Dial CLOCKWISE until the correct time is indicated at the arrow
labeled "TIME".
CAUTION: Set Time Dial in CLOCKWISE direction only. DO NOT FORCE TIME
DIAL IN REVERSE DIRECTION.
Pa
g
e 1 of 9
K
-Rain - H
y
drotek Controllers Instructions
8/2/2005
http://waterheatertimer.org/Woods-timers-and-manuals-old.html
Question and Answer IconNeed help?

Do you have a question about the Hydrotek 1120 and is the answer not in the manual?

Hydrotek 1120 Specifications

General IconGeneral
BrandHydrotek
Model1120
CategoryController
LanguageEnglish

Summary

Controller Functions and Operation

Controller Component Functions

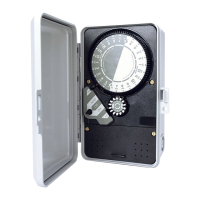
Details the purpose and function of key controller parts like the time dial, day wheel, and switch knob.

Setting Time and Day

Instructions on how to set the correct day of the week and time of day on the controller dial.

Operating the Hydrotek Controller

Manual and Automatic Operation

Guides on how to operate the controller manually and set it for automatic daily operation.

Setting Operating Times

Explains how to use timing pins for programming desired operating times and multiple zone valves.

Electrical Connections and Diagrams

Connection Instructions by Series

Specific procedures for connecting the 1000 and 2000 series controllers, including safety cautions.

Wiring and Circuit Diagrams

Provides electrical wiring and circuit diagrams for 1000 and 2000 series controller models.

Controller Diagrams

Wiring Diagram Models

Illustrates wiring diagrams for specific models like 2210 and 2214.

Controller Diagram

A general diagram illustrating the controller's internal layout or function.

Parts and Components

Controller Parts List

A detailed list of internal components and their corresponding part numbers for the controllers.

Other Components

Lists additional components available for the Hydrotek controllers, such as relays and transformers.

Troubleshooting Common Issues

Timekeeping and Operation Problems

Addresses issues like the controller failing to keep time or staying on improperly, with causes and solutions.

Manual and Automatic Mode Failures

Troubleshoots problems with manual ON mode and automatic AUTO mode operation, including switch adjustments.

Installation for Rainswitch Ready Controllers

Rainswitch Controller Features

Highlights features of the 2510, 2514, and 2520 series Rainswitch Ready Controllers.

Rainswitch Control Switch Operation

Explains the function of the Rainswitch control switch positions (ON, OVERRIDE) and notes for usage.

Rainswitch Wiring Connections

Details wire connection diagrams and procedures for models 2510, 2514, and 2520 with Rainswitch.

Related product manuals