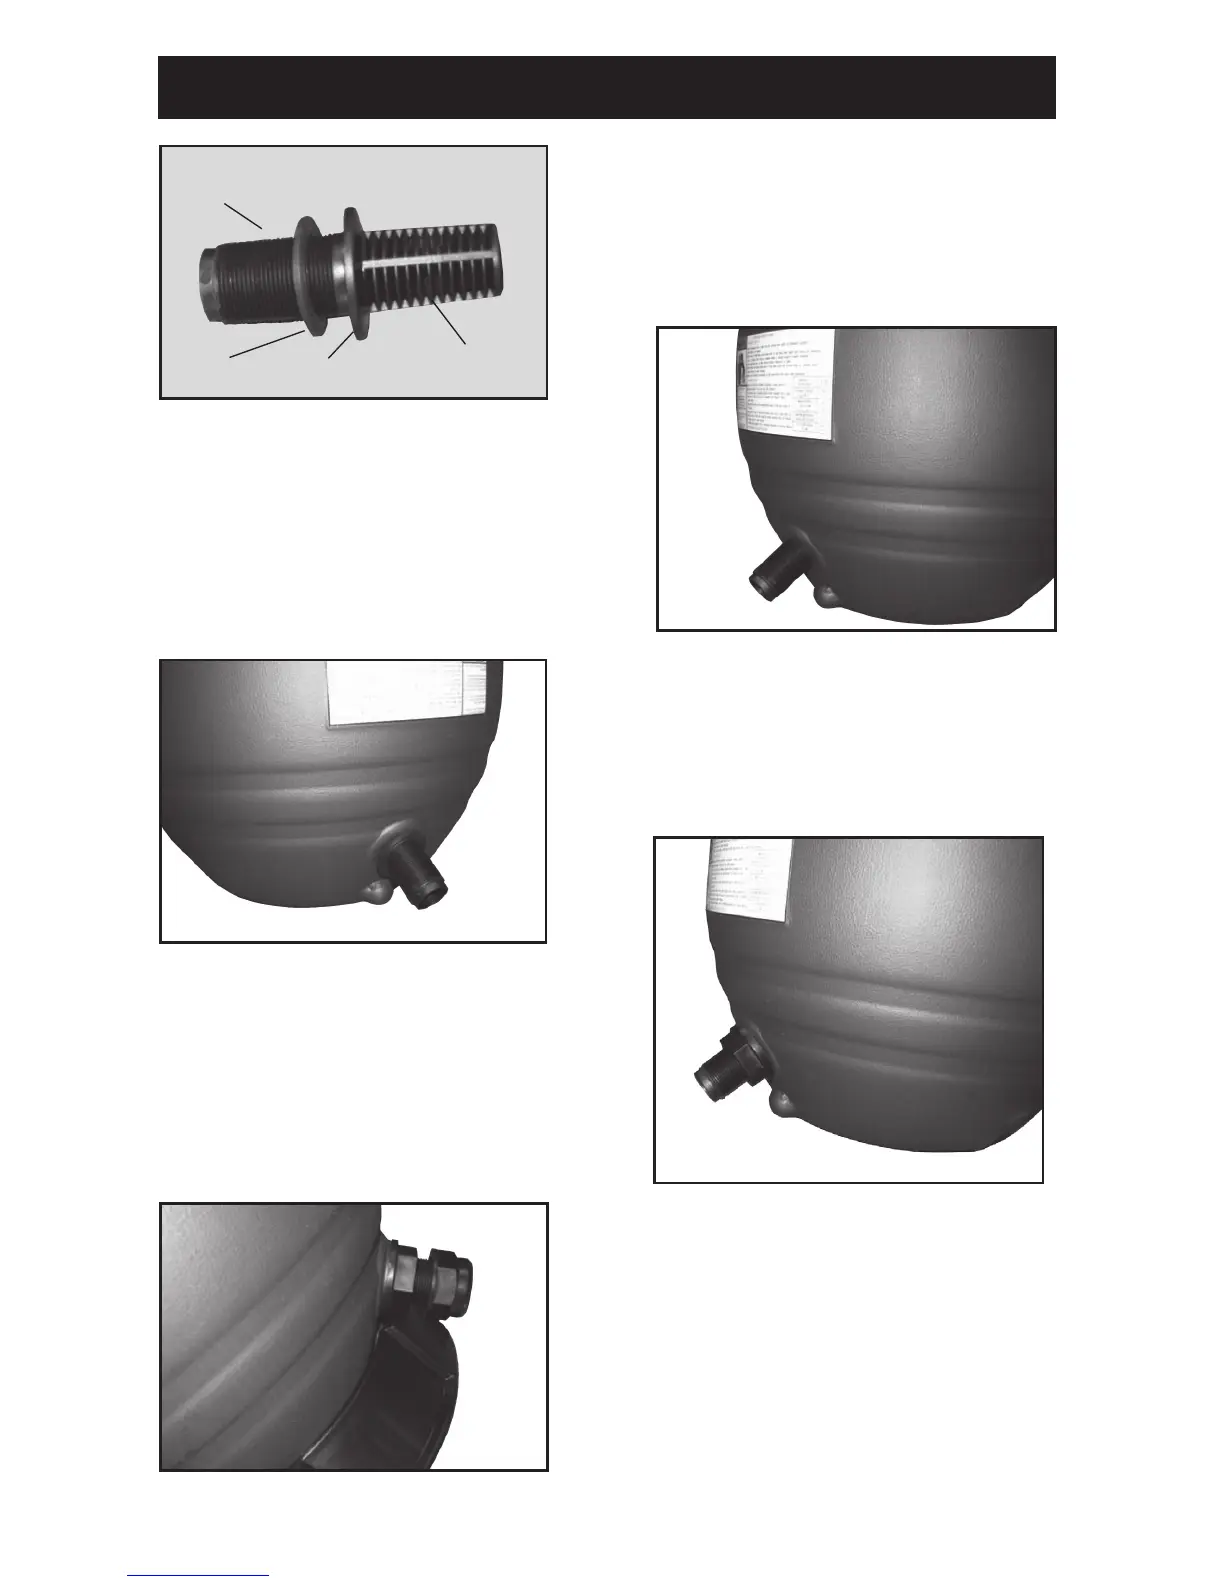
STEP TWO - ATTACH DRAIN ASSEMBLY
• If drain assembly (Fig. 3) is all together, take
it apart. Take one rubber gasket and put over
threaded part of the drain assembly. Flat part
of gasket must be flush against sealing plate.
• Place other gasket on threaded part of the drain
assembly that is outside of tank, flat side
to the tank. (Fig. 5)
• Place drain cap over threaded part on outside
of the tank. (Fig. 7)
Hand tighten only!
• From inside the tank, insert drain assembly
through hole in bottom of tank. (Fig. 4)
You will see the threaded part of the
drain assembly on the outside of the tank.
• Place locking nut on threaded part and
thread until snug. Hand tighten only!
Be sure to hold drain assembly from inside
the tank while hand tightening locking nut.
(Fig. 6)
Fig. 3
Threads
Gasket
Sealing Plate
This side inside tank
Fig. 4
Fig. 5
Fig. 7
Fig. 6
5